By: Team AY1920S1-CS2103T-W13-2 Since: September 2019 Licence: MIT
1. Introduction
Creating and managing your students and classes have never been easier. Njoy teaching assistant aims to enable teachers to easily manage their students and activities right from their keyboard. With just a few commands, you will be able to manage your classes, create questions, start a slideshow, generate quizzes and much more! Interested? Jump to Section 3, “Getting Started” to get started.
2. Features Summary
-
Manage your students easily with just a few strokes of your keyboard.
-
Easily assign students to group.
-
Tag or mark students who are weak at certain subjects.
-
-
Create questions that is easy to manage with a single interface.
-
Easy input and management of your questions.
-
Utilise your questions fully by using Slideshow.
-
-
Generate quizzes for your students. Type once, generate anytime.
-
Create random quizzes either automatically or manually.
-
Export quizzes for distribution.
-
-
Timetable Manager for scheduling your classes and events.
-
Create and manage your schedule with a single calendar.
-
Easily export your timetable with a single command.
-
-
Notes Manager to act as lightweight, digital Post-It to easily identify your priorities.
-
Keep track of your reminders.
-
View in a glance the important tasks.
-
-
Statistics provide a comprehensive view of your students' performance.
-
Understand the academic performance of your class.
-
View honourable students and identify the struggling students in one look.
-
3. Getting Started
-
Ensure you have Java
11or above installed in your Computer. -
Download the latest
njoy.jarhere. -
Copy the file to the folder you want to use as the home folder for your NjoyAssistant.
-
Double-click the file to start the app. The GUI should appear in a few seconds.
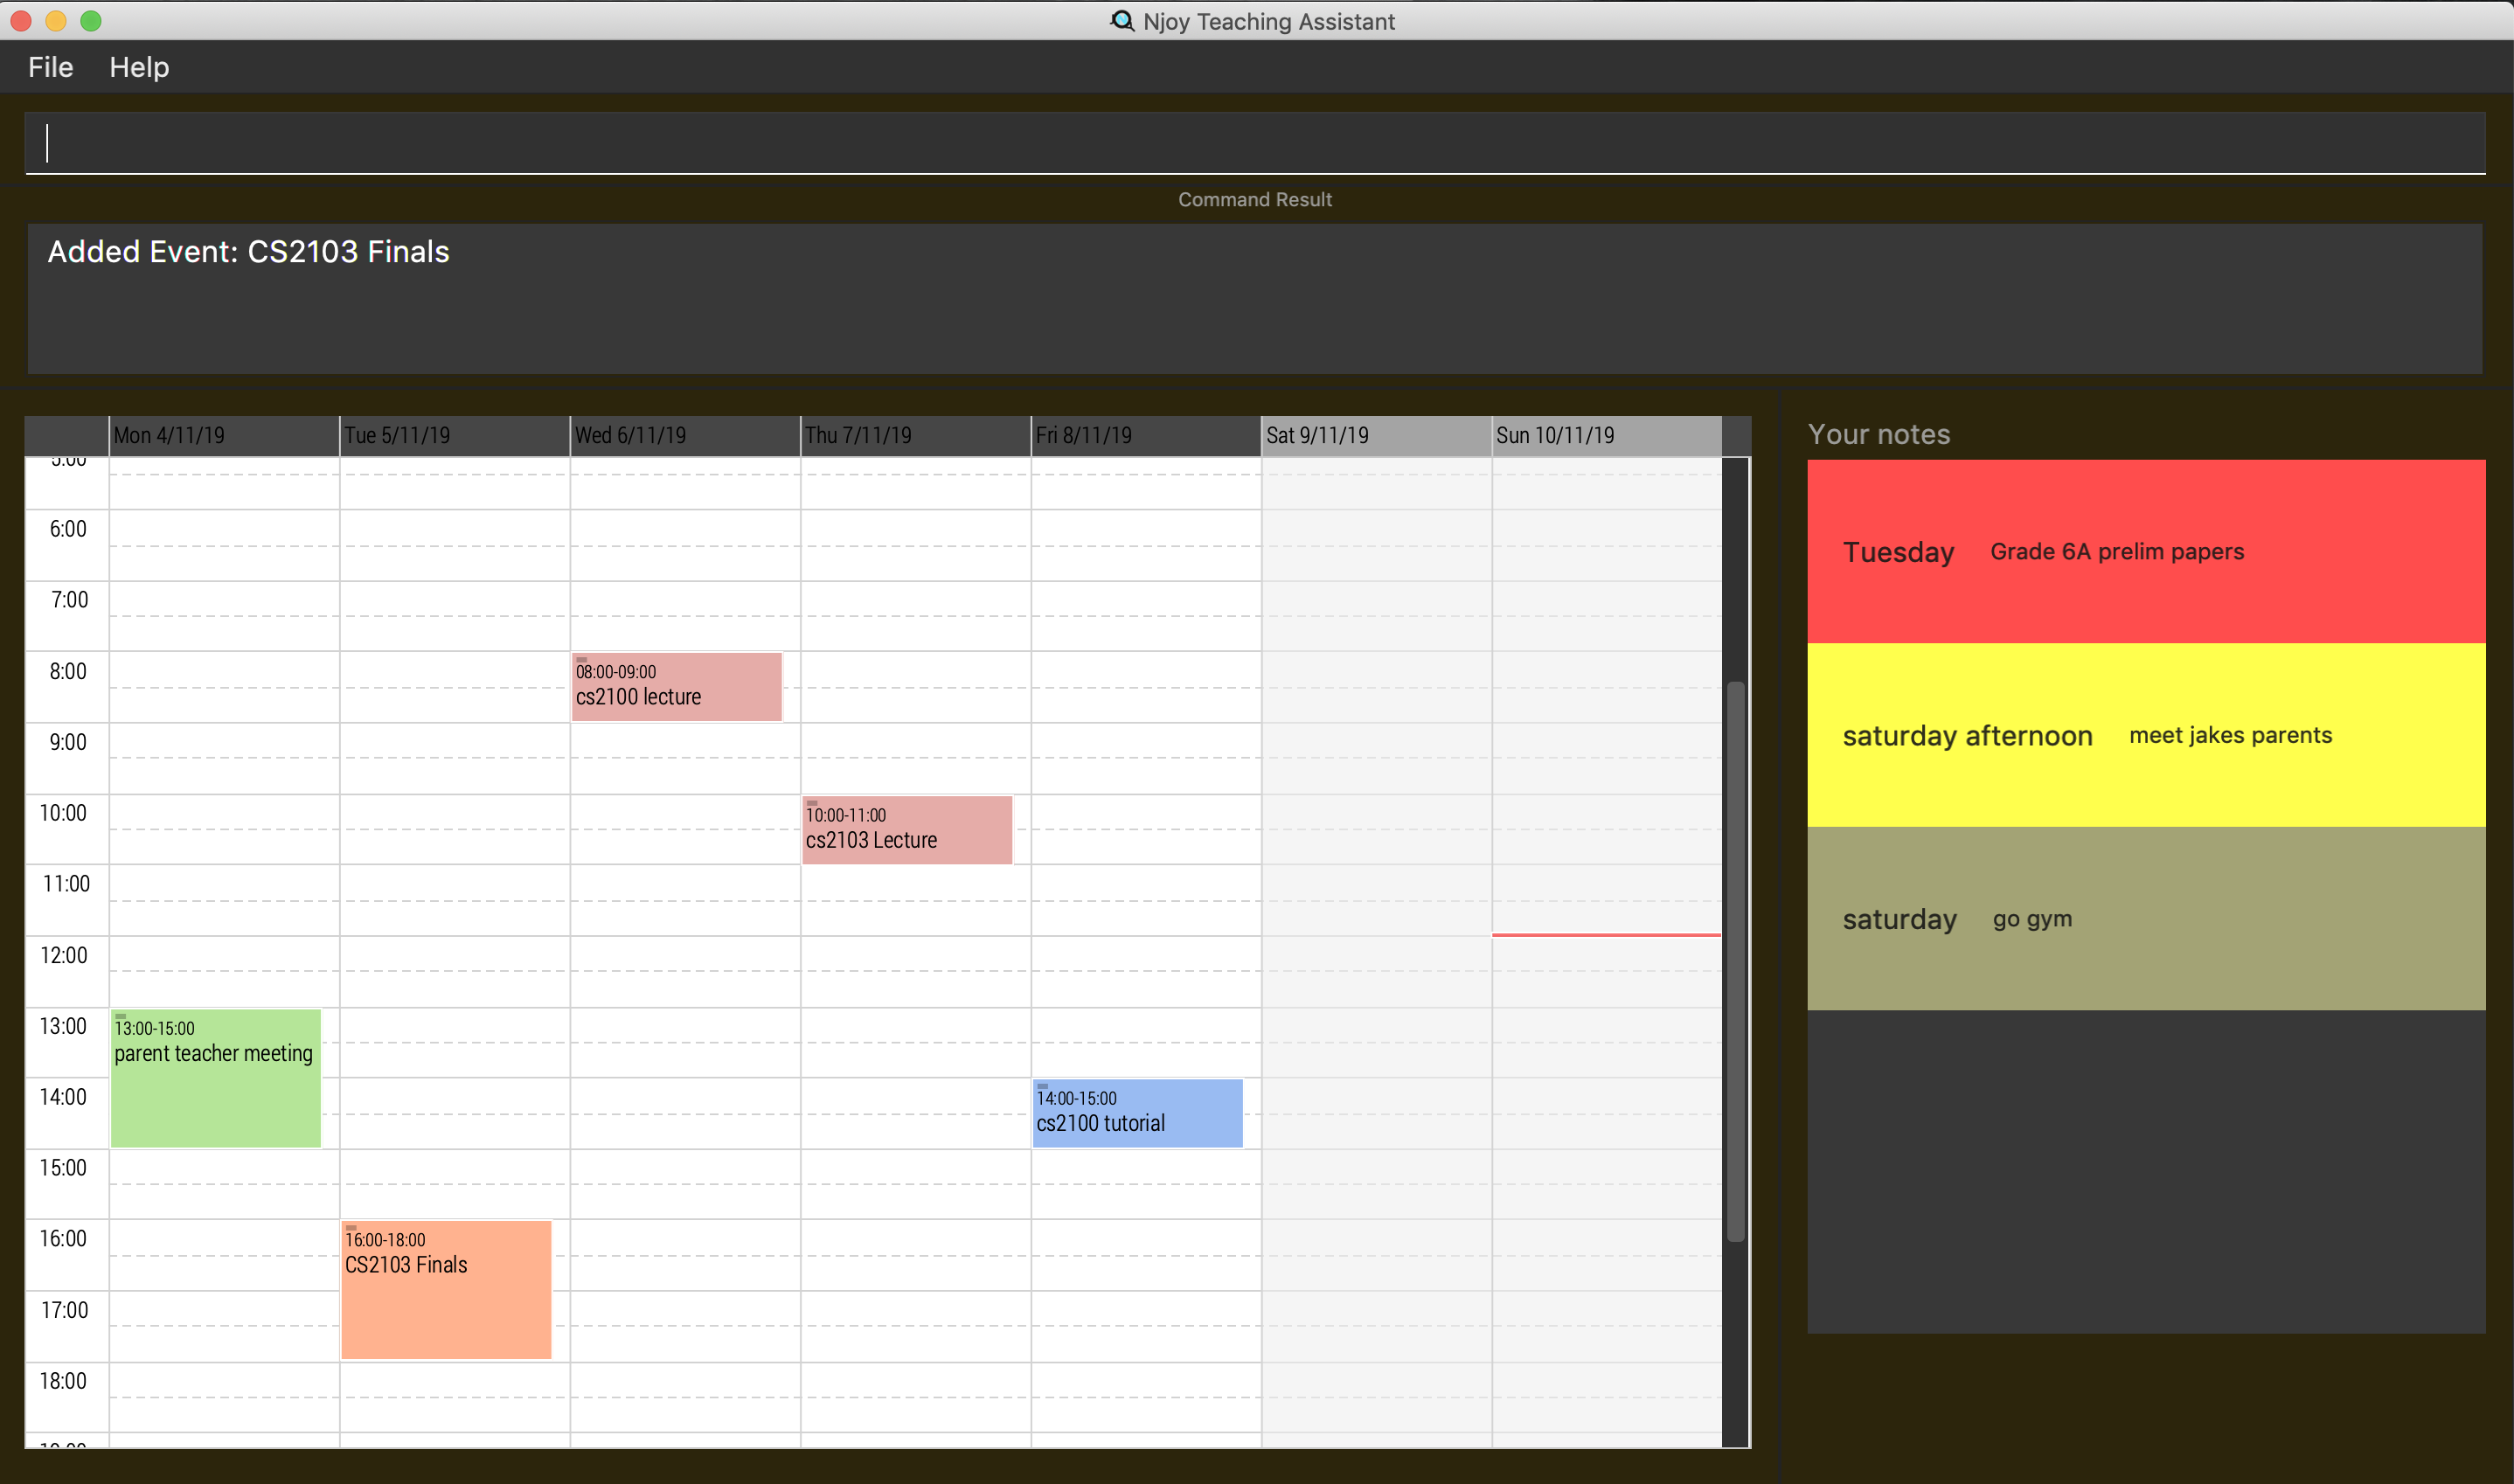 Figure 1. GUI of Njoy Teaching Assistant
 -
Type the command in the command box and press Enter to execute it.
e.g. typinghelpand pressing Enter will open the help window.
3.1. Running .jar file
-
Download the
njoy.jarfile -
Double click on
njoy.jarfile to run the application
If you are not able to run the application using the method above, use the following:
. Open Terminal(Mac)/Command Prompt(Windows)
. Type cd [PATH TO DIRECTORY CONTAINING .JAR FILE]
. Type java -jar njoy.jar to run the application.
4. Sample Data
| The NJoy Assistant starts with some data as examples. Upon the first startup, the students, questions, events and notes storage are loaded with sample data. The user should clear these if they are not of importance, as they merely serve as examples. |
The following steps provide an example of how to clear the sample user data for questions. The same steps can
be applied to clear the storage for students, events and notes albeit slight differences.
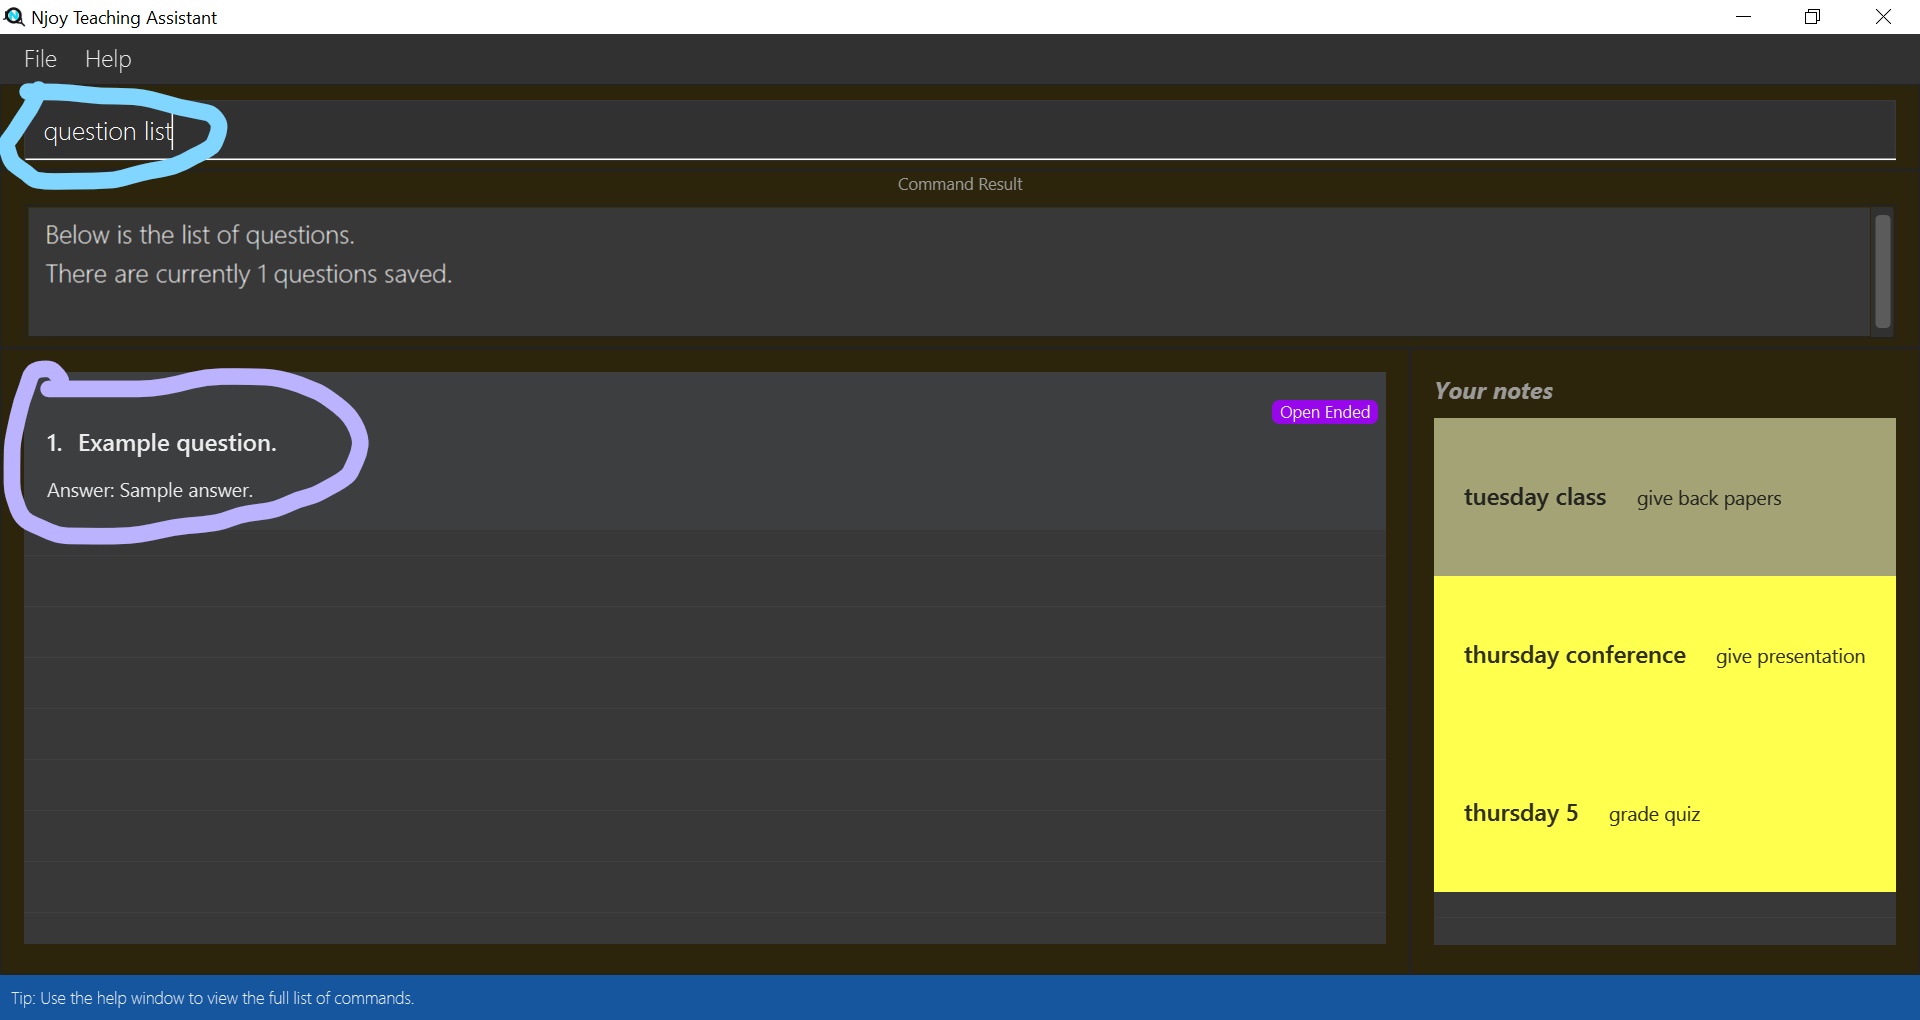
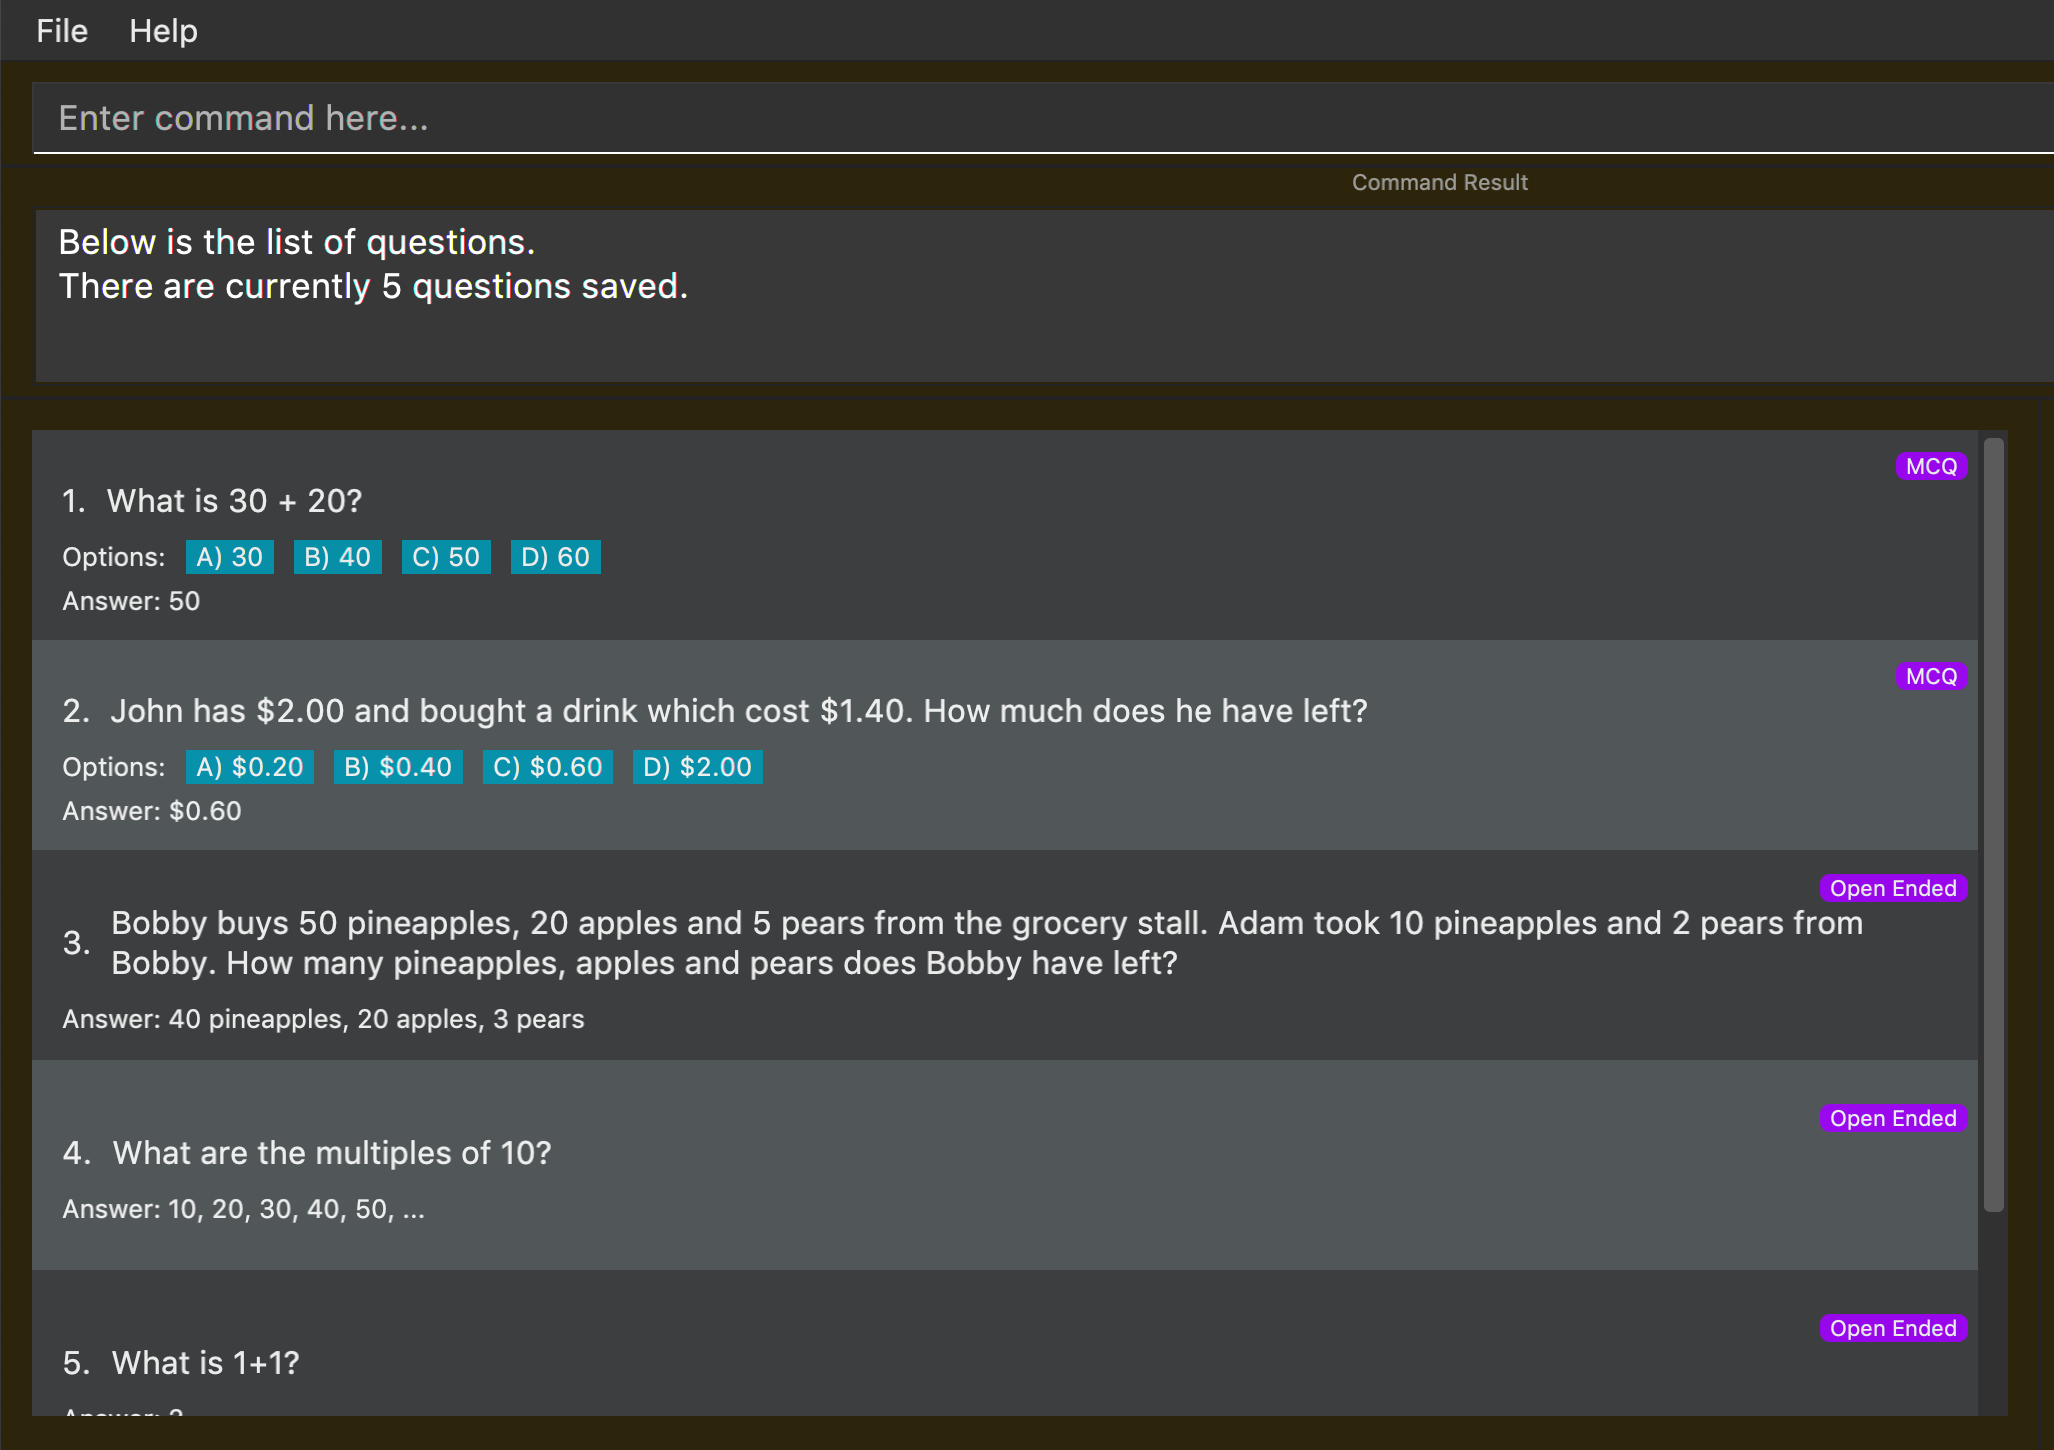
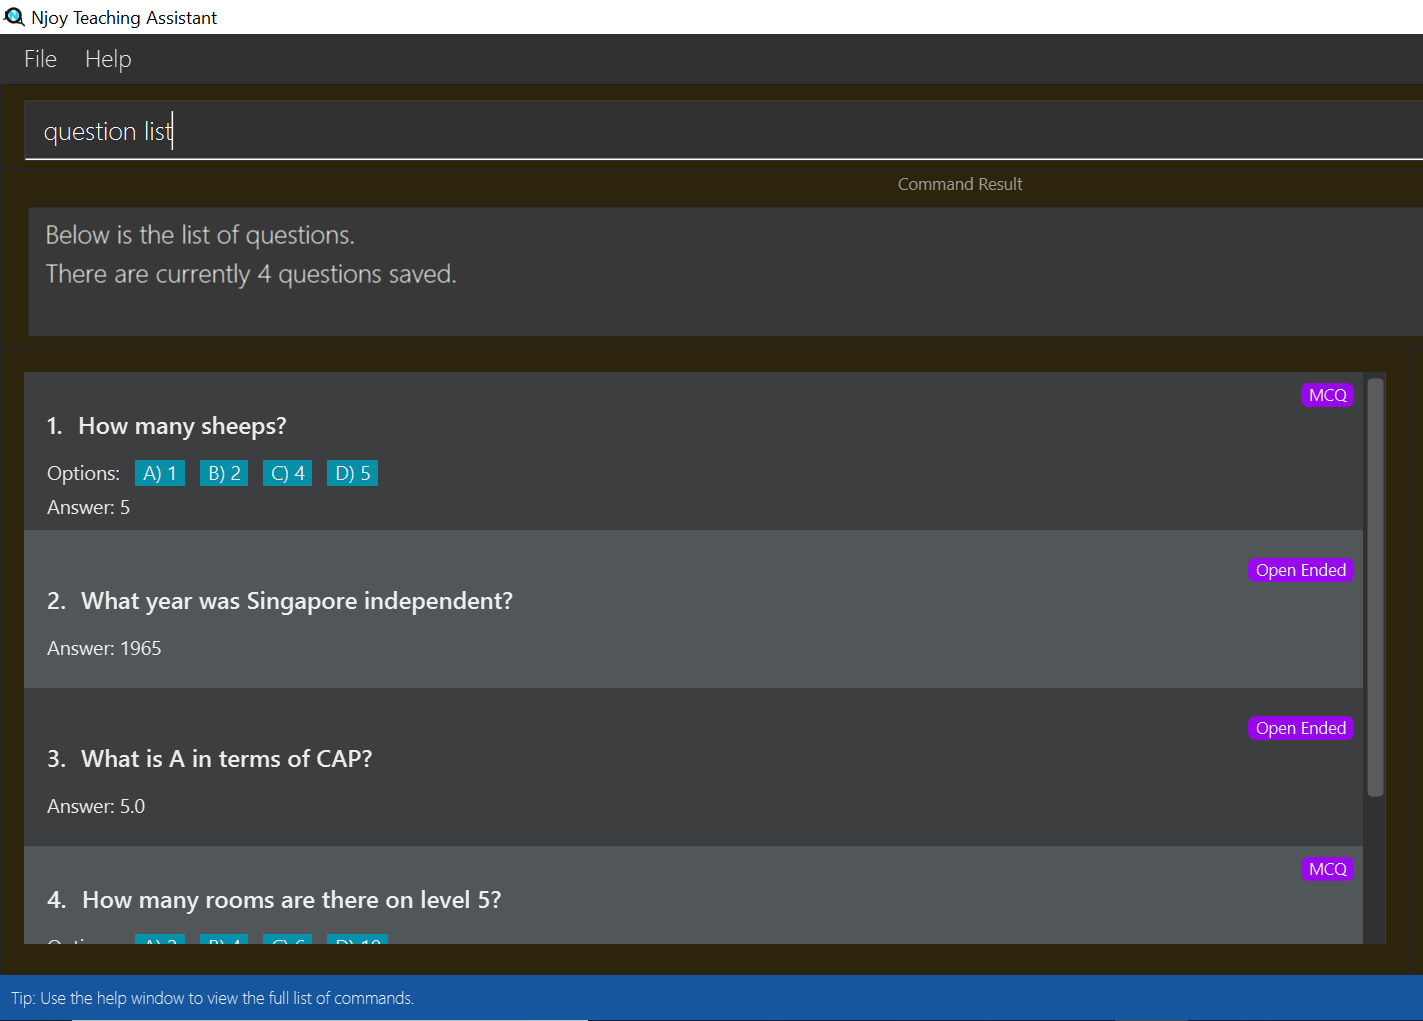
Step 1. To see the list of questions, type in the following command: question list. The sample question is
circled in purple.
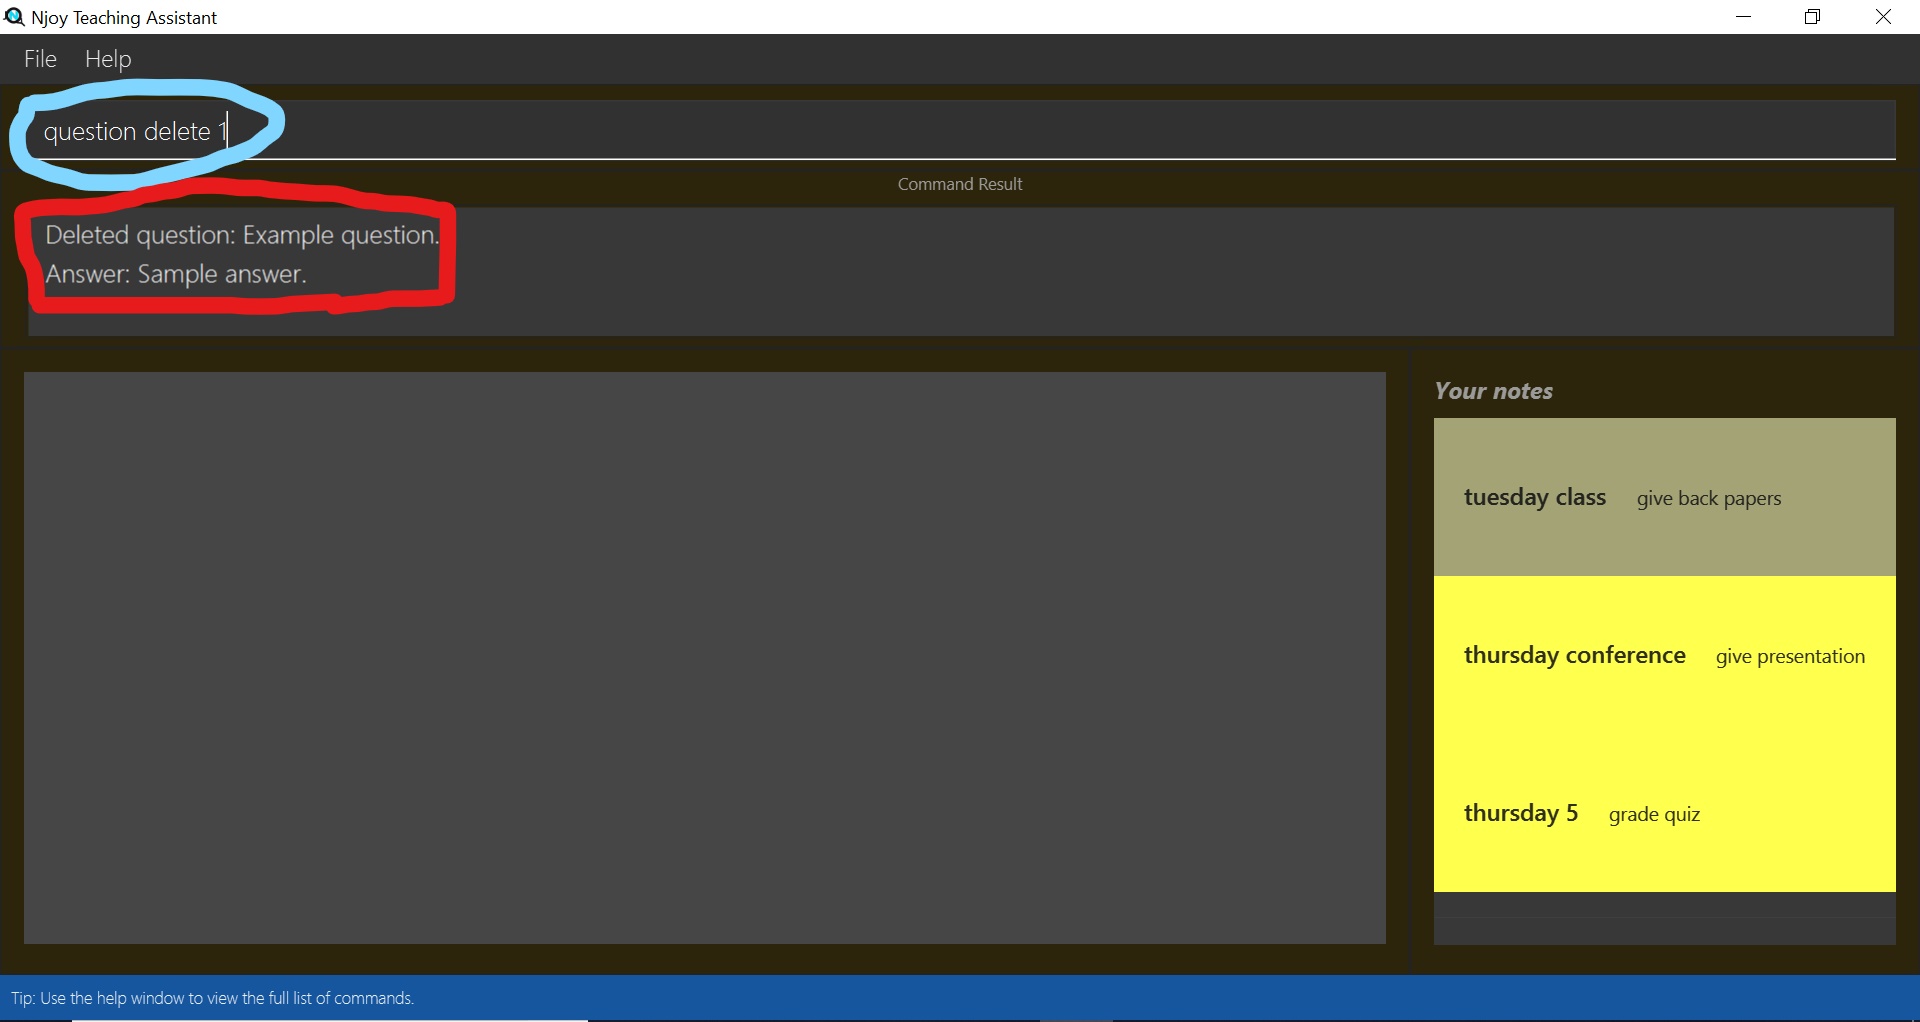
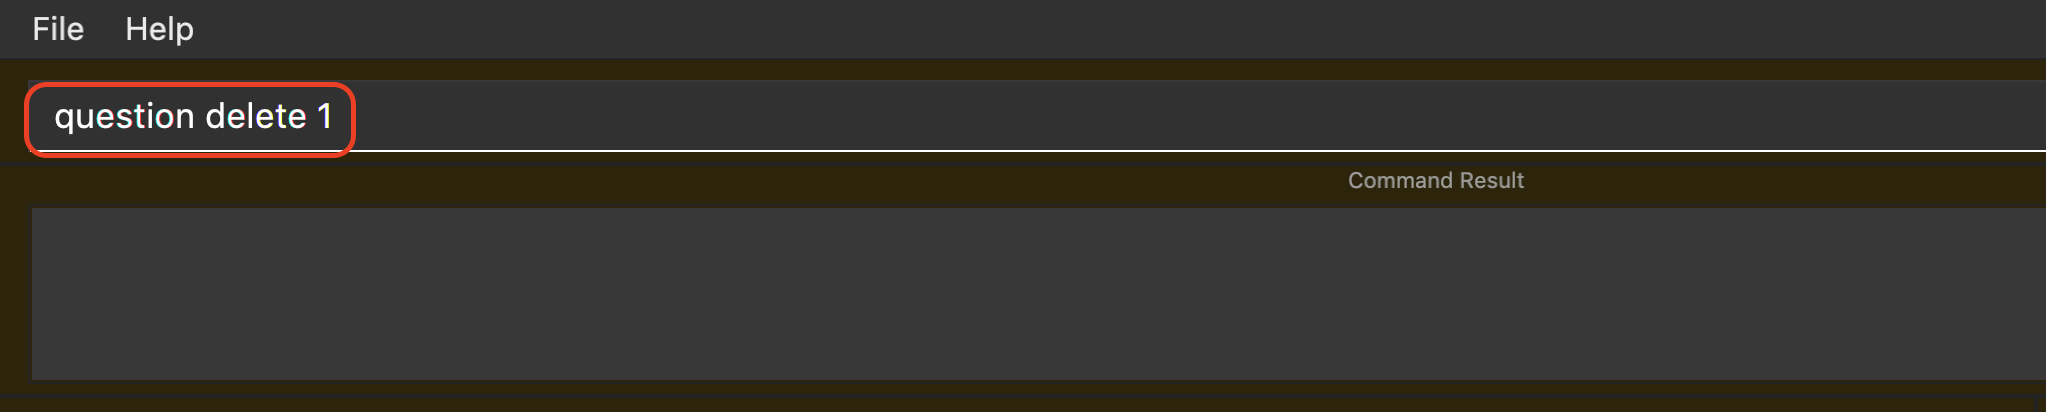
Step 2. To delete the sample question, type in the following command: question delete 1. This deletes the
first question in the question list, which in this case is the sample question!
After which, you should see the message circled in red indicating the success of the deletion.
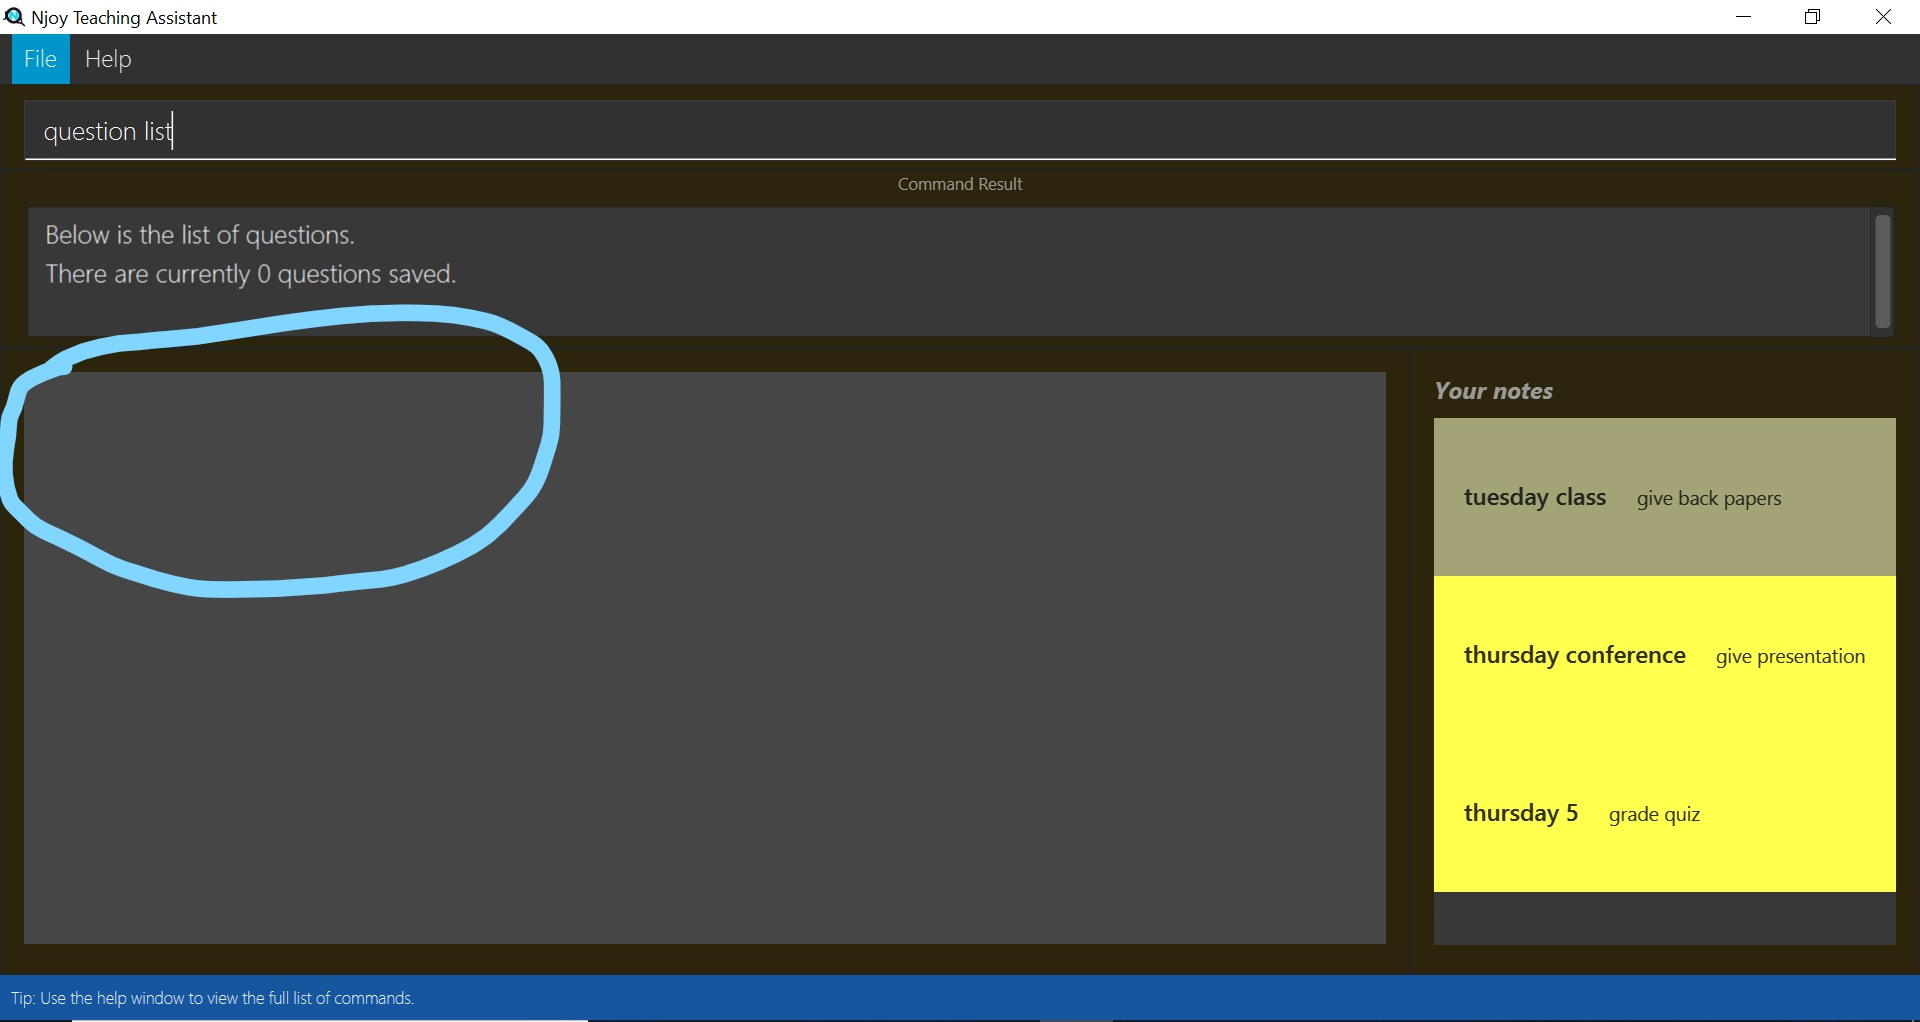
Step 3. You’re already done! To confirm that the question has been deleted, once again type in the following
command: question list. You should see that there are no more sample questions!
4.1. Differences in Sample Data Deletion
-
Students: The steps for deletion are the same as for the sample question.
-
Notes: The steps for deletion are the same as for the sample question, except that the notes are displayed on the right hand side of the User Interface.
-
Events: The steps for deletion are the same as for the sample question, except that to view the event, a different command:
event viewhas to be keyed into the command line.
5. Commands
Command Format
All commands start with a command word (e.g student, question, quiz, event, note) followed by the command action. Certain commands may include additional keywords and will be specified in the description.
| Njoy might choose to ignore or validate against additional arguments provided as commands. |
| Duplication of the specified keywords and options might result in errors or nondeterministic selection of fields. In most cases, the latest field option overwrites the duplicate fields provided. |
5.1. Students - student
5.1.1. Adding a student
Adds a student
Format: student name/… tag/…(optional)
The keywords supported by this feature includes:
| Keyword | Description |
|---|---|
|
The name of the student. |
|
The weak subjects of the student. |
tag fields of a student represent the weak subjects of a particular student, and is an optional field which can be added later under the Tag feature
|
Examples:
-
Untagged student:
student name/John Doe
Adds an untagged student named John Doe -
Student with one tag:
student name/John Doe tag/Chemistry
Adds a student named John Doe with one tag Chemistry -
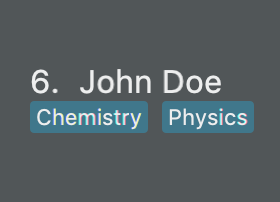
Student with multiple tags:
student name/John Doe tag/Chemistry tag/Physics
Adds a student named John Doe with tags Chemistry and Physics
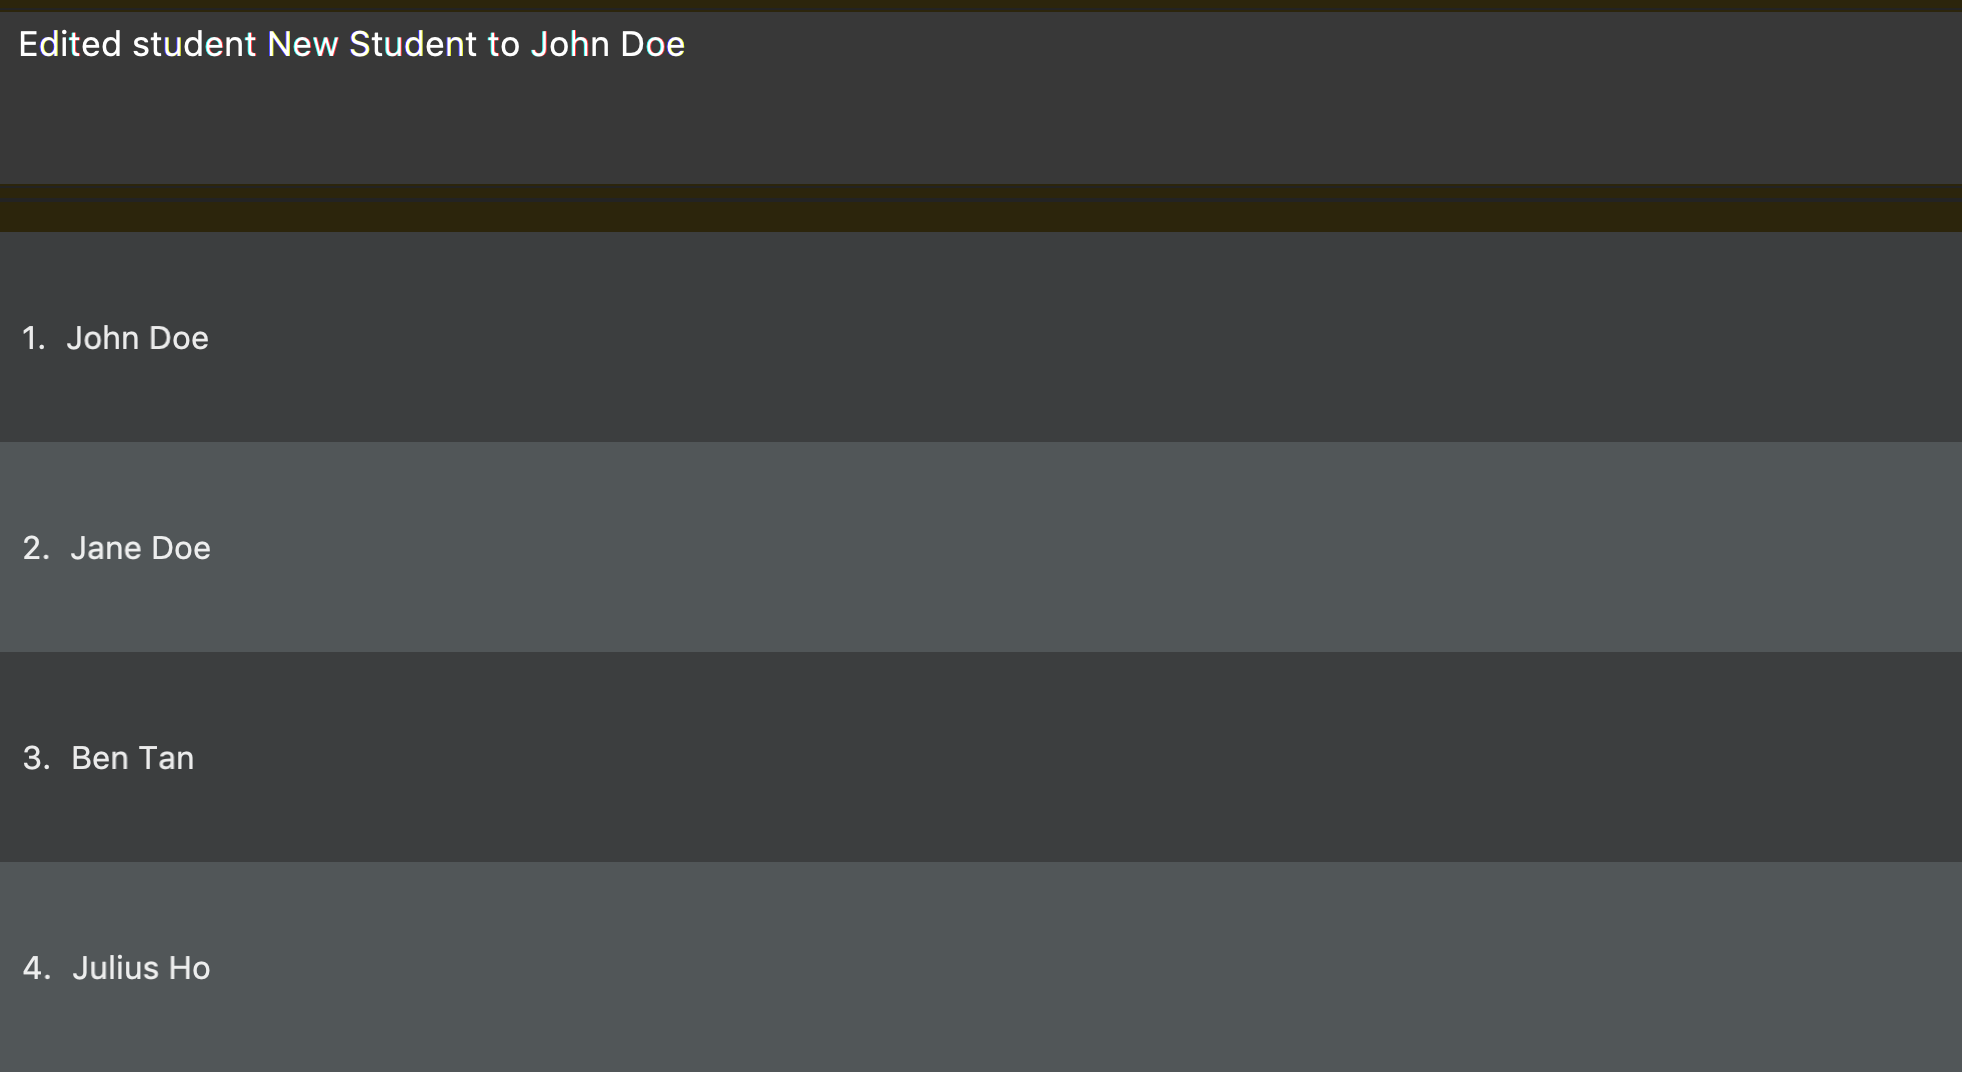
5.1.2. Editing a student
Edit a student currently stored.
Format: student [index number] name/…
| All tags and mark of the student to be edited will be transferred over to the new student. |
The keywords supported by this feature includes:
| Keyword | Description |
|---|---|
|
Index number of the student to be edited in the student list |
|
New name of the student to be edited. |
Examples:
-
student 1 name/John Doe
Changes the name of the student with index number 1 in the student list to John Doe

5.1.3. Deleting a student
Delete a student from the student list.
Format: student delete [INDEX]
The keywords supported by this feature includes:
| Keyword | Description |
|---|---|
|
Index number of the student to be deleted in the student list |
Example:
-
student delete 1
Deletes the first student in the student list.
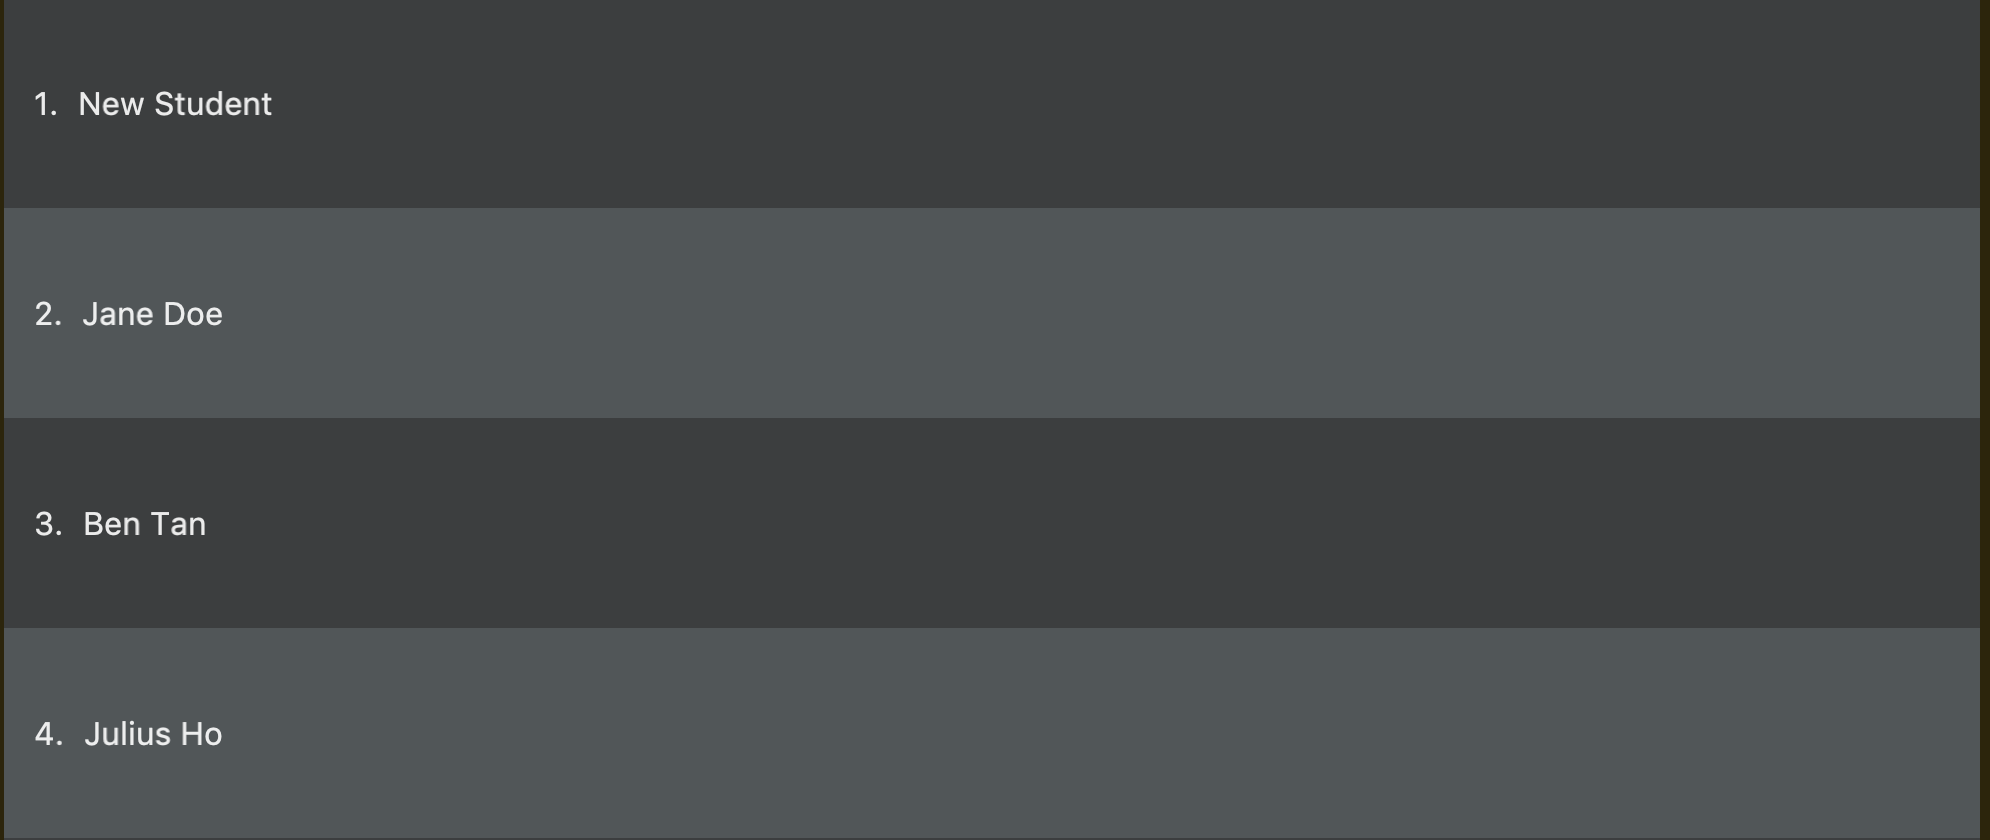
5.1.4. Listing students
Display the list of students in the Main Window, and also displays the list in the Command Result Box+
Format: student list
The keywords supported by this feature includes:
-This command does not support any additional keywords-
Example:
-
student list
Lists the students.
5.2. Tags - tag
Represents the weak subjects of a student, allowing users to focus on the specified weak subject of the student.
5.2.1. Adds a tag to a student: tag
Allows a user to add a tag to an already tagged student.
Format: tag index/… tag/…
The keywords supported by this feature includes:
| Keyword | Description |
|---|---|
|
The index number of the student you want to add the tag to |
|
The name of the tag you want to add to the student |
| Tags cannot be multiple-worded, and cannot contain special characters. |
Examples:
-
Add one tag:
tag index/1 tag/Chemistry
Adds tag Chemistry to student with index number 1 -
Add multiple tags to a student:
tag index/1 tag/Chemistry tag/Physics
Adds tag Chemistry and tag Physics to student with index number 1
The screenshot below shows a representation of a student with tags
5.3. Mark - mark
Marks academically weak students, allowing users to pay extra attention to the marked students.
5.3.1. Marks a student: mark
Allows a user to mark an already created student.
Format: mark index/…
The keywords supported by this feature includes:
| Keyword | Description |
|---|---|
|
The index number of the student you want to mark |
Examples:
-
mark index/1
Marks the student with index number 1
5.3.2. Remove mark from a student: unmark
Allows a user to remove mark from an already created student who has been previously marked.
Format: mark unmark index/…
The keywords supported by this feature includes:
| Keyword | Description |
|---|---|
|
The index number of the student you want to unmark |
Examples:
-
mark unmark index/1
Unmarks the student with index number 1

5.4. Groups - group
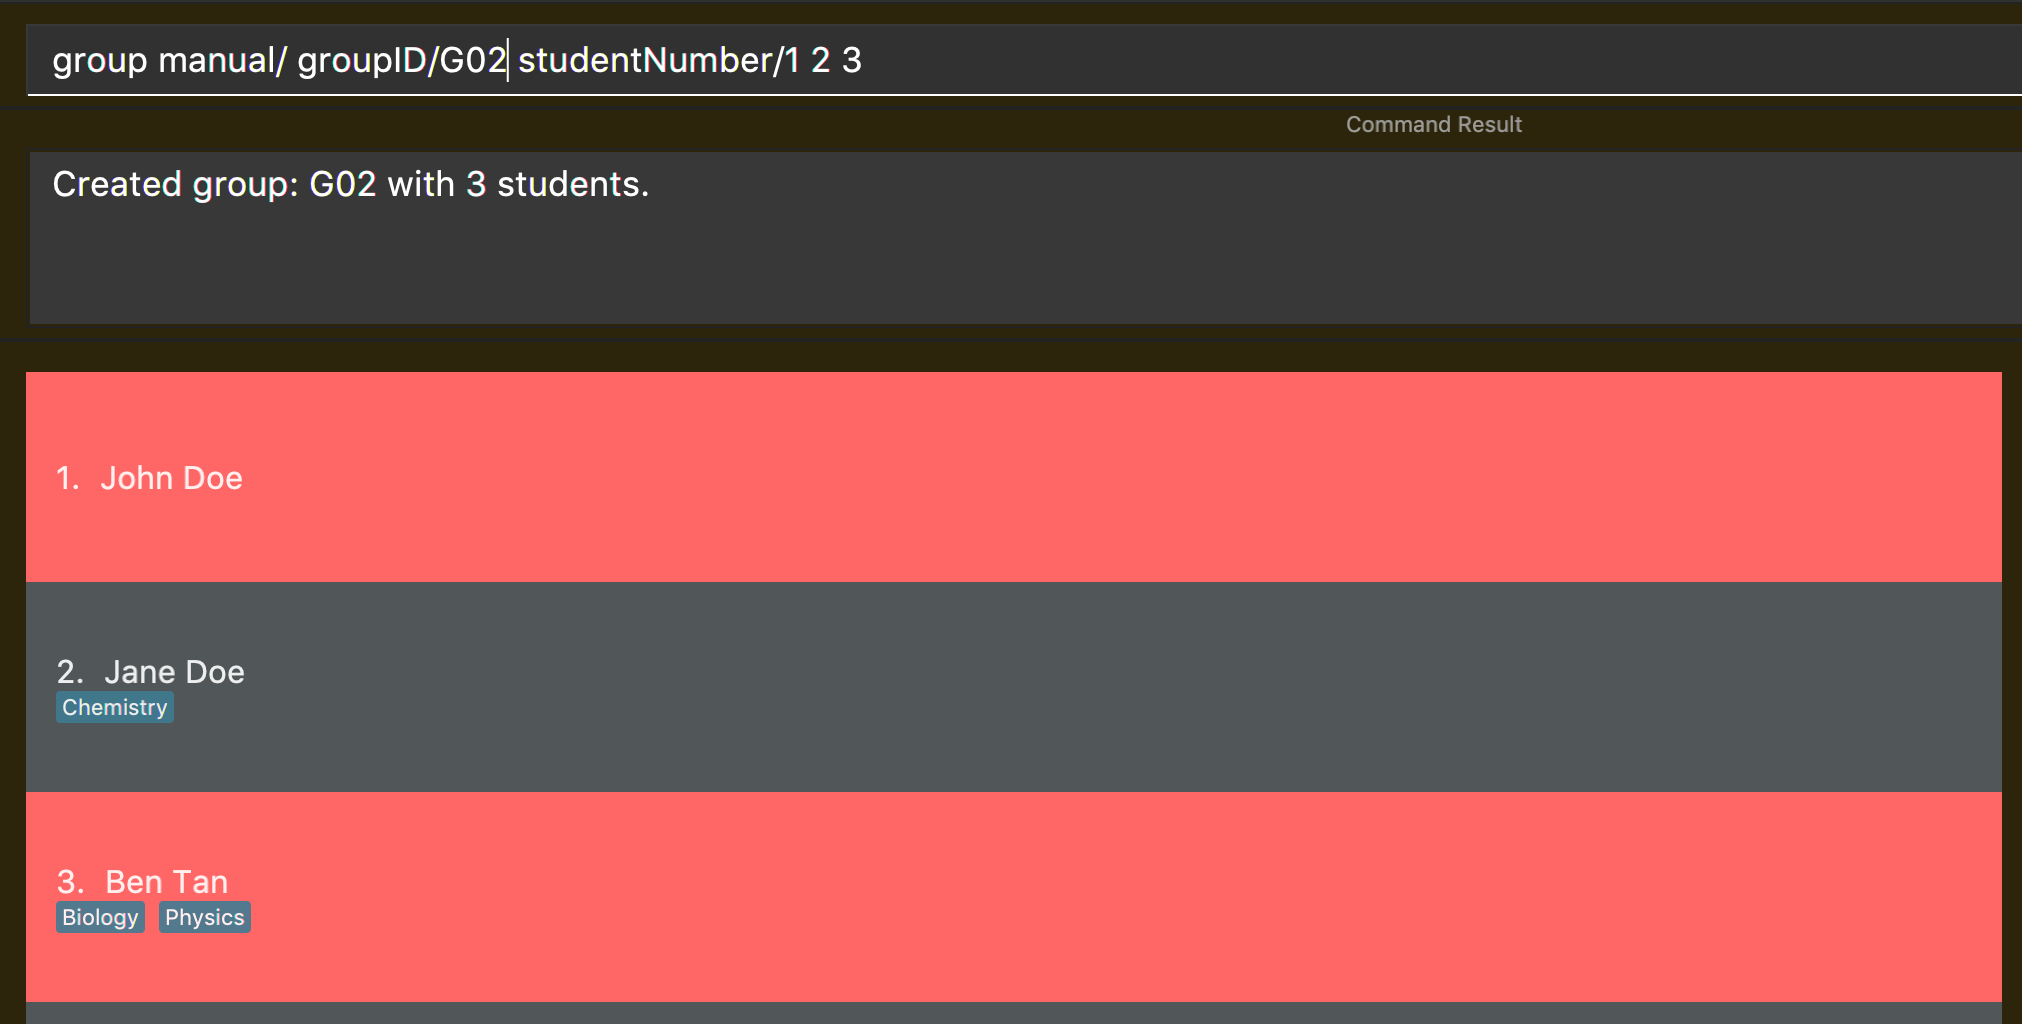
5.4.1. Creating a Group manually: manual
Allows a user to create a group manually.
Format: group manual groupID/… studentNumber/…
The keywords supported by this feature includes:
| Keyword | Description |
|---|---|
|
The name of the group |
|
The index numbers of the students you want to add to the group |
| You are not allowed to create groups without specifying any student numbers, ie : create groups with no students inside the group. |
Examples:
-
group manual groupID/G03 studentNumber/1 2 3
Adds student index numbers 1, 2 and 3 to the group named G03.
5.4.2. Adding a Student to a Group: add
Allows a user to add a Student to a Group.
Format: group add groupID/… studentNumber/… groupIndexNumber/…
The keywords supported by this feature includes:
| Keyword | Description |
|---|---|
|
The name of the group |
|
The index number of the student you want to add to the group |
|
The index number within the group that you want to add the student to |
| For a group that already contains students with group index numbers 1,2 and 3, the group index number you specify in this command can only be from 1-4, ie the index numbers that you want the new student to take, so as to ensure that there are no gaps in the index numbers. |
Examples:
-
group add groupID/G01 studentNumber/2 groupIndexNumber/3
Adds student 2 to the group index number 3 for the group named G01.
5.4.3. Removing a Student from a Group: delete
Allows a user to remove a student from a group.
Format: group delete groupID/… groupIndexNumber/…
The keywords supported by this feature includes:
| Keyword | Description |
|---|---|
|
The name of the group |
|
The index number of the student within the group that you want to remove |
Examples:
-
group delete groupID/G01 groupIndexNumber/1
Removes the student with group index number 1 for the group named G01.
5.4.4. Exporting a Group to a Word Document: export
Allows a user to export a group to a Word Document.
This feature was implemented as we realise that teachers may not have access to their computers at all times,
and thus may print out group information to view during these times.
Format: group export groupID/…
The keywords supported by this feature includes:
| Keyword | Description |
|---|---|
|
The name of the group |
Examples:
-
group export groupID/G01
Exports the group named G01 to a word document namedG01.docx, found under the exports folder.
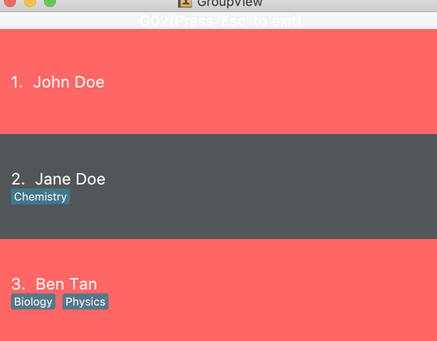
5.4.5. Showing students from a group:
Allows a user to see all students from a group.
| Groups and students are meant to be separate entities, and only adding a student to the group or removing a student from a group will change the group view obtained by typing the below command. Tagging, Marking/Unmarking and editing students will not reflect in changes in the group view obtained. |
Format: group groupID/…
The keywords supported by this feature includes:
| Keyword | Description |
|---|---|
|
The name of the group |
Examples:
-
group groupID/G01
Shows all the students that belong to group with groupIDG01

5.5. Questions - question
The questions feature is the starting point for creating quizzes and starting a slideshow. With questions, you are able to manage your existing questions, and add new ones which will be automatically saved.
5.5.1. Creating a question
Create and store questions according to the type specified.
Format: question question/… answer/… type/… (MCQ OPTIONS IF APPLICABLE)
Note that for mcq question type, it is necessary to input keywords a/, b/, c/, d/.
|
The keywords supported by this feature includes:
| Keyword | Description |
|---|---|
|
Question topic. |
|
Answer to the question. |
|
Type of question( |
|
Option A for MCQ. |
|
Option B for MCQ. |
|
Option C for MCQ. |
|
Option D for MCQ. |
Note that answer is free text and allows any input since answers may be accompanied with explanations.
Therefore, for mcq questions, ensure that the answer entered reflects the correct option.
|
Examples:
-
Open ended question:
question question/Which year did Singapore gain independence? answer/1965 type/open
Creates an open ended question with topic 'Which year did Singapore gain independence?' with answer '1965'. -
MCQ:
question question/Which year did Singapore gain independence? answer/1965 type/mcq a/1965 b/1963 c/1968 d/1970
Creates an mcq with topic 'Which year did Singapore gain independence?' with answer '1965' and choices '1965', '1963', '1968', '1970'.

5.5.2. Editing a question
Edit a question from the question list. All keywords are optional.
Format: question [INDEX] question/… answer/… type/… (MCQ KEYWORDS IF APPLICABLE)
Note that when changing question type from open ended to mcq, it is necessary to input options a/, b/, c/, d/.
|
The keywords supported by this feature includes:
| Keyword | Description |
|---|---|
|
The question index as defined by the list and find commands. |
|
Question topic. |
|
Answer to the question. |
|
Type of question( |
|
Option A for MCQ. |
|
Option B for MCQ. |
|
Option C for MCQ. |
|
Option D for MCQ. |
Note that answer is free text and allows any input since answers may be accompanied with explanations.
Therefore, for mcq questions, ensure that the answer entered reflects the correct option.
|
Examples:
-
question 1 question/What is 1+1? answer/2
Edits the first question in the list changing existing question topic to 'What is 1+1?' and answer to '2'. -
question 1 type/mcq a/1965 b/1963 c/1968 d/1970
Edits the type of the first question in the list from open ended question to mcq and state choices '1965', '1963', '1968', '1970'.

5.5.3. Deleting a question
Delete a question from the question list.
Format: question delete [INDEX]
The keywords supported by this feature includes:
| Keyword | Description |
|---|---|
|
The question index as defined by the list and find commands. |
Example:
-
question delete 1
Deletes the first question in the list.
5.5.4. Listing your saved questions
Display the stored questions and list them in ascending order according to the time that it was created.
Format: question list
The keywords supported by this feature includes:
-This command does not require any additional keywords-
Example:
-
question list
Displays the question list.
5.5.5. Searching for a question
Search and display questions using keywords and similar terms.
|
The ordering of questions is based on similarity and the ordering is such that questions that is most similar
to your search term will be at the top.
|
Format: question find/…
The keywords supported by this feature includes:
| Keyword | Description |
|---|---|
|
Search term to find in the list of questions. |
Example:
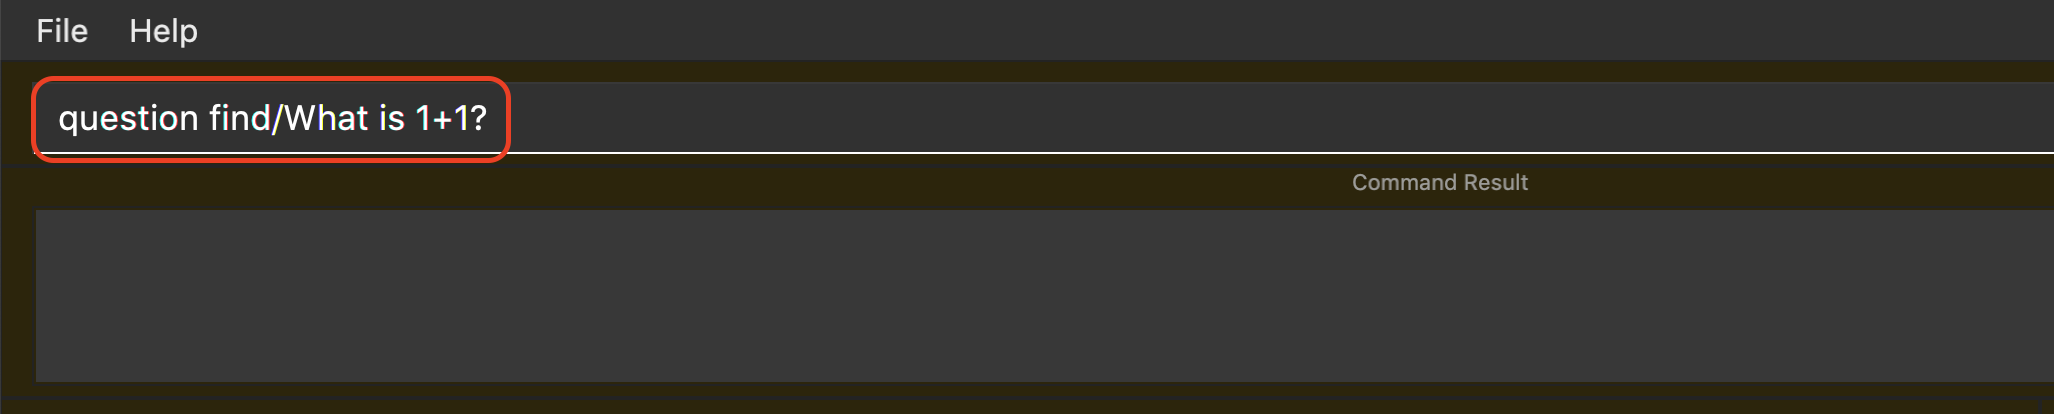
-
question find/What is 1+1?
Searches through the question list to find questions close to the search term 'What is 1+1?'.
5.5.6. Starting a Slideshow
Start a slideshow based on the questions selected. The sequence of the questions displayed will follow the ordering of input.
Format: question slideshow [QUESTIONS INDEX]
The keywords supported by this feature includes:
| Keyword | Description |
|---|---|
|
Index of questions separated by a whitespace. Follows the index as defined in the list and find commands. |
The following controls are used to navigate through the slideshow:
| Control | Description |
|---|---|
|
Go to next question. |
|
Go to previous question. |
|
Quit the slideshow. |
|
Show or hide the answer to the question. |
The following controls are used for polling mcq type questions:
| Control | Description |
|---|---|
|
Add one response to option A. |
|
Add one response to option B. |
|
Add one response to option C. |
|
Add one response to option D. |
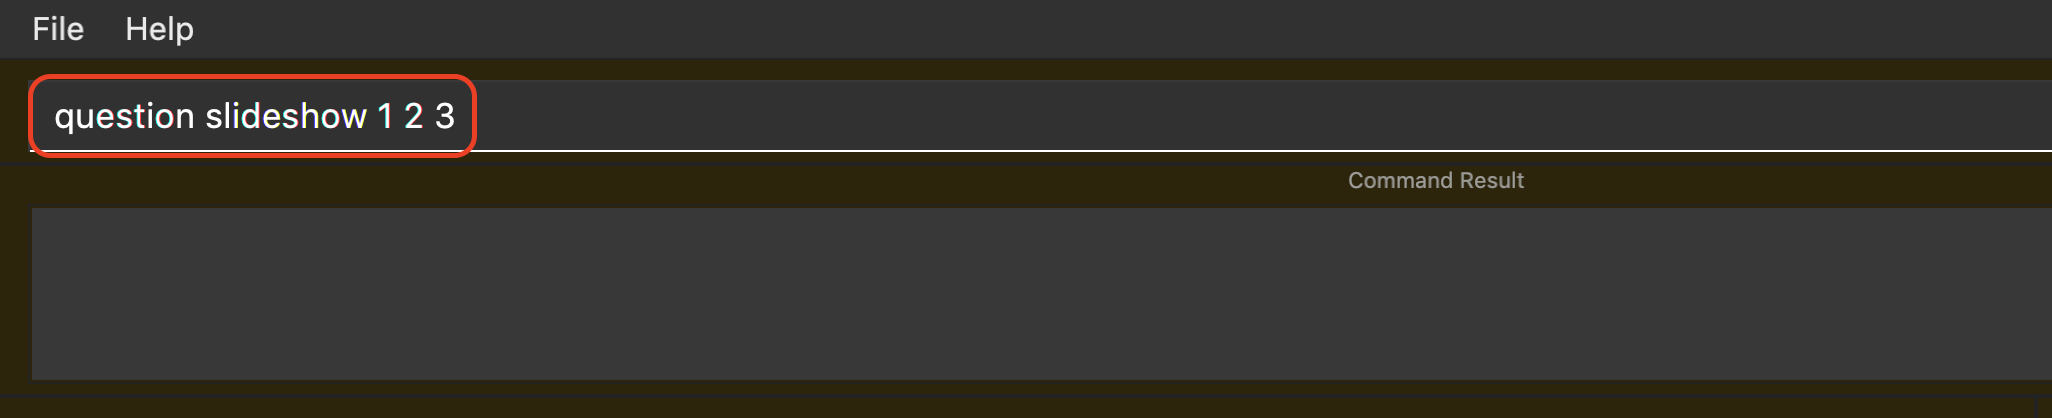
Example:
-
question slideshow 1 2 3
Starts a slideshow with questions containing index '1', '2' and '3'.
Below is an example of how to navigate through the slideshow and utilise the polling feature:
Step 1. When the slideshow window appears, scroll between the questions using the Left arrow(←) and Right arrow(→) keys.
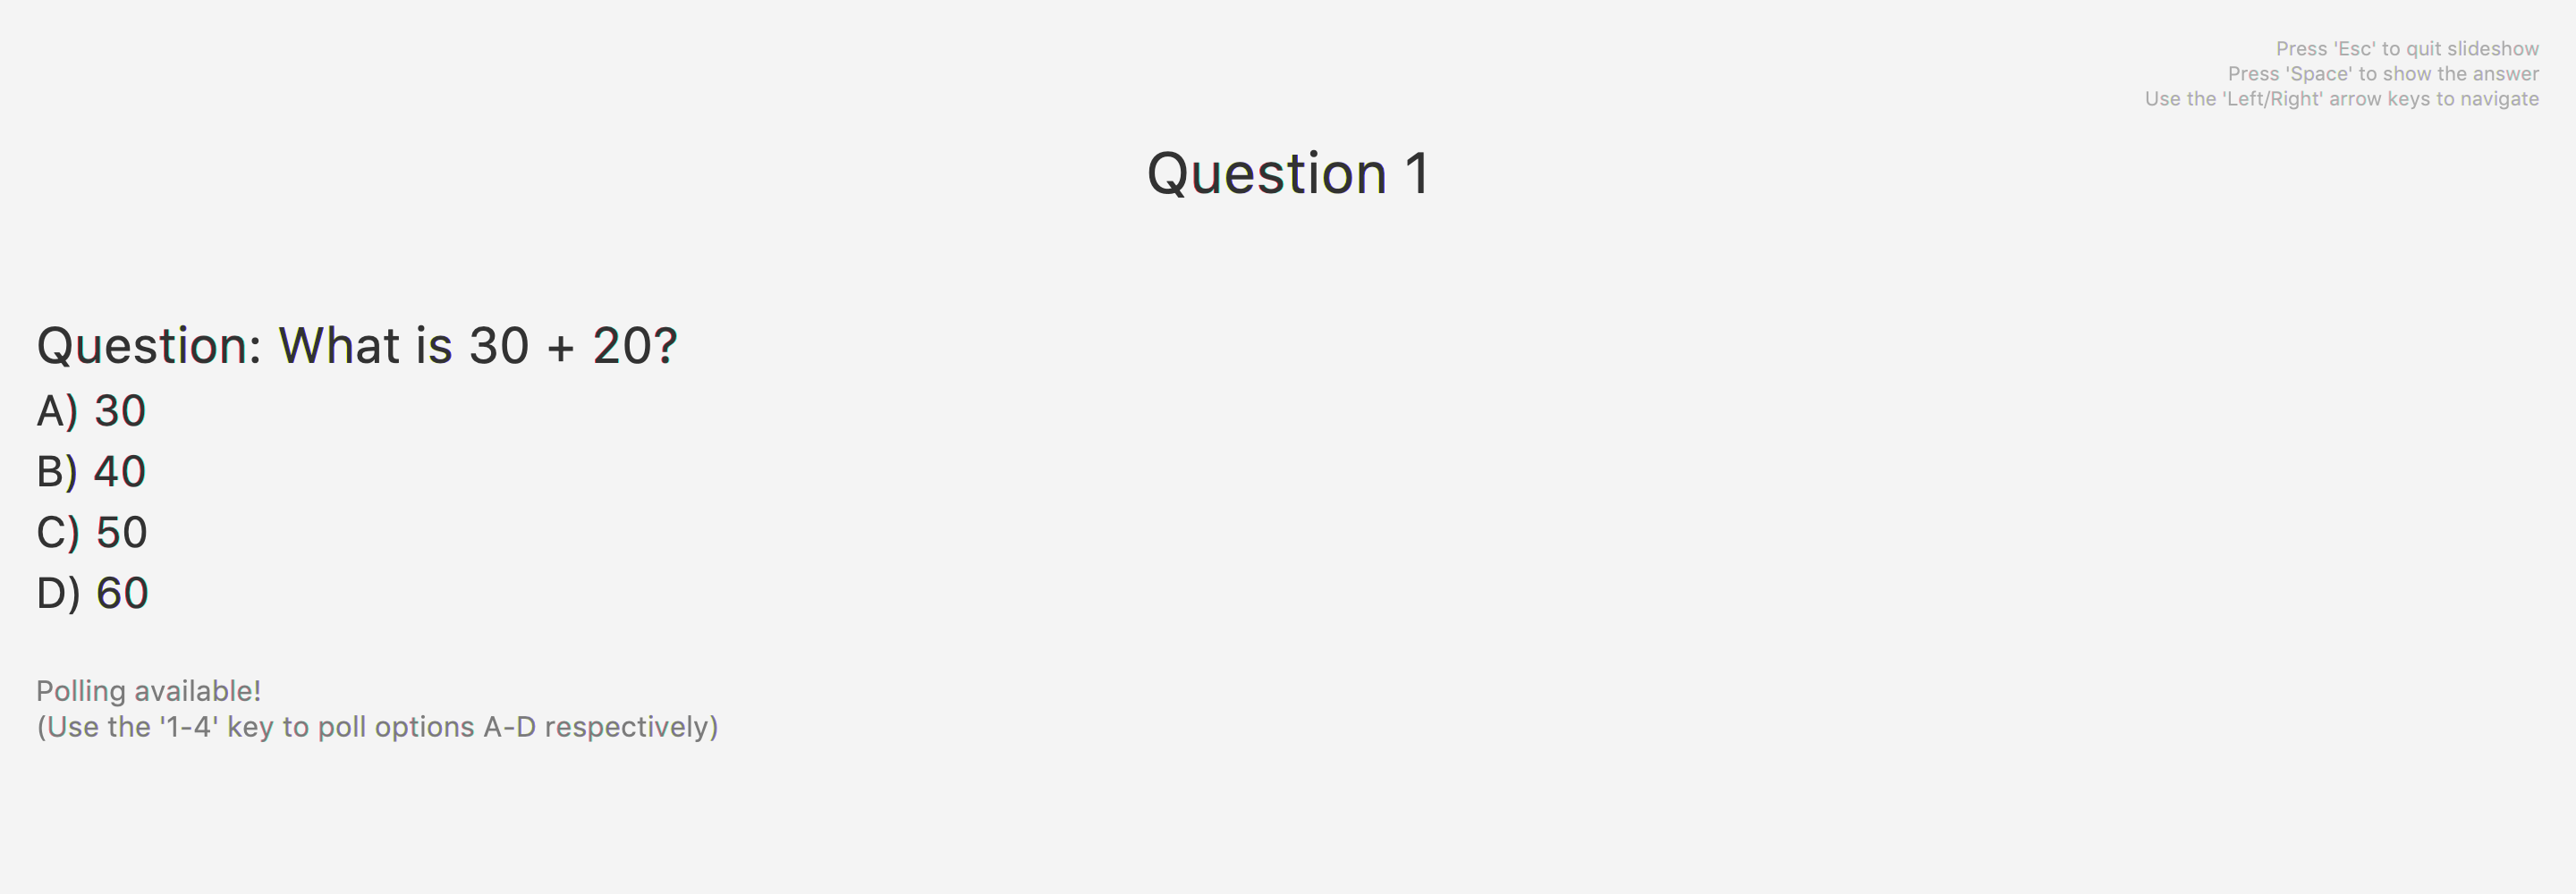
Step 2. Use the Space key to show or hide the answer. For mcq type questions, you may use the 1-4 keys to add to the poll results for options A to D respectively.
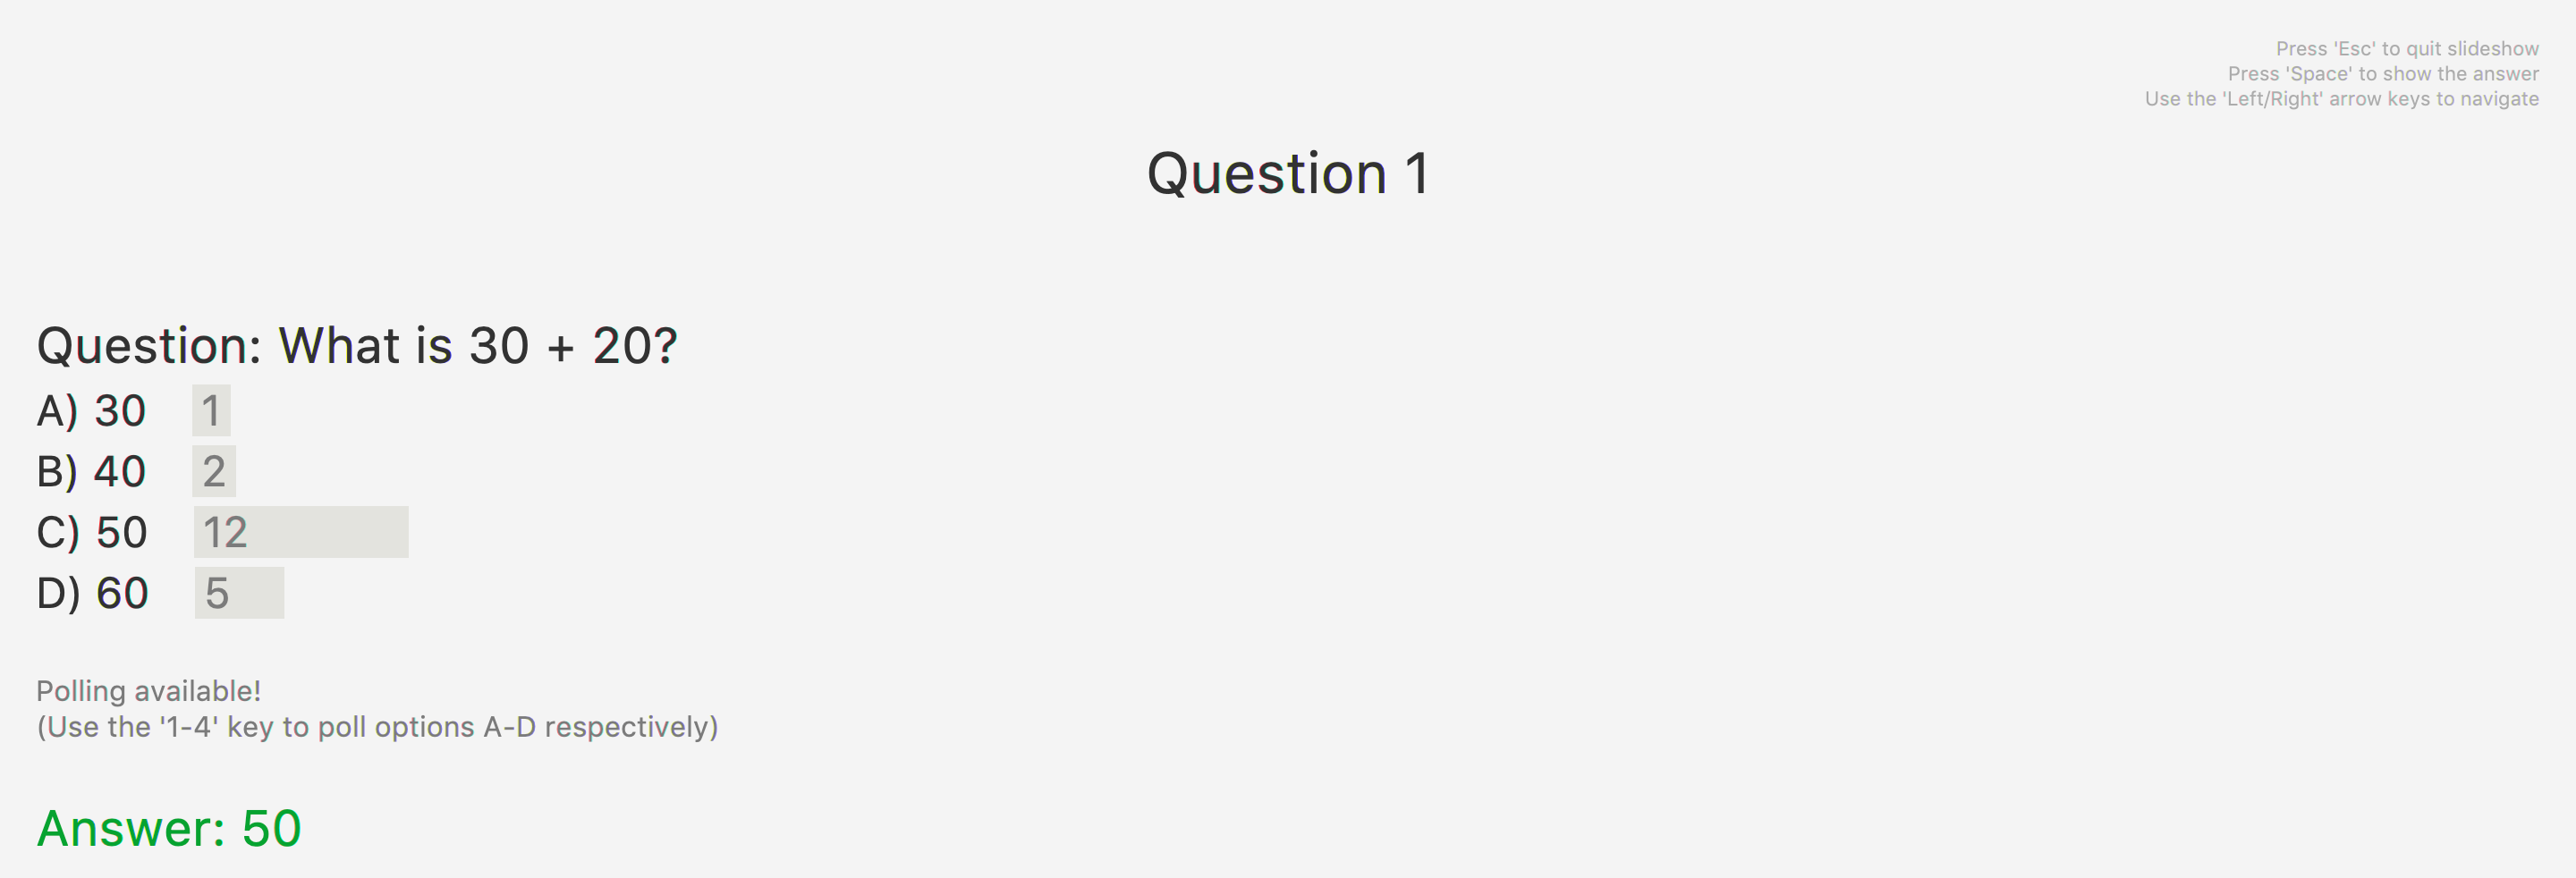
Step 3. When you want to end the slideshow, use the Esc key to exit or navigate beyond the last question of the slideshow and it will automatically exit.
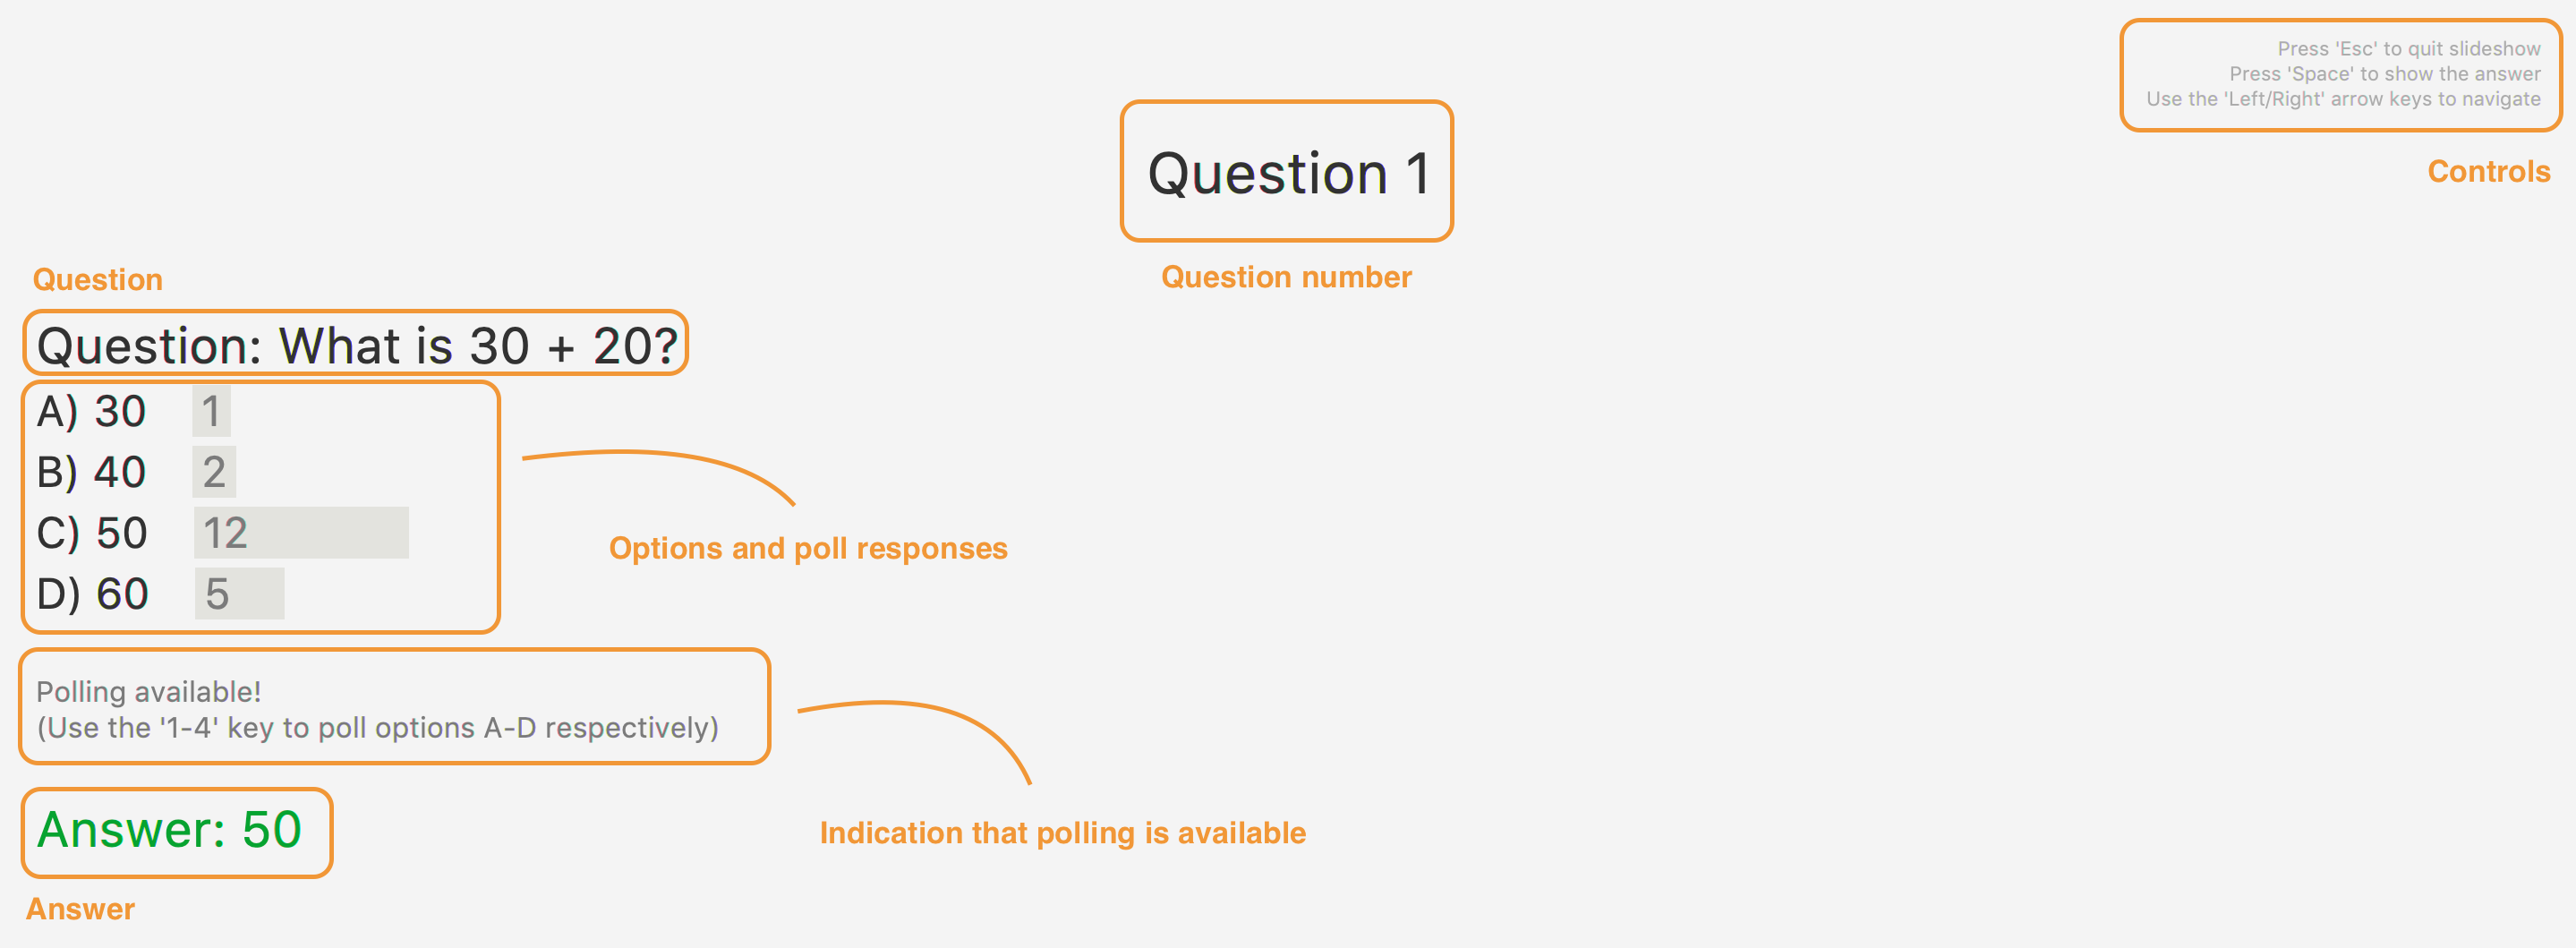
Here is a summary of the various components of the slideshow feature:
5.6. Quizzes - quiz
After taking the effort to record different questions, a teacher might be wondering what other features could the NJoy Teaching Assistant actually provide? What better way to make use of your predefined questions to create quizzes for homework, revision or even assignments?
| Unfortunately, since majority of the quiz commands rely on question and quiz question indexes, it is entirely up to the user to ensure the correct indexes of the questions or quiz questions have been entered. |
You may refer to creating a question for examples on how to add questions and listing the questions on how to view the current list of questions in the databank.
| For the following examples, we will be operating under the assumption that these sample questions are in the question bank. |
5.6.1. Creating a Quiz manually: manual
Allows a user to create a quiz manually.
Format: quiz manual quizID/… questionNumber/… (One or more question numbers can be added)
The format supported by this feature includes:
| Keyword | Description |
|---|---|
Quiz ID |
The label of the quiz. |
Question Numbers |
The question numbers you want to add to the quiz. |
Examples:
-
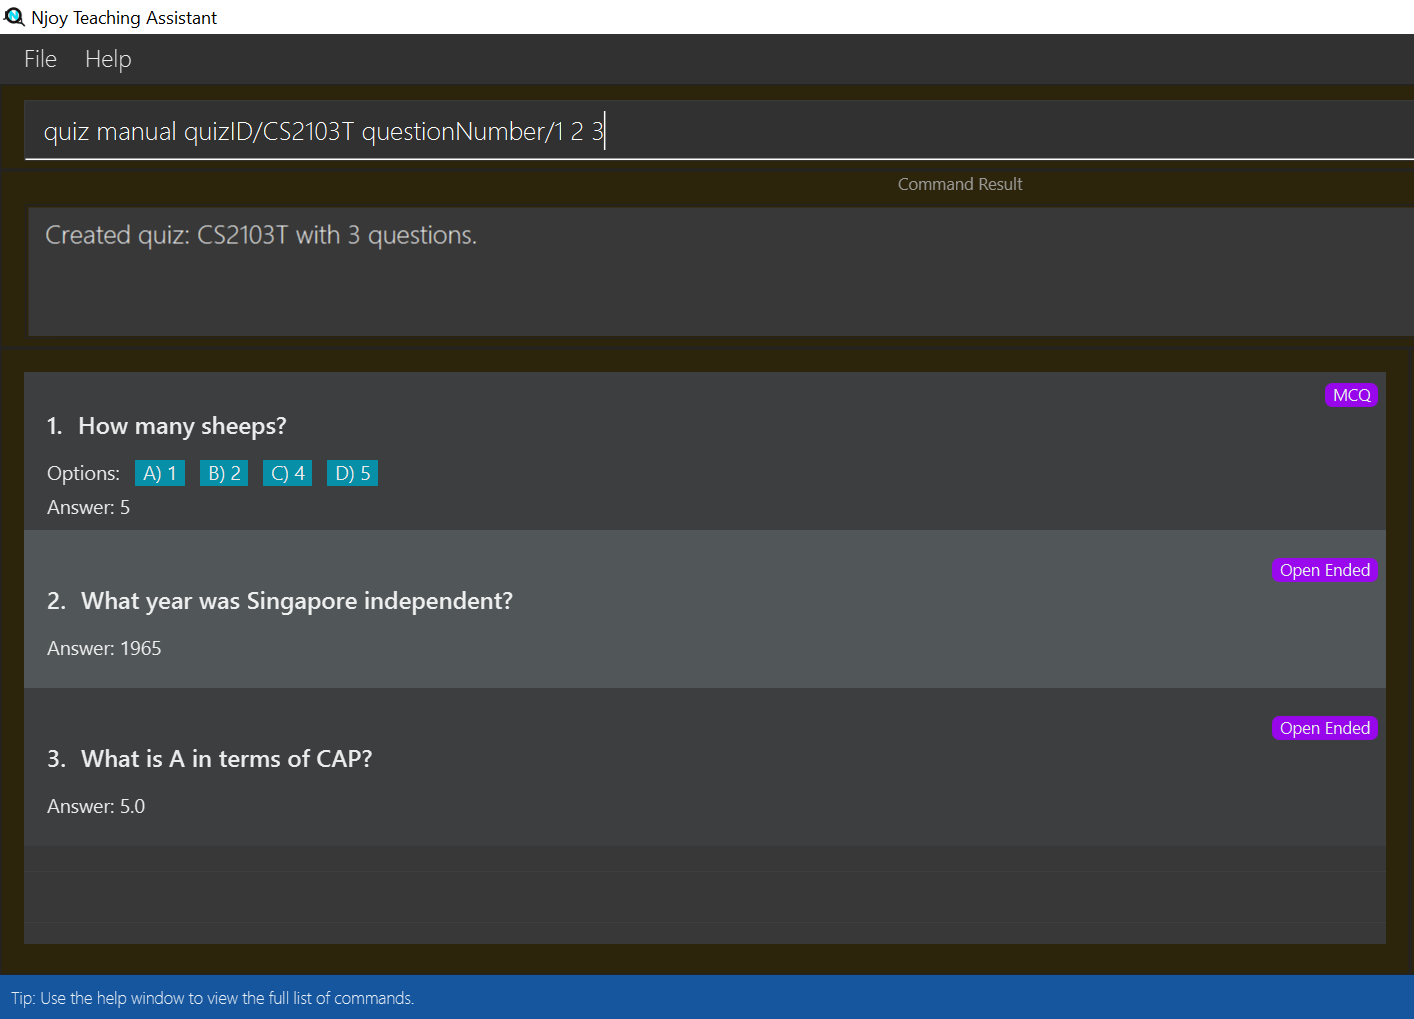
quiz manual quizID/CS2103T questionNumber/1 2 3
Adds question numbers 1, 2 and 3 to the quiz labelled CS2103T.
5.6.2. Creating a Quiz automatically: auto
Allows a user to create a quiz automatically.
| The questions chosen are randomised from the questions that you have previously added. As such, the user has to ensure enough questions are available in storage for quiz creation. |
Format: quiz auto quizID/… numQuestions/… type/… (Type can either be mcq/open/all)
The format supported by this feature includes:
| Keyword | Description |
|---|---|
Quiz ID |
The label of the quiz. |
Number of Questions |
The number of questions you want added to the quiz. |
Question Type |
The type of questions you want added to the quiz: mcq, open, all. |
Examples:
-
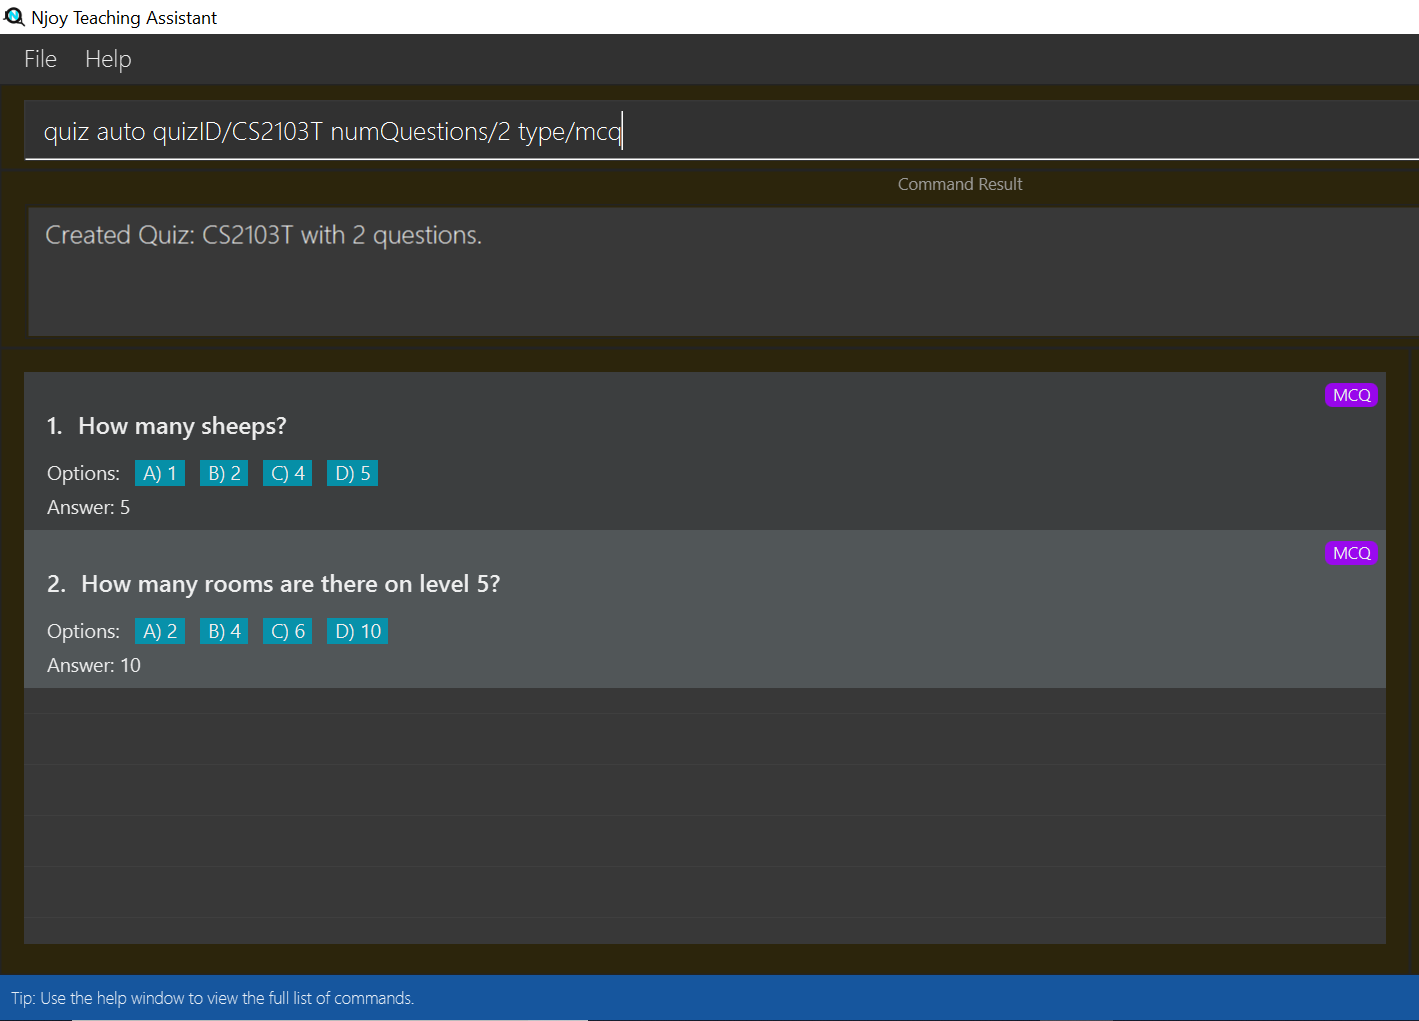
quiz auto quizID/CS2103T numQuestions/2 type/mcq
Adds 2 questions of type mcq to the quiz labelled CS2103T. -
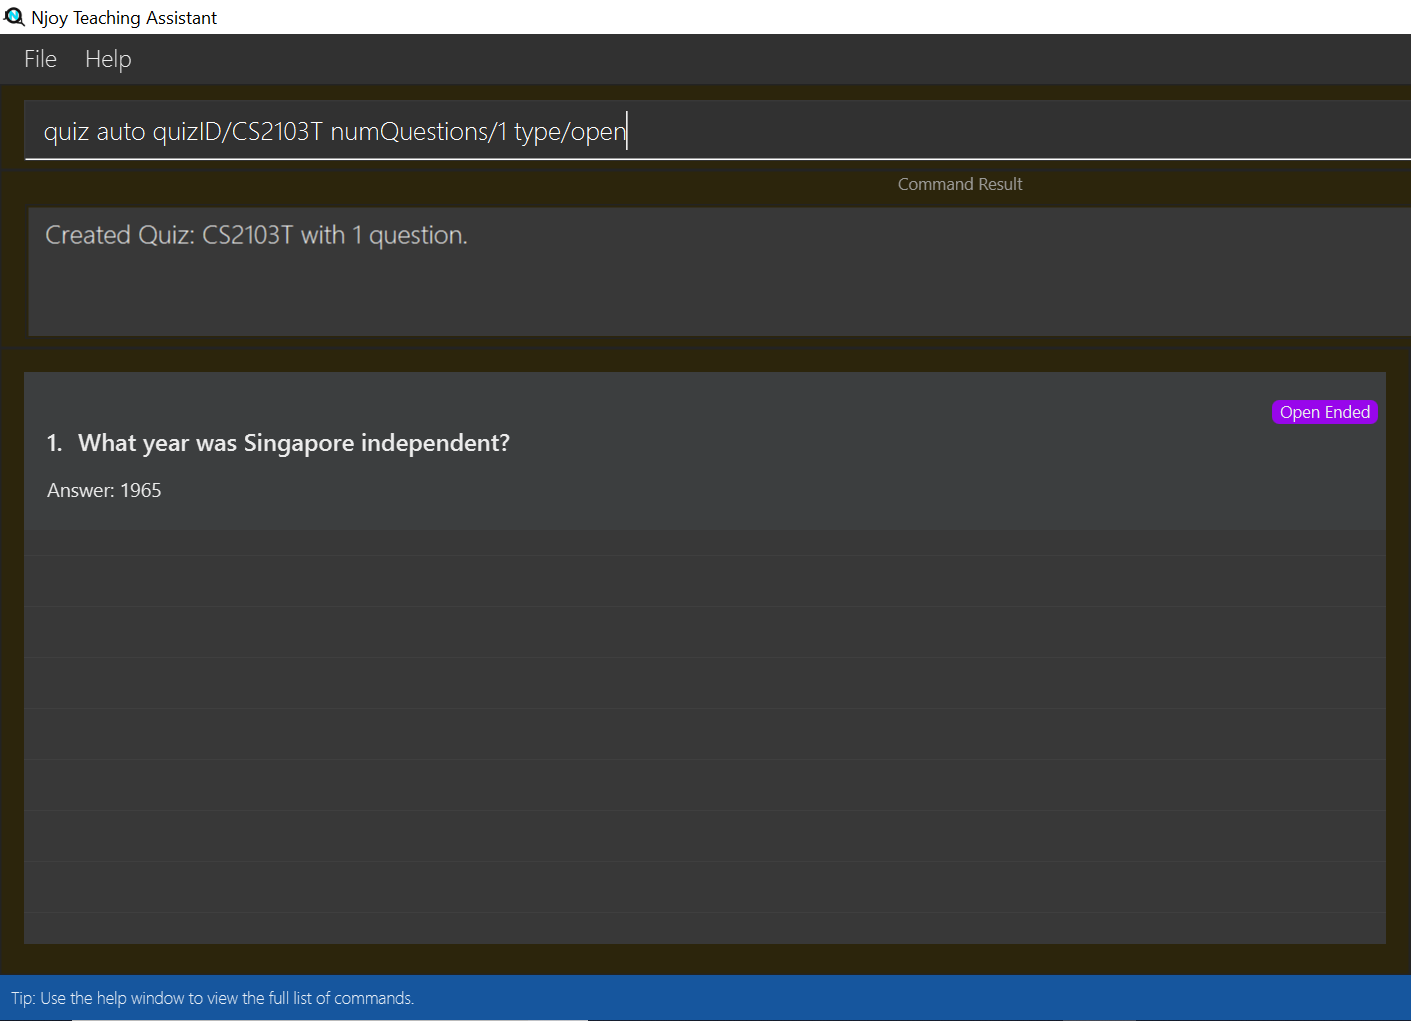
quiz auto quizID/CS2103T numQuestions/1 type/open
Adds 1 question of type open-ended to the quiz labelled CS2103T. -
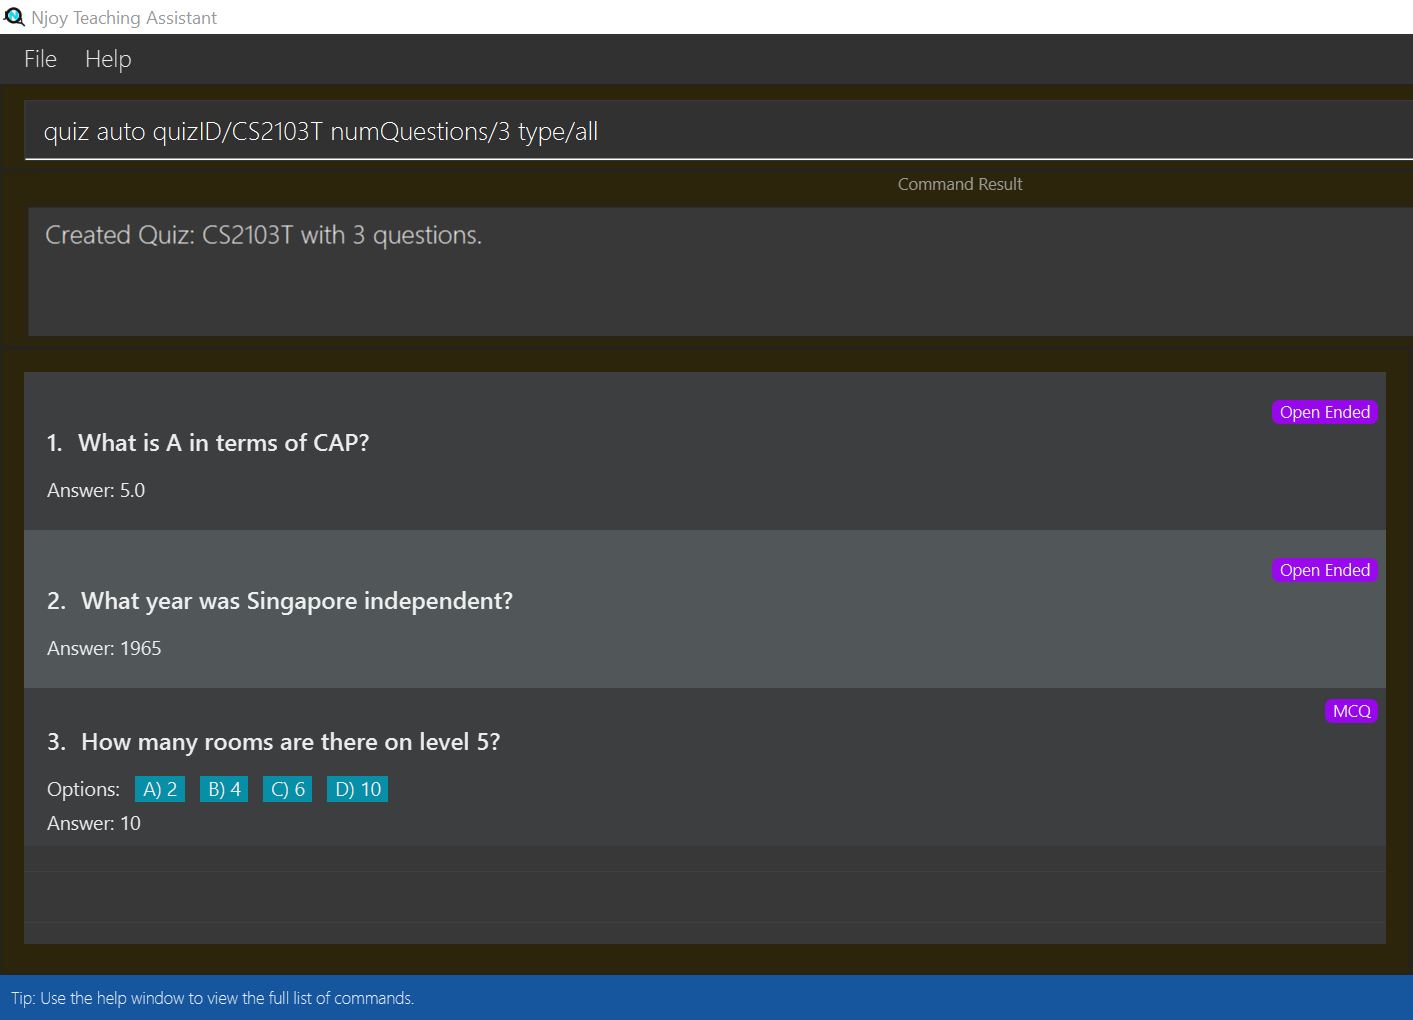
quiz auto quizID/CS2103T numQuestions/3 type/all
Adds 3 questions of any type to the quiz labelled CS2103T.
5.6.3. Adding a Question to a Quiz: add
Allows a user to add a question to a quiz.
Format: quiz add quizID/… questionNumber/… quizQuestionNumber/…
The format supported by this feature includes:
| Keyword | Description |
|---|---|
Quiz ID |
The label of the quiz. |
Question Number |
The question number you want to add to the quiz. |
Quiz Question Number |
The question number in the quiz you want to add the question to. |
Examples:
-
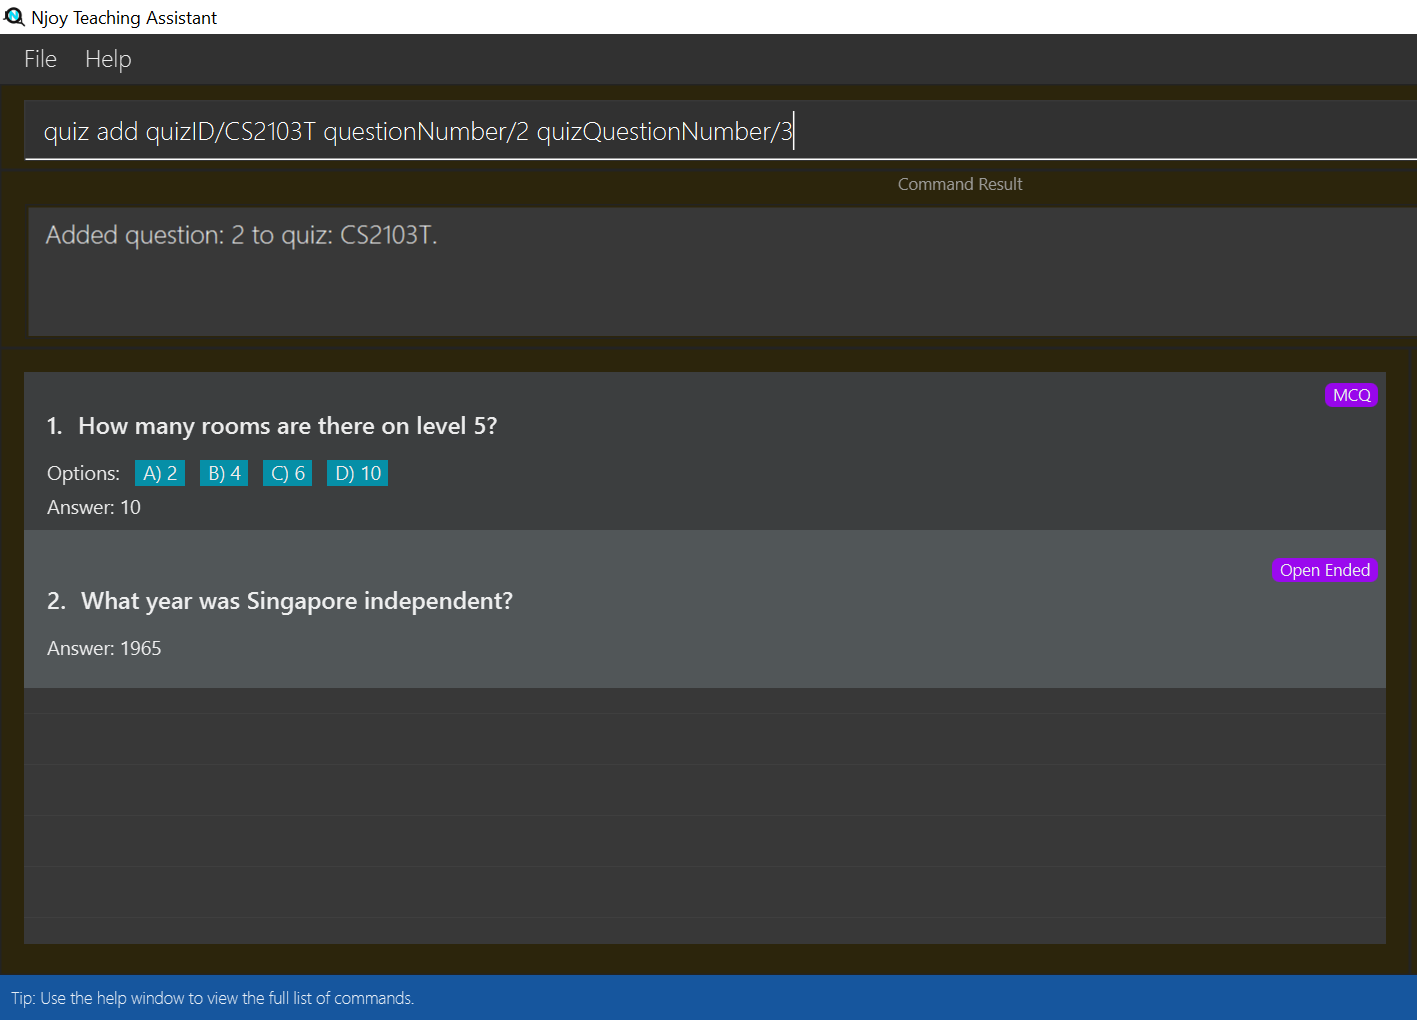
quiz add quizID/CS2103T questionNumber/2 quizQuestionNumber/3
Adds question 2 to the quiz question number 3 for the quiz labelled CS2103T.
5.6.4. Deleting a Question from a Quiz: delete
Allows a user to delete a question from a quiz.
| Do take note that the user can only delete one question at a time. |
Format: quiz delete quizID/… quizID/… quizQuestionNumber/…
The format supported by this feature includes:
| Keyword | Description |
|---|---|
Quiz ID |
The label of the quiz. |
Quiz Question Number |
The question number of the question i the quiz to be deleted. |
Examples:
-
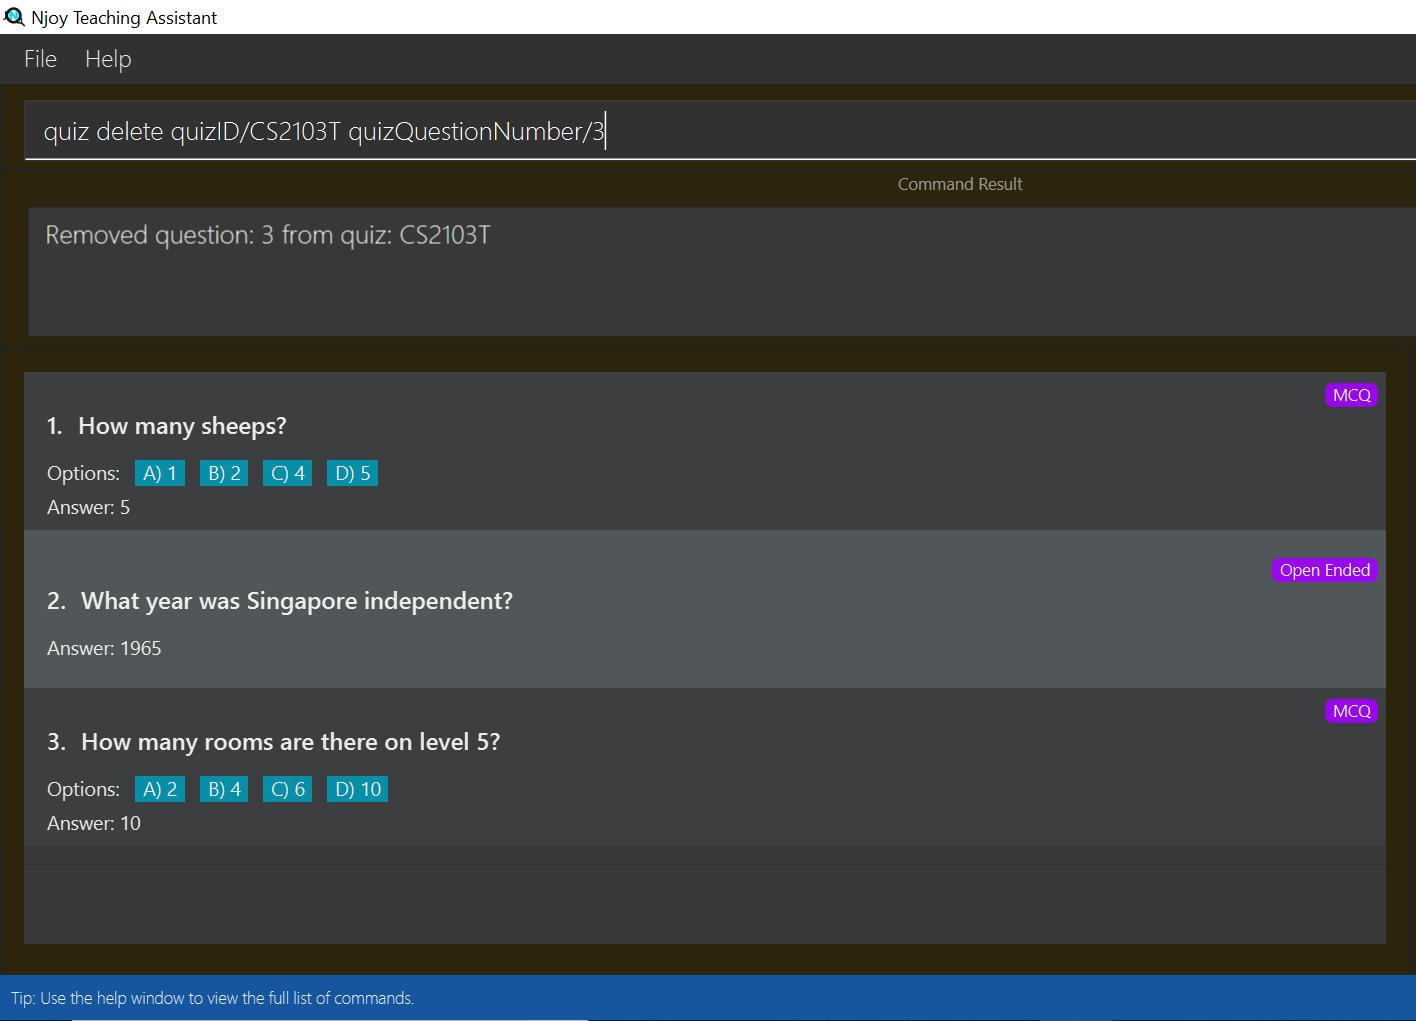
quiz delete quizID/CS2103T quizQuestionNumber/3
Deletes the quiz question number 3 for the quiz labelled CS2103T.
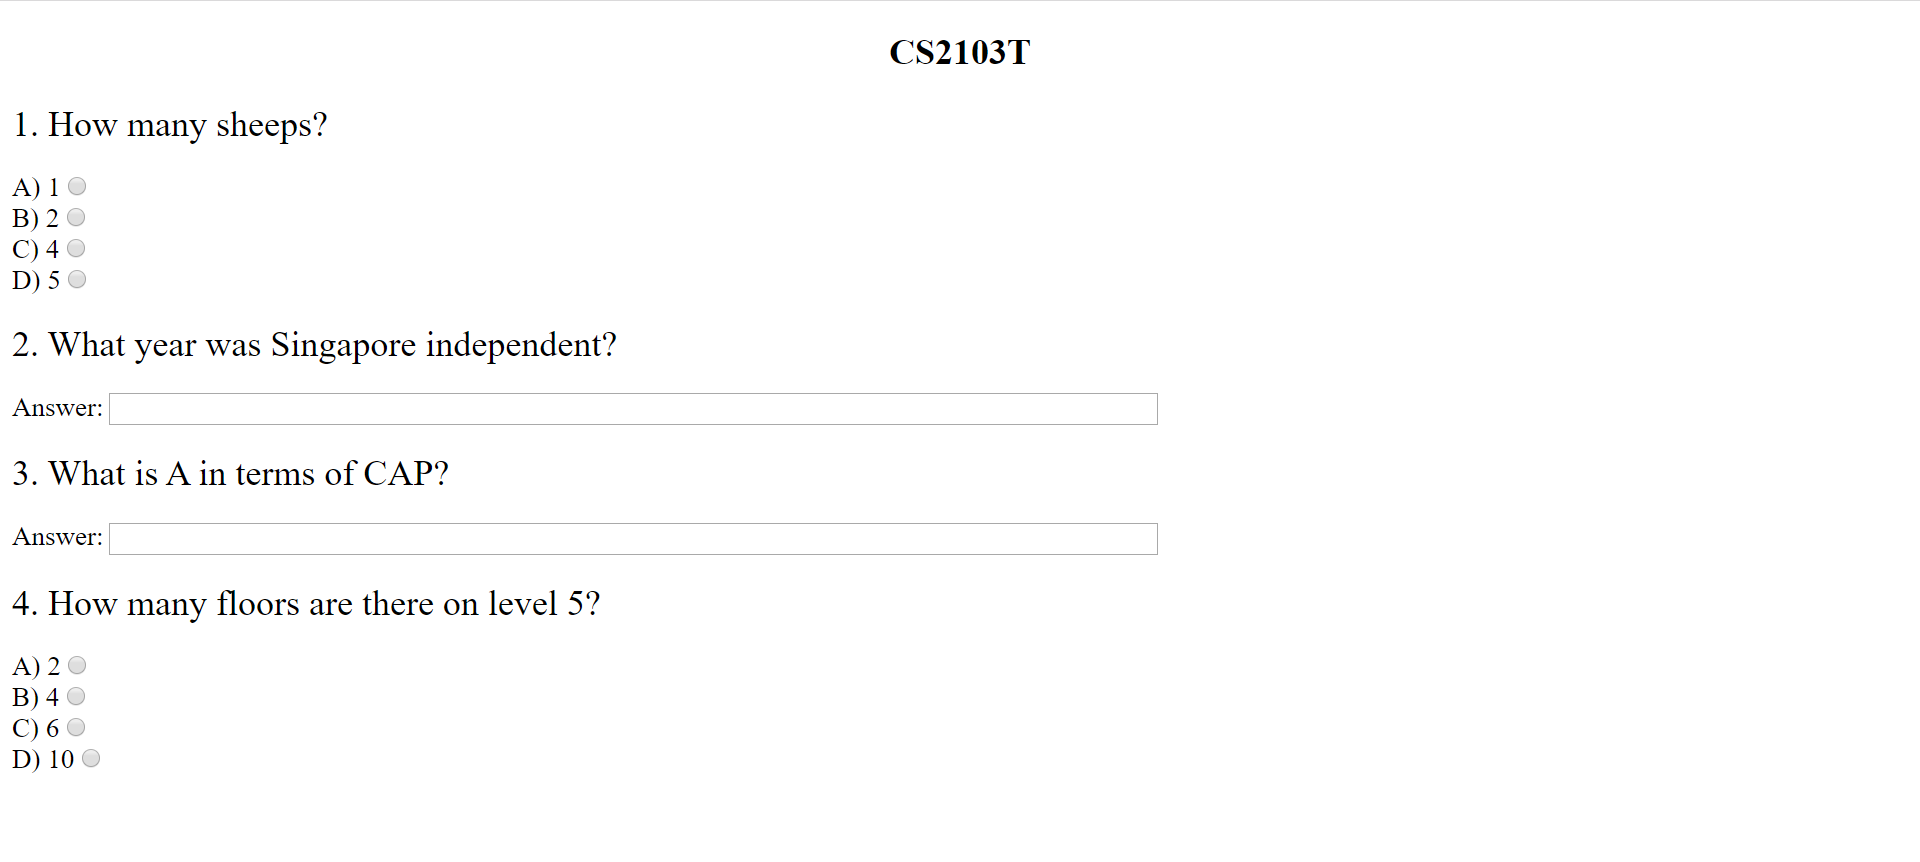
5.6.5. Exporting a Quiz to HTML: export
Allows a user to export a quiz to a formatted HTML file. This file is saved in a folder "currentDirectory/exports/".
Format: quiz export quizID/…
The format supported by this feature includes:
| Keyword | Description |
|---|---|
Quiz ID |
The label of the quiz. |
Examples:
-
quiz export quizID/CS2103T
Exports the quiz labelled CS2103T to a formatted HTML file.
The following example demonstrates how to find the export file:
Step 1. After executing the quiz export command on the quiz labelled CS2103T, the user should navigate to their current directory. An exports folder as shown in the image below should be created!
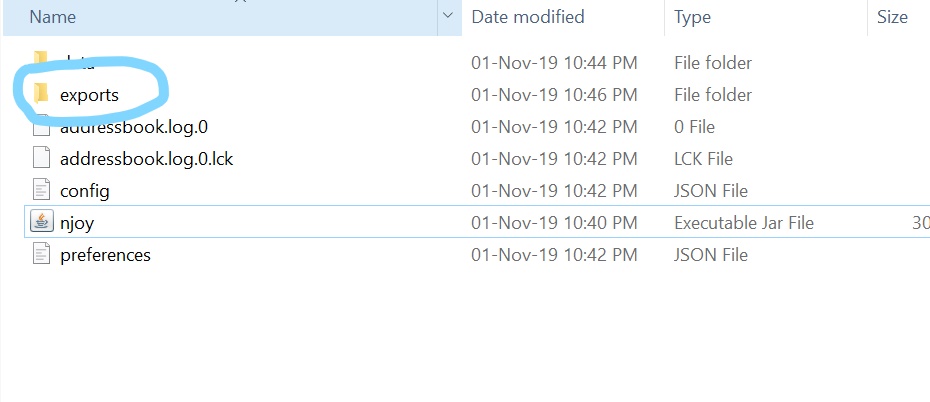
Step 2. Open the folder and double click the html file labelled with the file name CS2103T.

Step 3. Now you can send the custom quiz file to your students!
The quiz should be in a similar format as displayed below.
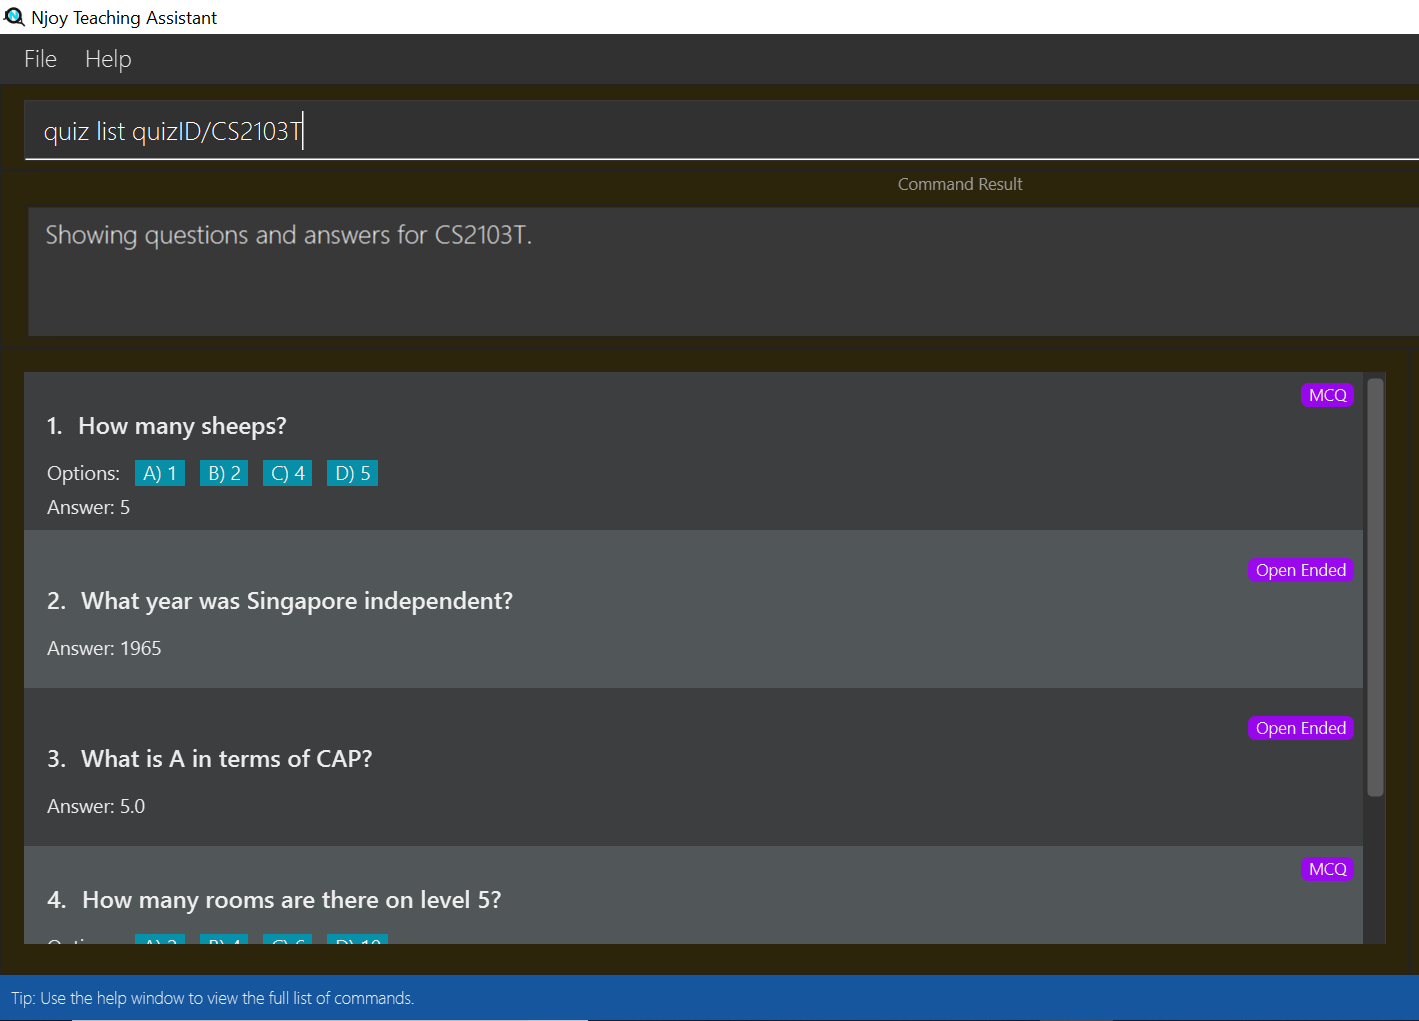
5.6.6. Listing a Quiz: list
Allows a user to list a quiz’s questions and answers.
Format: quiz list quizID/…
The format supported by this feature includes:
| Keyword | Description |
|---|---|
Quiz ID |
The label of the quiz. |
Examples:
-
quiz list quizID/CS2103T
Lists the questions and answers for the quiz labelled CS2103T.
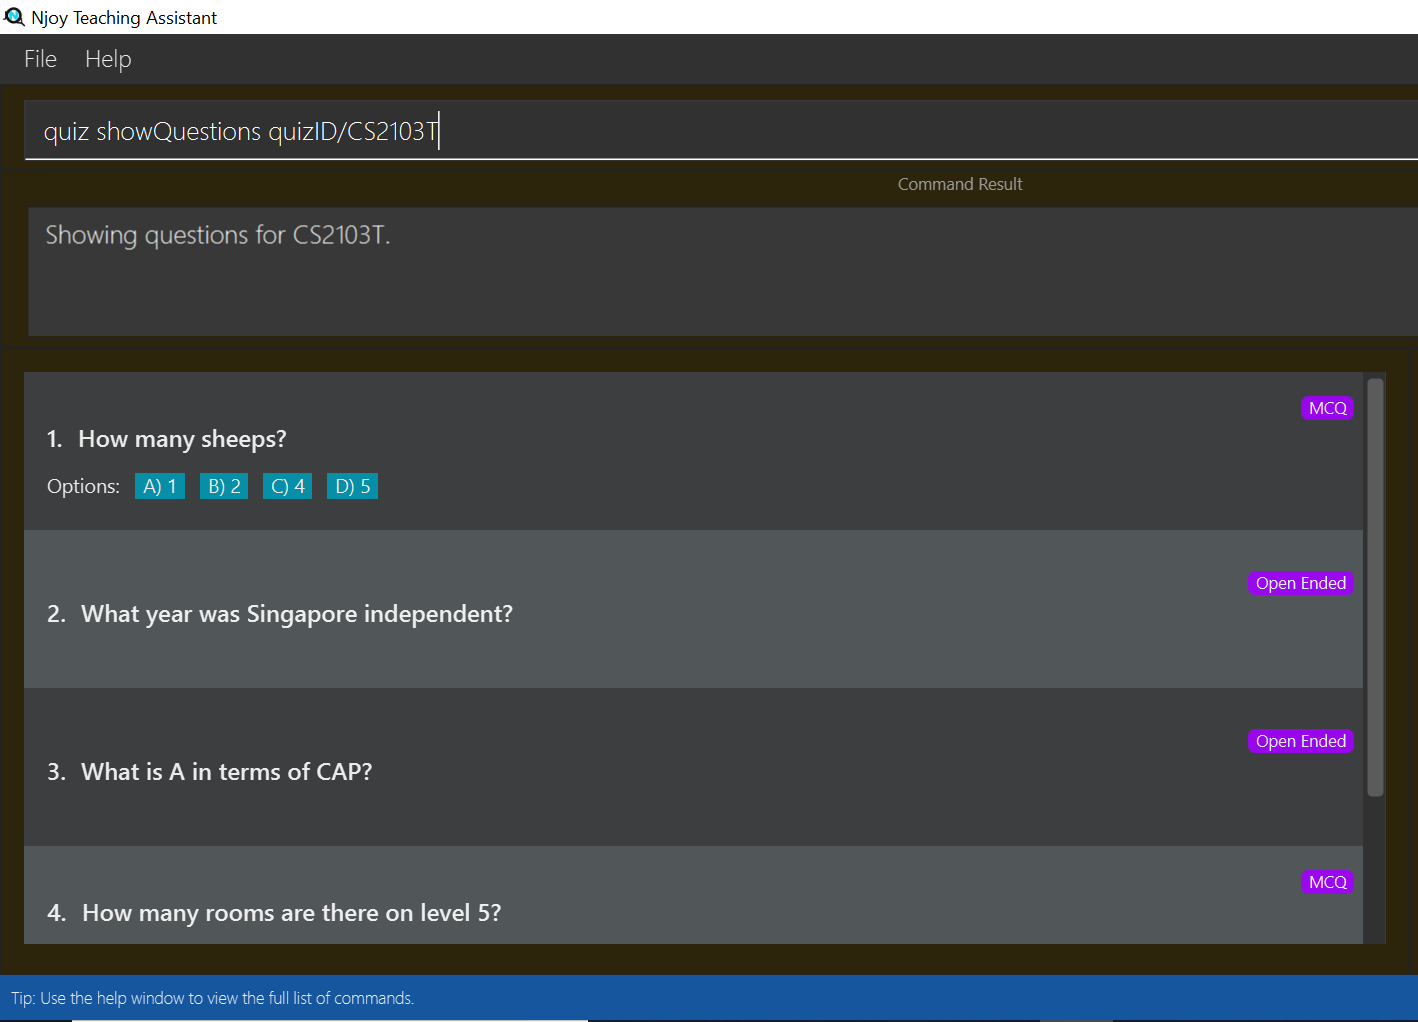
5.6.7. Showing only a Quiz’s Questions: showQuestions
Allows a user to show only a quiz’s questions.
Format: quiz showQuestions quizID/…
The format supported by this feature includes:
| Keyword | Description |
|---|---|
Quiz ID |
The label of the quiz. |
Examples:
-
quiz showQuestions quizID/CS2103T
Shows only the questions for the quiz labelled CS2103T.
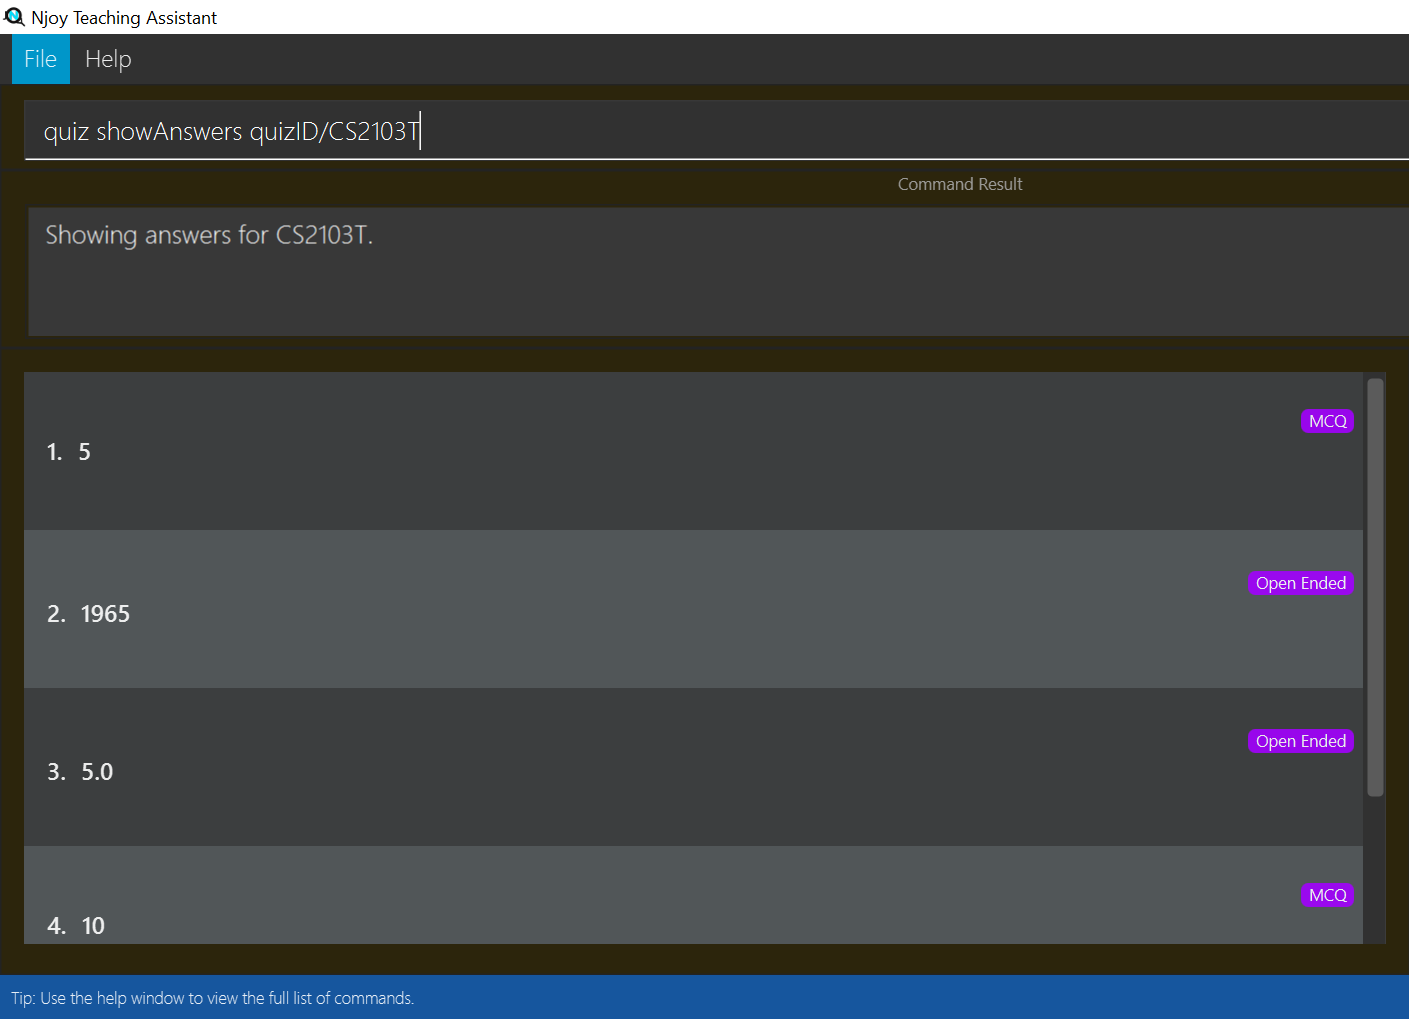
5.6.8. Showing only a Quiz’s Answers: showAnswers
Allows a user to show only a quiz’s answers.
Format: quiz showAnswers quizID/…
The format supported by this feature includes:
| Keyword | Description |
|---|---|
Quiz ID |
The label of the quiz. |
Examples:
-
quiz showAnswers quizID/CS2103T
Shows only the answers for the quiz labelled CS2103T.
5.7. Events - event
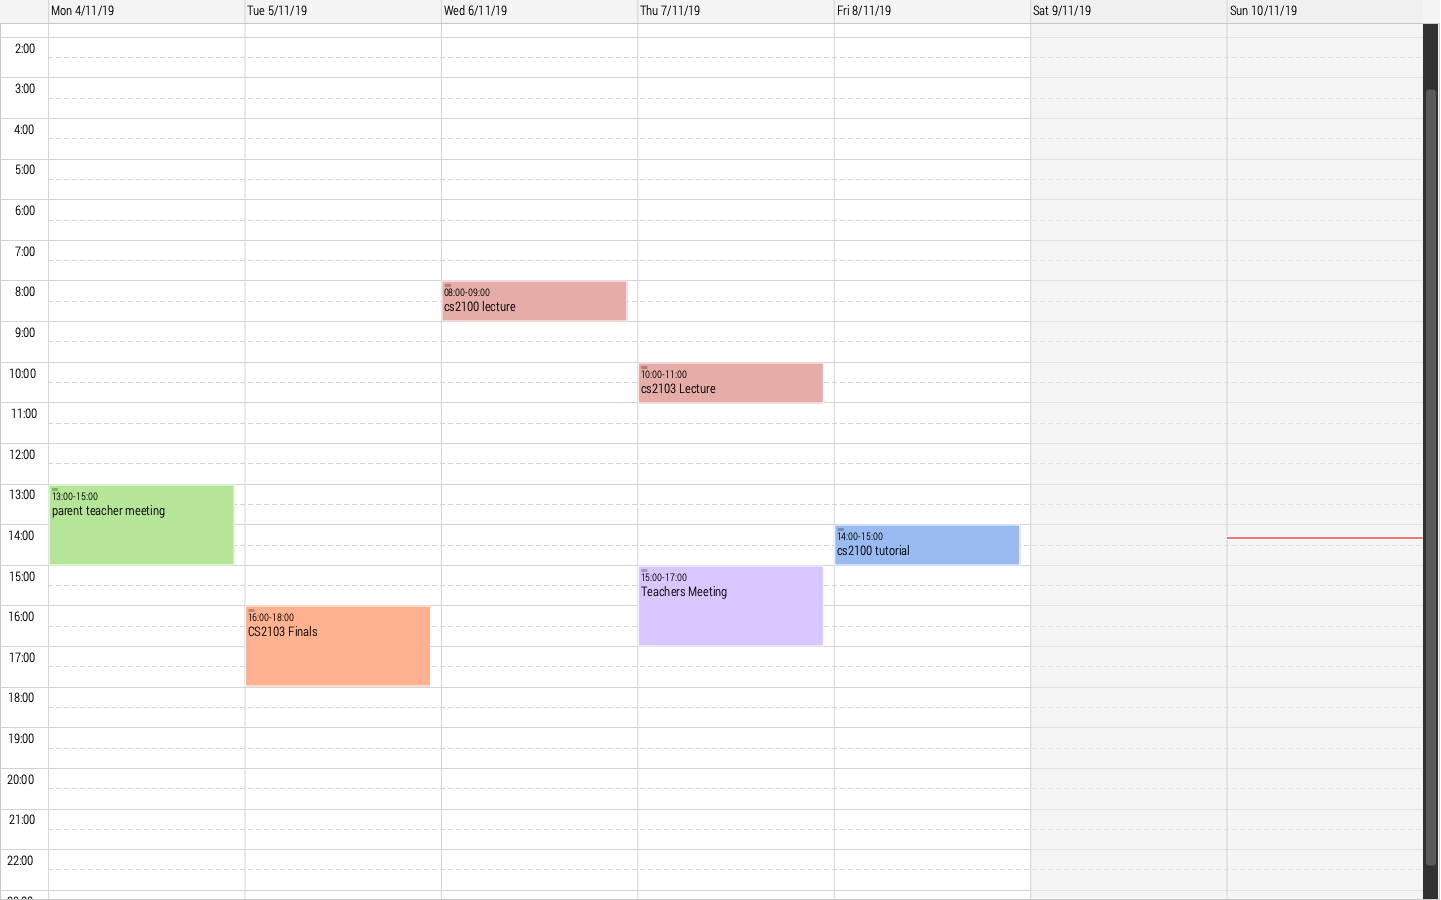
This feature aims to provide event management into nJoy assistance through a visually-pleasing scheduler / calendar.
| The red line in the calendar marks the current date and time. |
5.7.1. Creating a event
Create, store and render a event.
Format: event eventName/… startDateTime/… endDateTime/… recur/… color/…
| All parameters / options are required to create an event. |
| Note that for start and end date-time, it is necessary to input it in the following manner: YYYY-MM-DDThh:mm, with the time being in 24 hour format. For example, 21st Oct 2019 2PM should be expressed in this manner: 2019-10-21T14:00 |
| Note that the event name should not contain backslash characters. |
| Events in the future have a slightly darker color. This is intentional. |
| If invalid event start and end date times are provided that exceed the bounds, Njoy might choose to pick the closest date time available or validate against the invalid date. |
The options supported by this feature includes:
-
eventName- Name of the event -
startDateTime- The start date and time of the event -
endDateTime- The end date and time of the event -
recur- Recurrence of the event. Either none, daily or weekly. -
color- Enter any number from 0 - 23 to set the color of this event. The numbers are pre-matched to unique colors.
Examples:
-
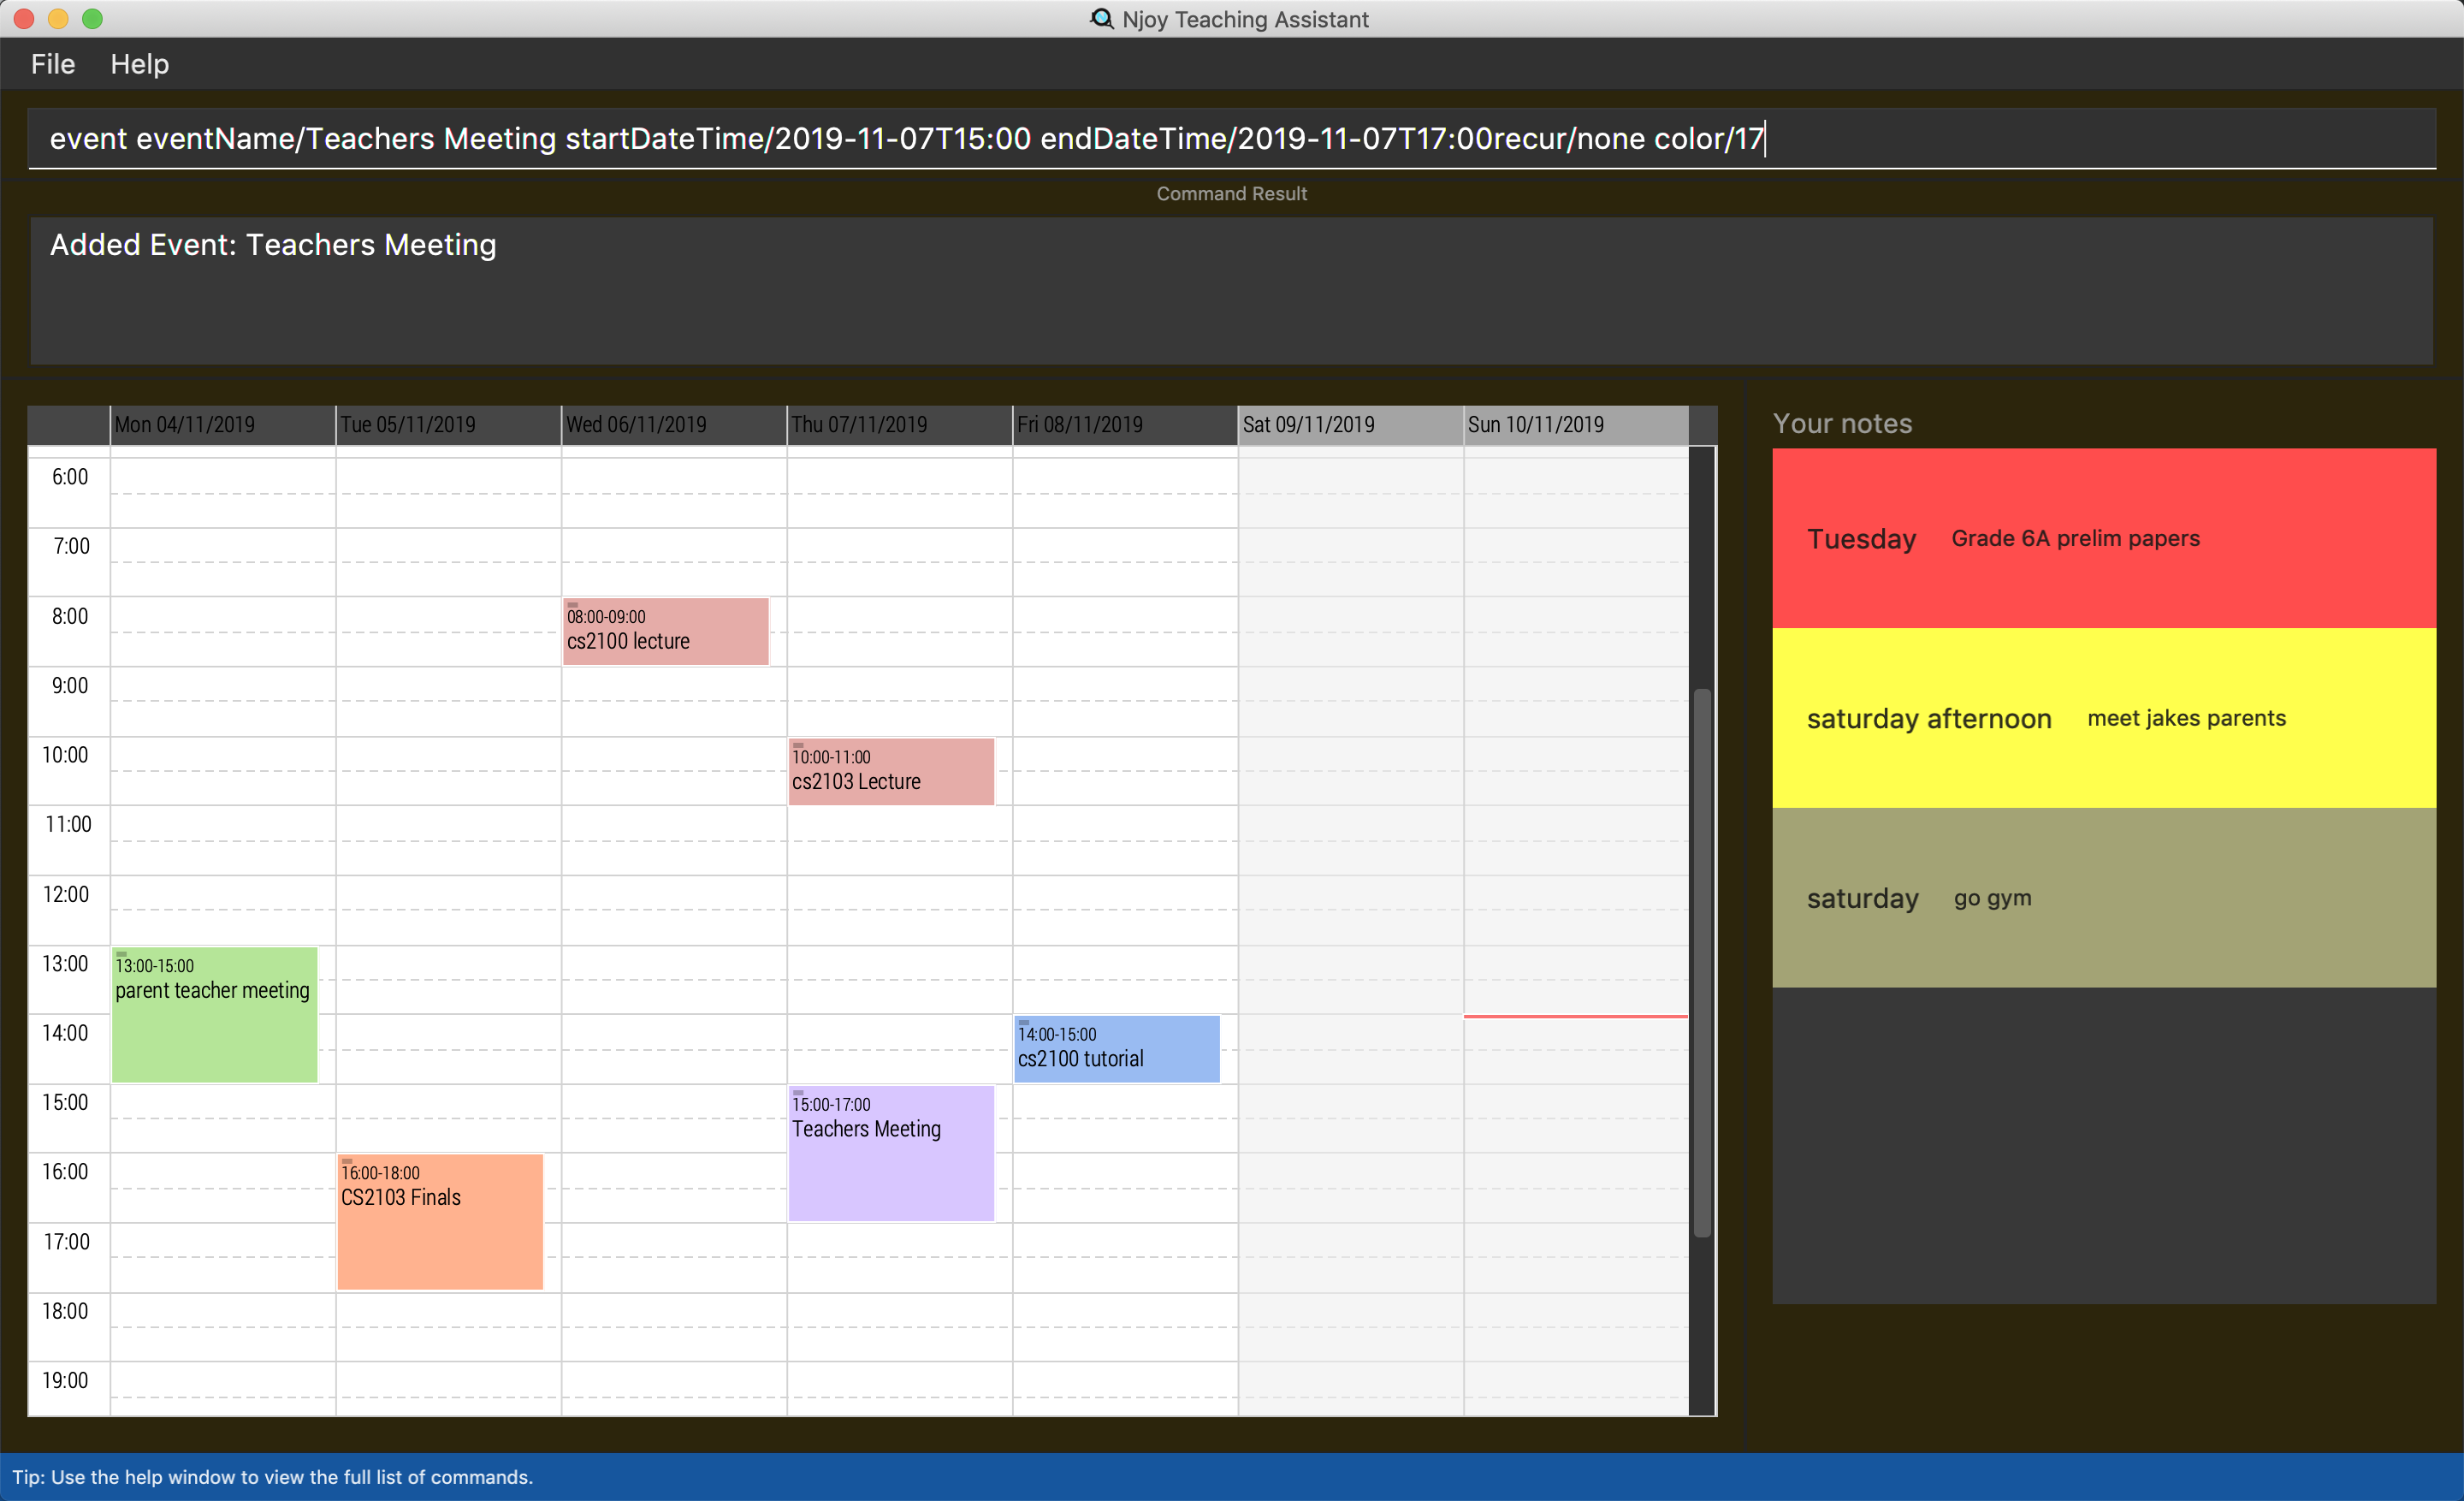
Non-Recurring Event:
event eventName/Teachers Meeting startDateTime/2019-11-07T15:00 endDateTime/2019-11-07T17:00
recur/none color/17
Creates a event with event name 'Teachers Meeting' with start date and time '7th Nov 2019, 1500' with end date and time '7th Nov 2019, 1700' and a color grouping of '17'.
5.7.2. Indexing a event
Gets the index a event based on its event name. If more than one event has the same name, the command will return the index and details of all of them. Else if the event name is not found, it shows the event which has the most similar event name.
| Users should always run this command before edit or delete event commands. As the index of a event CAN change while the application is running. For example, deleting another event will affect the index of other events. |
Format: event indexOf/…
The options supported by this feature includes:
-
indexOf/- Name of the event
Examples:
-
event indexOf/CS2103T Lecture
Returns the index and details of the CS2103T Lecture in the calendar.
5.7.3. Editing a event
Edit a event currently stored. All fields are optional.
Format: event [INDEX] eventName/… startDateTime/… endDateTime/… recur/… color/…
The options supported by this feature includes:
-
[INDEX]- The event index as defined by the index command. -
eventName- Name of the event -
startDateTime- The start date and time of the event -
endDateTime- The end date and time of the event -
recur- Recurrence of the event. Either none, daily or weekly. -
color- Enter any number from 0 - 23 to set the color of this event.
Examples:
-
event 2 eventName/CS2101 Lecture
Edits the event name of the event with index 2 to 'CS2101 Lecture'.
5.7.4. Deleting a event
Delete a event from the calendar.
Format: event delete [INDEX]
The options supported by this feature includes:
-
[INDEX]- The event index as defined by the index command.
| Deleting a event which is recurring (daily or weeekly) will delete all instances of that event. |
-
event delete 1
Deletes the event with index 1
5.7.5. Viewing all events
Show all your events in the calendar. All fields are optional
Format: event view scheduleMode/… targetDate/…
The options supported by this feature includes:
-
scheduleMode- Schedule viewing mode of the calendar. Either weekly or daily. -
targetDate- The target date to show for the week. If in daily mode, simply show the events in the date. If in weekly mode, show the week which includes the specified dateThe target date option must be specified in the following format: yyyy-mm-dd. E.g. 2019-11-23
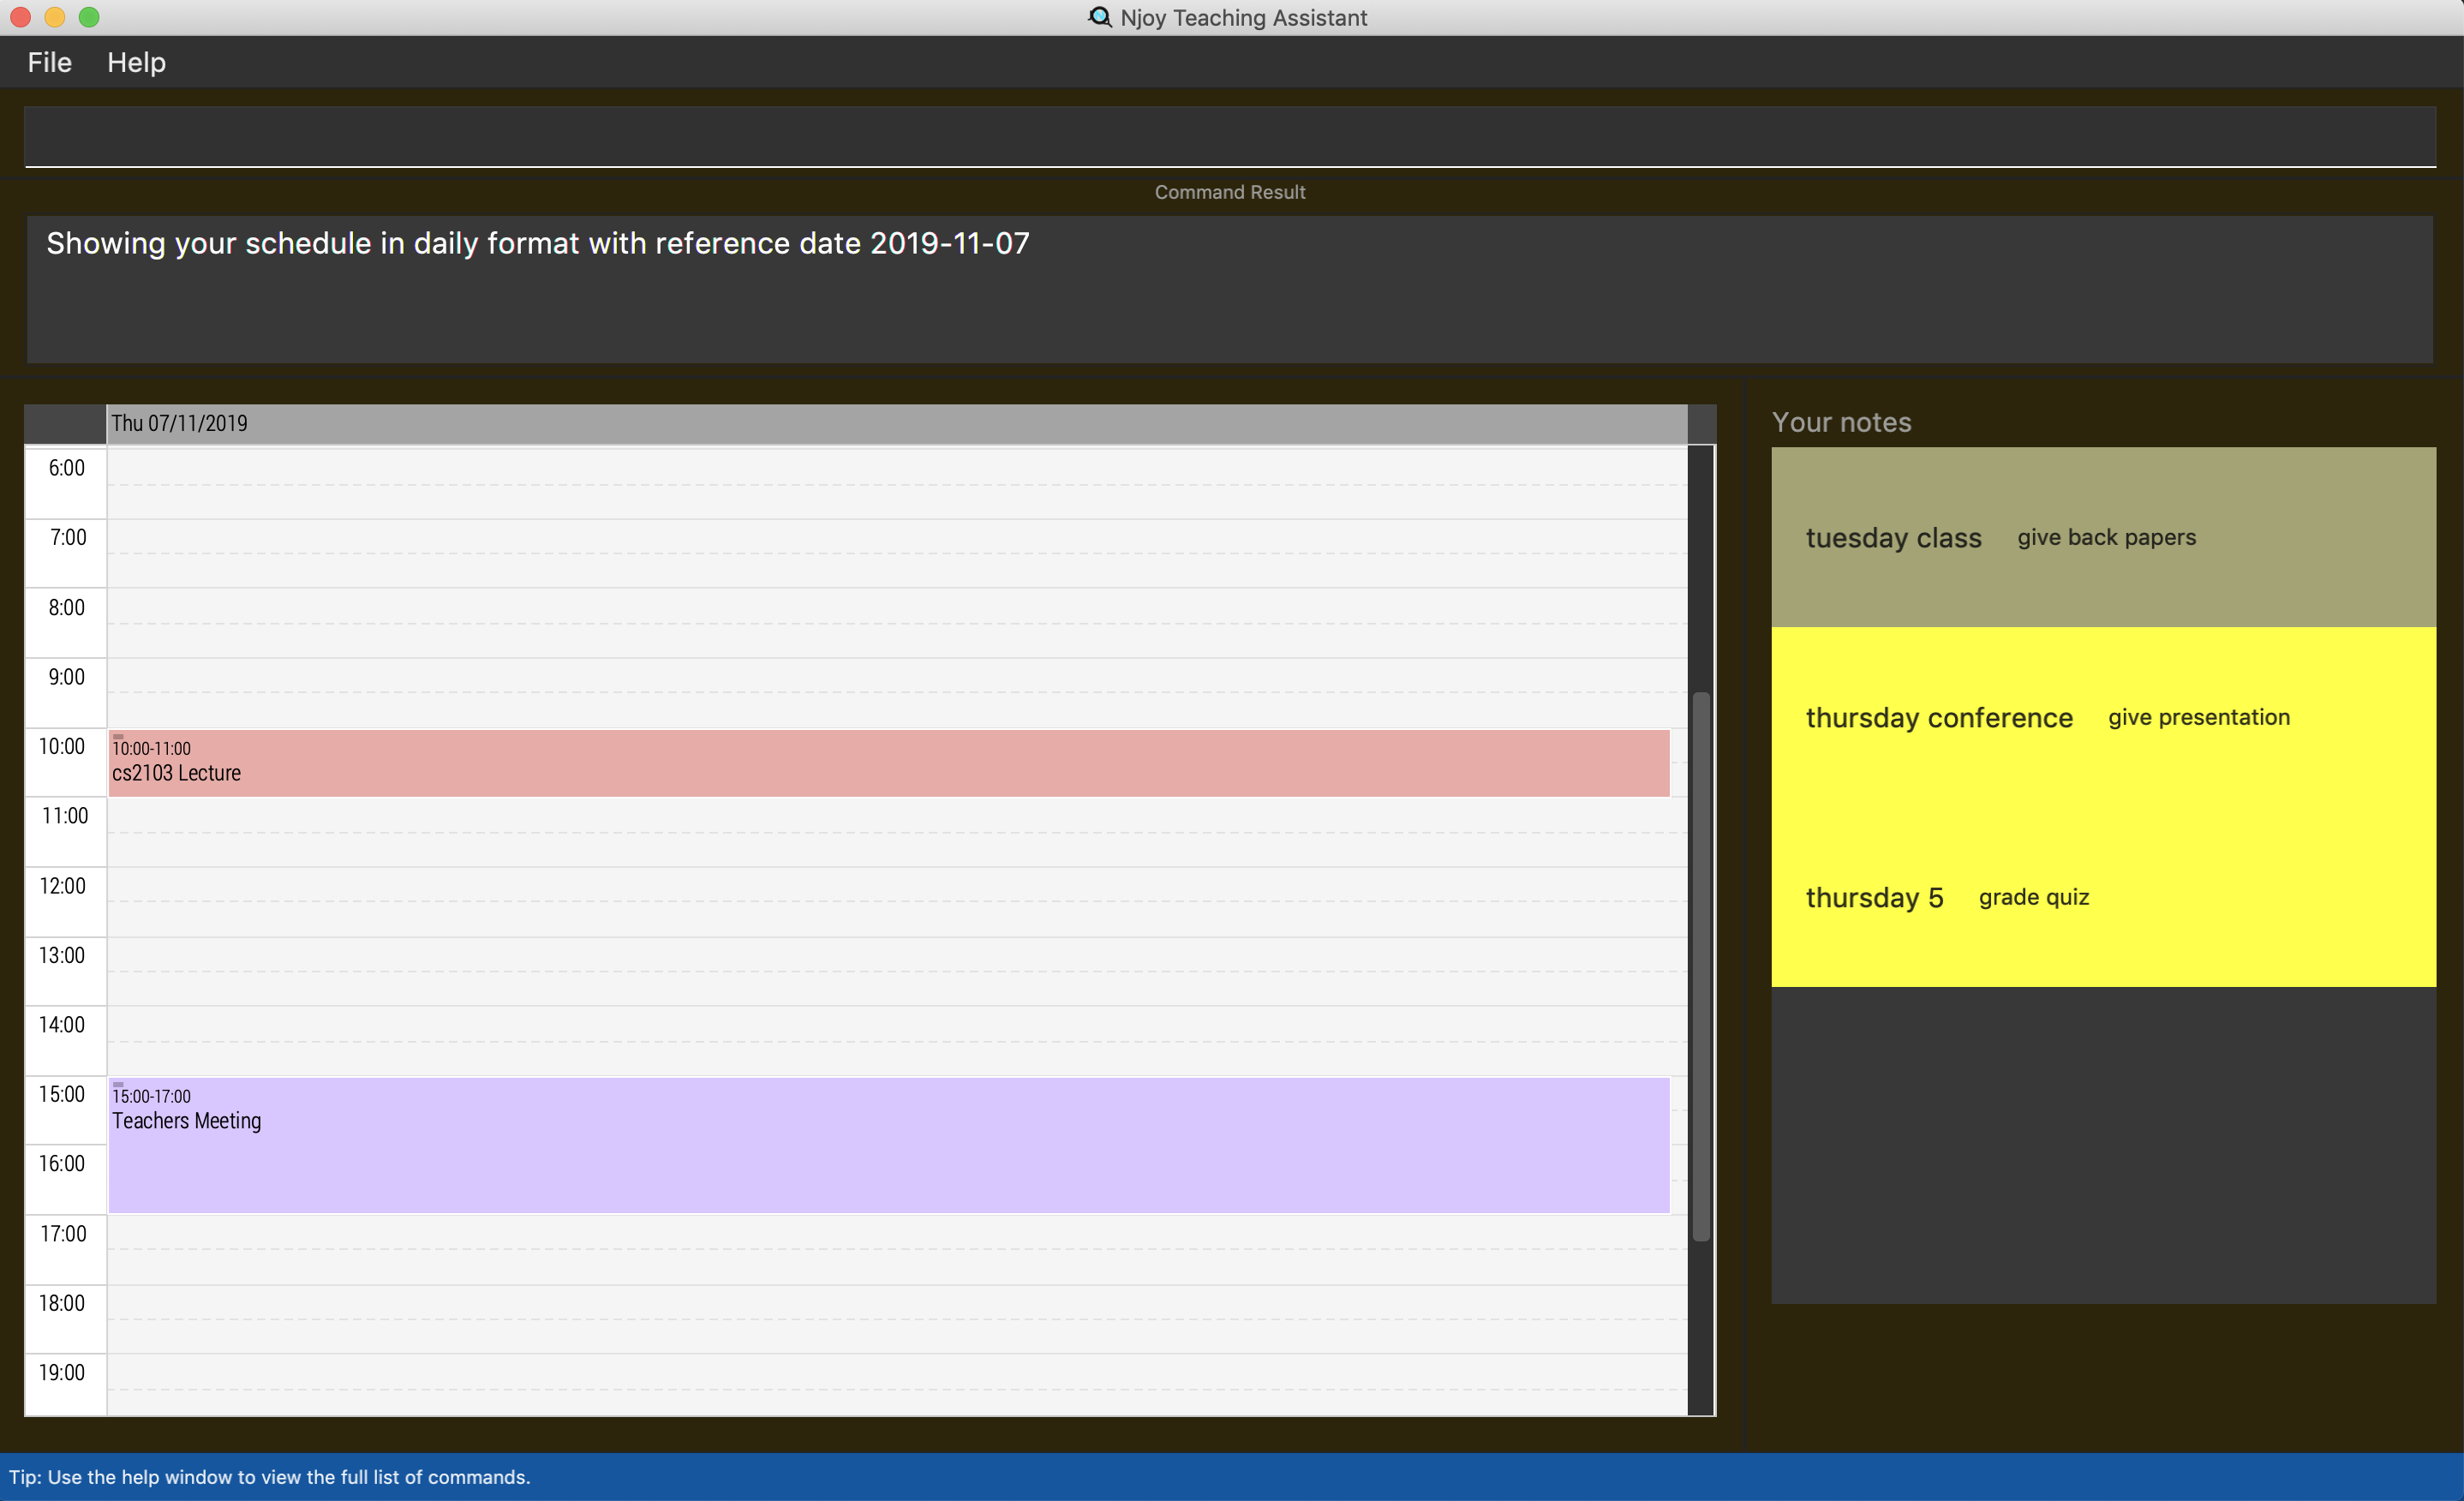
Example:
-
event view scheduleMode/daily targetDate/2019-11-07
Opens the calendar view in daily mode with the target date 7 November 2019.
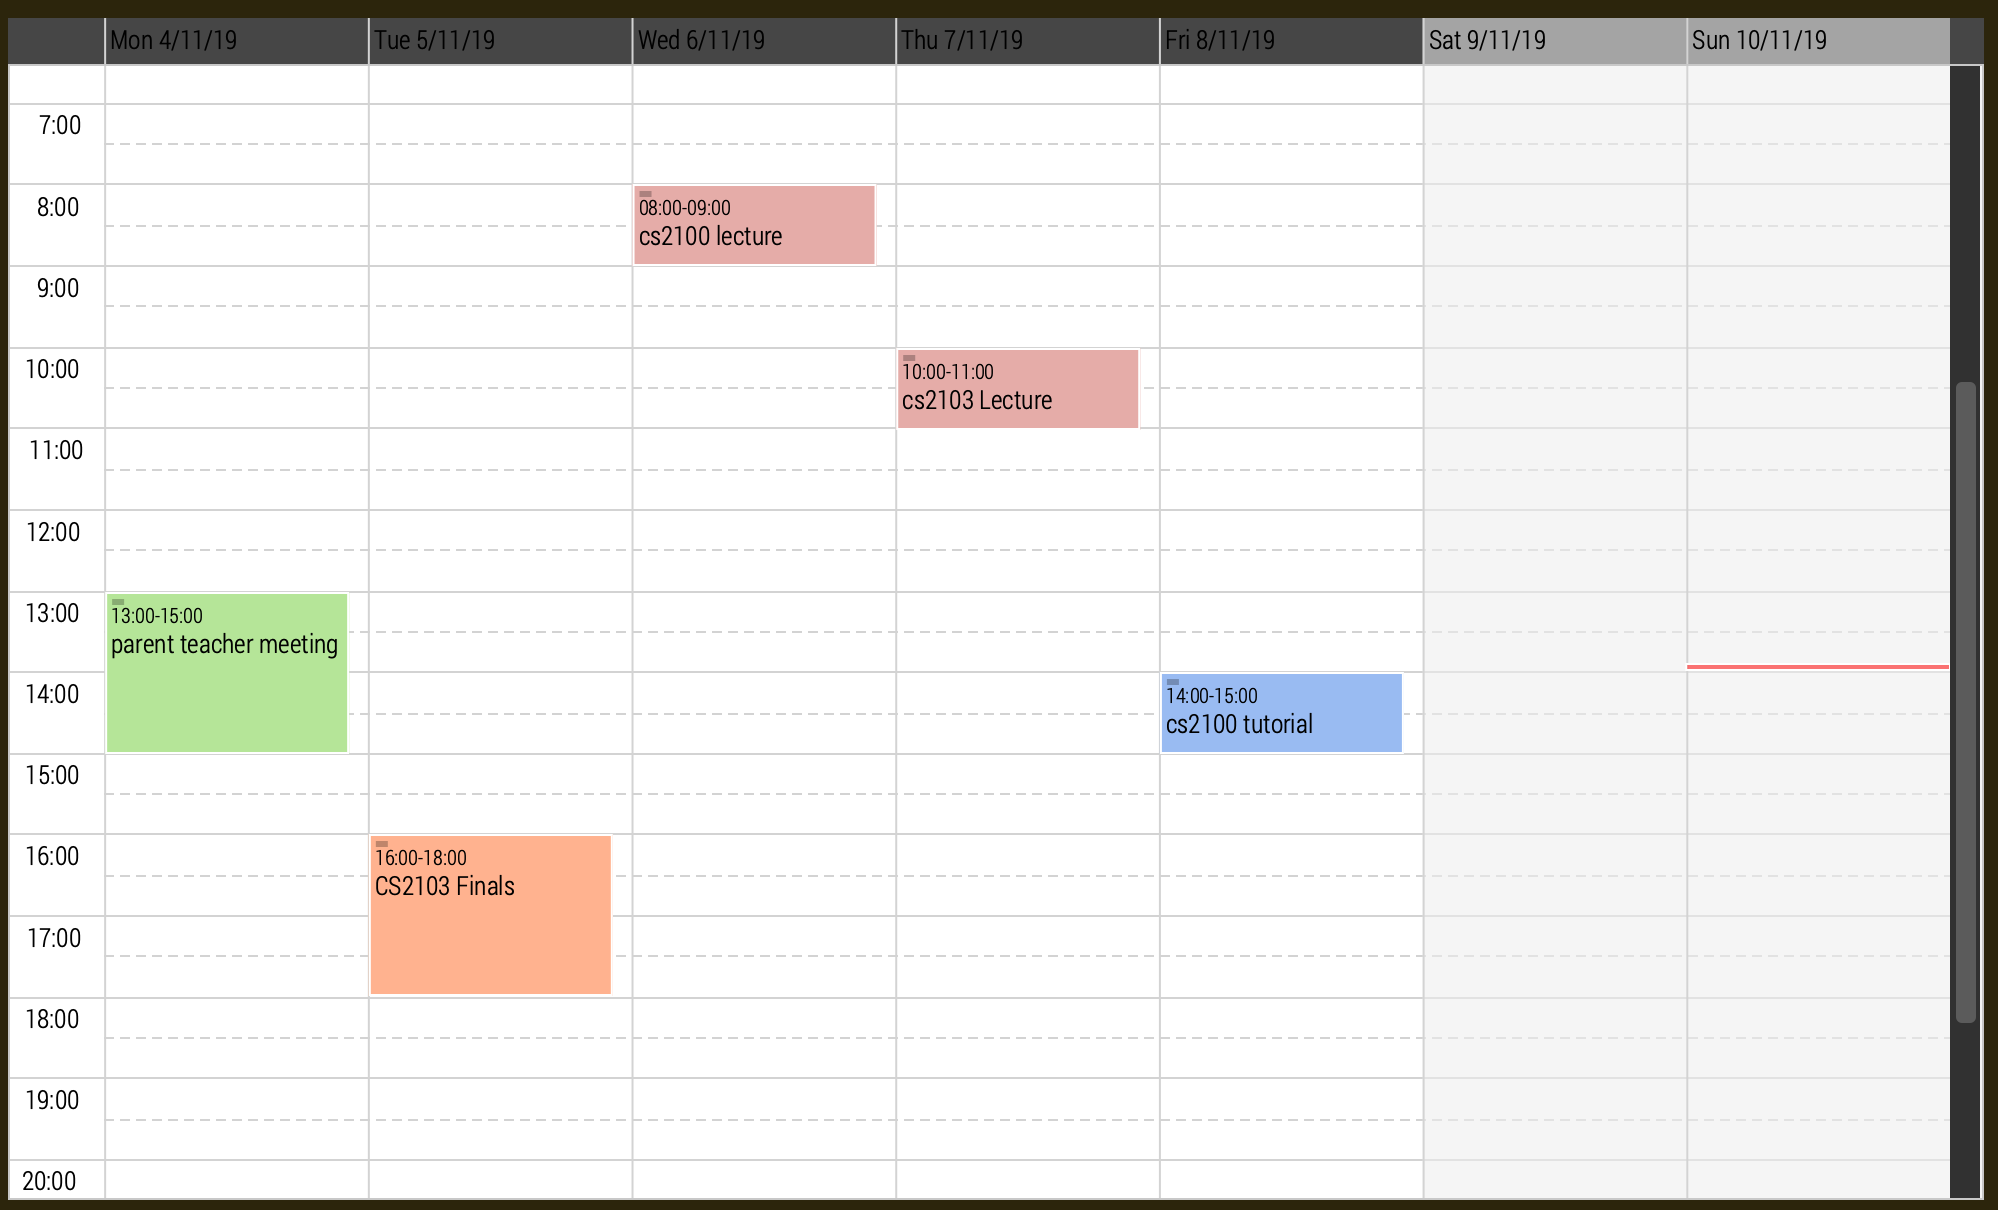
5.7.6. Taking screenshot of schedule
Takes a screen shot of the calendar as PNG file
Format: event screenshot
| Scroll to which portion of the calendar is to be taken, and the application will then open a separate full screen window to maximise the content captured of the screenshot. |
| The event schedule screenshot is stored in the printable directory which is in the same directory as the NJoy assistant. If the directory exists beforehand, no new directory is created. See finding schedule screenshot. |
| The screenshot will be saved based on the current settings of your event schedule. For example if you are viewing 2019-11-23 on a weekly mode, the file name will be saved as WEEKLY_2019-11-23. NJoy will also overwrite any screenshots from the past with the same event name, to ensure that the screenshot in the printable directory is the most updated. |
-
Example:
event screenshot
Takes a screenshot of the current calendar and saves it into Printable folder.
The following example demonstrates how to find the screenshot:
Step 1. After executing the event screenshot command, the user should navigate to their current directory. An printable folder as shown in the image below should be created!
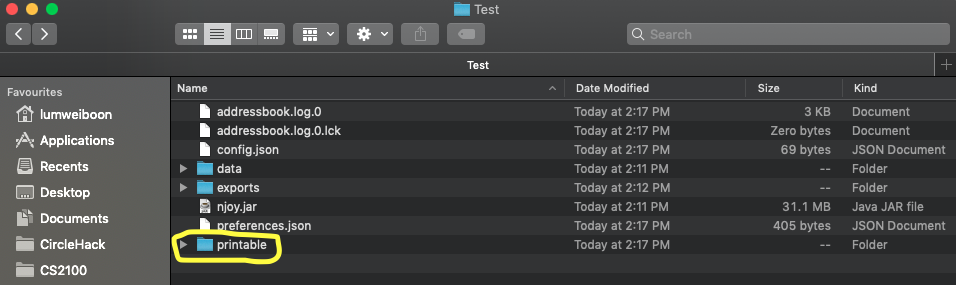
Step 2. The png file will be named according to your schedule settings in the format VIEWMODE_TARGETDATE.png
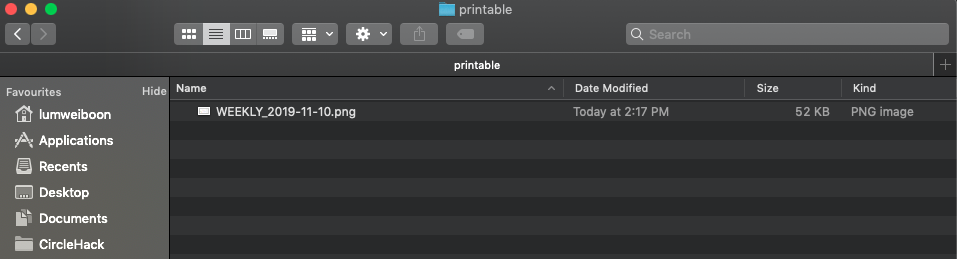
Step 3. Now you can share your calendar screenshot with others (or yourself)!
5.7.7. Export all events
Exports stored events into a .ics file. This file type can easily be imported into Google Calendar and other
mainstream calendar applications.
Format: event export
| The file will be exported into the exports folder with the file name nJoy_Schedule.ics. If the file already exists it will replace it, so you know the .ics file will be your most updated version of your schedule. |
| The file will be exported into the same directory as quiz and group exports. See quiz export, group export |
Example:
-
event export
Exports your events into the exports directory with file name nJoy_Schedule.ics
The following example demonstrates how to find the export file:
Step 1. After executing the event export command, the user should navigate to their current directory. An exports folder as shown in the image below should be created!
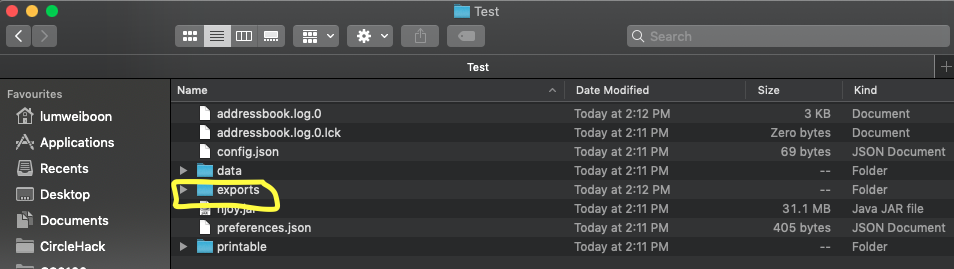
Step 2. The file should be named nJoy_Schedule.ics inside the exports directory.
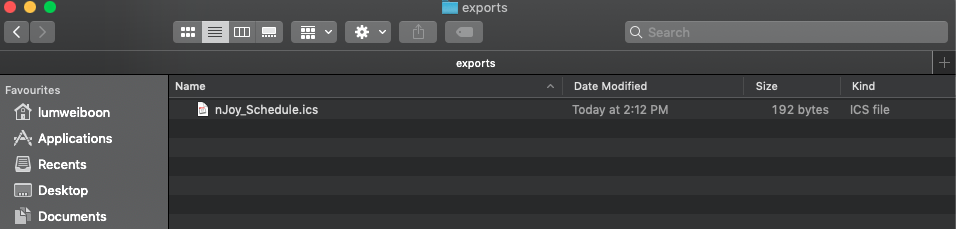
Step 3. Now you can import your events into other calendar applications with this ics file!
5.8. Notes - notes
5.8.1. Creating a note
Create lightweight, digital notes and reminders quickly and easily as specified.
Format: note note/… desc/… priority/… (optional)
The options supported by this feature includes:
-
note- The note title. -
desc- The description of the note. -
priority(optional)- The level of priority placed on this note. It can be of typeunmarked,low,mediumorhigh. It is by default set to unmarked if field is omitted.
| All non-optional fields are required and also cannot consist exclusively of whitespace characters. All leading and trailing whitespaces of the fields will be ignored. |
All priority fields can be in either lowercase or UPPERCASE. (e.g. note note/sample title desc/sample desc priority/low is the same as e.g. note note/sample title desc/sample desc priority/LOW).
|
priority levels are distinguishable by their colour in the User Interface. unmarked or default notes have grey panels, while low, medium and high priority notes have green, yellow and red panels respectively.
|
| The notes panel is not responsive. The User Interface only supports title and description of limited length. Notes that exceed this length will be truncated. For information on how to view these notes, see the note list command. |
Examples:
-
Unmarked Note:
note note/Friday morning class 6A desc/give back prelim papers
Creates an unmarked note with title 'Friday morning class 6A' and description 'give back prelim papers'. -
High priority note:
note note/Tuesday 1pm desc/Science Conference priority/high
Creates a high priority note with title 'Tuesday 1pm' and description 'Science Conference'.
5.8.2. Editing a note
Edit a note currently stored. All fields are optional but at least one field has to be provided for editing. The new note should not be the same as the original one and should have a unique note title.
Format: note [INDEX] note/… desc/… priority/…
To change the priority of a high, medium or low note to the default status, the prefix priority/ is to be followed by unmarked. (e.g. note 2 priority/unmarked).
|
The options supported by this feature includes:
-
[INDEX]- The note index as shown in the User Interface. The topmost note has index 1, followed by 2 and so on. -
note- The note title. -
desc- The description of the note. -
priority- The level of priority placed on this note. It can be of typeunmarked,low,mediumorhigh.
Examples:
-
note 1 note/changed title
Edits the first note in the list to the title 'changed title'. -
note 2 desc/give speech priority/unmarked
Edits the description of the second note in the list to ’give speech’ of unmarked/default priority.
5.8.3. Deleting a note
Delete a note from the notes list.
Format: note delete [INDEX]
The options supported by this feature includes:
-
[INDEX]- The note index as shown in the User Interface. The topmost note has index 1, followed by 2 and so on.
Example:
-
note delete 1
Deletes the first note in the list.
5.8.4. Listing notes
Display the list of notes in the command result box.
Format: note list
| The note is rendered on the User Interface on load. However, note lengths that exceed the size of allocated panel might have their content truncated. Using the list function is useful in this case to see the full content of the notes. |
The options supported by this feature includes:
-This command does not support any additional options-
Example:
-
note list
Lists the notes.
5.8.5. Sorting notes
Sorts the list of notes by priority in descending order of the Priorities HIGH, MEDIUM, LOW and UNMARKED.
Format: note sort
The options supported by this feature includes:
-This command does not support any additional options-
Example:
-
note sort
Sorts the notes by priority.
5.9. Statistics - statistics
5.9.1. Generating a Statistics report
Create statistics reports of student scores using excel data files. The statistics generated is based
on the calculated weighted score of the input data.
Format: statistics file/… print/…(optional)
The options supported by this feature includes:
-
file- The absolute/relative file path of the data file. -
print(optional)- The filename of the printable report you wish to generate.
| The statistics feature only supports file type in the ‘Excel’ format. Data files are to end with the ’.xlsx’ extension. |
The print option allows the generation of a '.png' file containing a snapshot of the statistics report generated. Regardless of the print specifications, a new window is opened with the statistics report.
|
Printable statistics reports if specified are stored in the same place as where the JAR file is installed. The report can be found under a newly created printable directory. If the directory exists beforehand, no new directory is created.
|
| Filenames without `.png` extension will automatically have the extension appended to the end of the file name. |
| If the file name specified already exists in the printable directory, it will overwrite the existing file. |
Examples:
-
View Statistics Report (without saving):
statistics file/C:\Users\SampleUser\Desktop\6B Prelim Scores.xlsx
Shows the statistics report for excel file named ’6B Prelim Scores’. -
View and Save Statistics Report:
statistics file/C:\Users\SampleUser\Desktop\6B Prelim Scores.xlsx print/6B Prelim Performance Report
Shows the statistics report for excel file named ’6B Prelim Scores’. It also saves an image file containing a snapshot of the statistics report in the ’printable’ directory with name ’6B Prelim Performance Report’.
Data File Specifications
The data file needs to be specified in the following format to ensure that the statistics report is successfully generated.
| Failure to adhere to the following specifications might result in either the excel file being rejected or erroneous statistics. If the report is generated, it might be correct but the behavior is not guaranteed should the specifications mentioned below be violated or overlooked. |
-
Entries start at cell A1 with the cell
Students, regardless of whether there is score data. -
First row begins with the cell
Students, followed by their names. (e.g. row 1 of 4 cells havingStudents,Jason,MikeandPeter) -
First column states the different subjects starting from the second topmost cell. (e.g column 1 of 4 cells having
Students,Math,ScienceandEnglish.) -
There is at least one student.
-
There is at least one subject.
-
All student names have unique identifiers. (e.g. two students named Jason could be identified as
Jason 1andJason 2) -
All subject names have unique identifiers. (e.g. two subjects named Math could be identified as
Advanced MathandElementary Math) -
All students have a corresponding score for all subjects
-
All scores are numeric characters (integer or decimals)
-
There are no gaps between rows and columns.
-
All cells within the row and column range have at least one non-whitespace character.
-
All cells outside the row and column range are empty.
| Failure to adhere to the following specifications might result in some of the statistical data generated not being useful to the user. |
-
All scores should be in percentage terms. (0 ~ 100)
| The general rule for the file format is to ensure all entries in the file are as compact to the top left as possible; the entries should form a rectangular shape on the top left corner of the excel sheet. The rectangle should have no empty entries while all cells outside the rectangle are empty entries. |
The statistics report generated uses weighted average scores across the different subjects to perform analysis. All scores carry equal weight. The statistics generated allow you to see some of the common descriptive statistics and their relative distributions both in terms of frequency and percentile terms.
The screenshot below illustrates a sample data set that fulfills all of the above specifications.

5.10. Help - help
Opens up the help window.
Format: help
The format supported by this feature includes:
-This command does not require any additional options-
6. FAQ
Q: Where can I find a list of commands?
A: You may access the help guide included in the application by navigating to Help > Help F1 located on the menu bar or by pressing the F1 key.
Q: Unable to run the application.
A: Please see Section 3.1, “Running .jar file” on how to start the application.
7. Command Summary
-
Help :
help -
Exit :
exit -
Adding a student:
student name/… -
Removing a student:
student delete index/… -
Editing a student:
student [index] name/… -
Listing all students:
student list -
Tagging student:
tag index/… tag/… -
Marking a student:
mark index/… -
Unmarking a student:
mark unmark index/… -
Creating a group:
group manual groupID/… studentNumber/… -
Adding student to a group:
group groupID/… studentNumber/… groupIndexNumber/… -
Removing student from a group:
group delete groupID/… groupIndexNumber/… -
Showing students from a group:
group groupID/… -
Exporting a group:
group export groupID/… -
Creating a question:
question question/… answer/… type/… (MCQ OPTIONS IF APPLICABLE) -
Editing a question:
question [INDEX] question/… answer/… type/… (MCQ OPTIONS IF APPLICABLE) -
Deleting a question:
question delete [INDEX] -
Listing your saved questions:
question list -
Searching for a question:
question find/… -
Starting a slideshow:
question slideshow [QUESTIONS INDEX] -
Creating a Quiz Manually :
quiz manual quizID/… questionNumber/… -
Creating a Quiz Automatically :
quiz auto quizID/… numQuestions/… type/…[Where type is: mcq, open or all] -
Adding a Question to Quiz :
quiz add quizID/… questionNumber/… quizQuestionNumber/… -
Deleting a Question from Quiz :
quiz delete quizID/… quizQuestionNumber/… -
Listing a Quiz :
quiz list quizID/… -
Showing only Questions of a Quiz :
quiz showQuestions quizID/… -
Showing only Answers of a Quiz :
quiz showAnswers quizID/… -
Exporting a quiz:
quiz export quizID/… -
Adding an Event :
event eventName/… startDateTime/… endDateTime/… recur/… color/… -
Editing an Event :
event [INDEX] eventName/… startDateTime/… endDateTime/… recur/… color/… -
Deleting an Event :
event delete [INDEX] -
Viewing all Event :
event view scheduleMode/… targetDate/… -
Exporting Events :
event export -
Screenshot Calendar :
event screenshot -
Creating a Note :
note note/… desc/… -
Creating a Note with Priority :
note note/… desc/… priority/… -
Editing a Note :
note [INDEX] note/… desc/… priority/… -
Deleting a Note :
note delete [INDEX] -
Listing Notes :
note list -
Sorting Notes :
note sort -
Generating Statistics :
statistics file/… -
Generating Statistics and Saving :
statistics file/… print/…