Overview
My team and I were tasked with enhancing AddressBook3 - a CLI (Command Line Interface) application into a better product.
We decided to morph the application into the Njoy Teaching Assistant, to improve the quality of life for teachers by simplifying mundane administrative tasks.
In particular, the application enables teachers to maintain student records to manage students better;
set questions and quizzes to enhance students learning; and keep track of
their schedules with an interactive timetable.
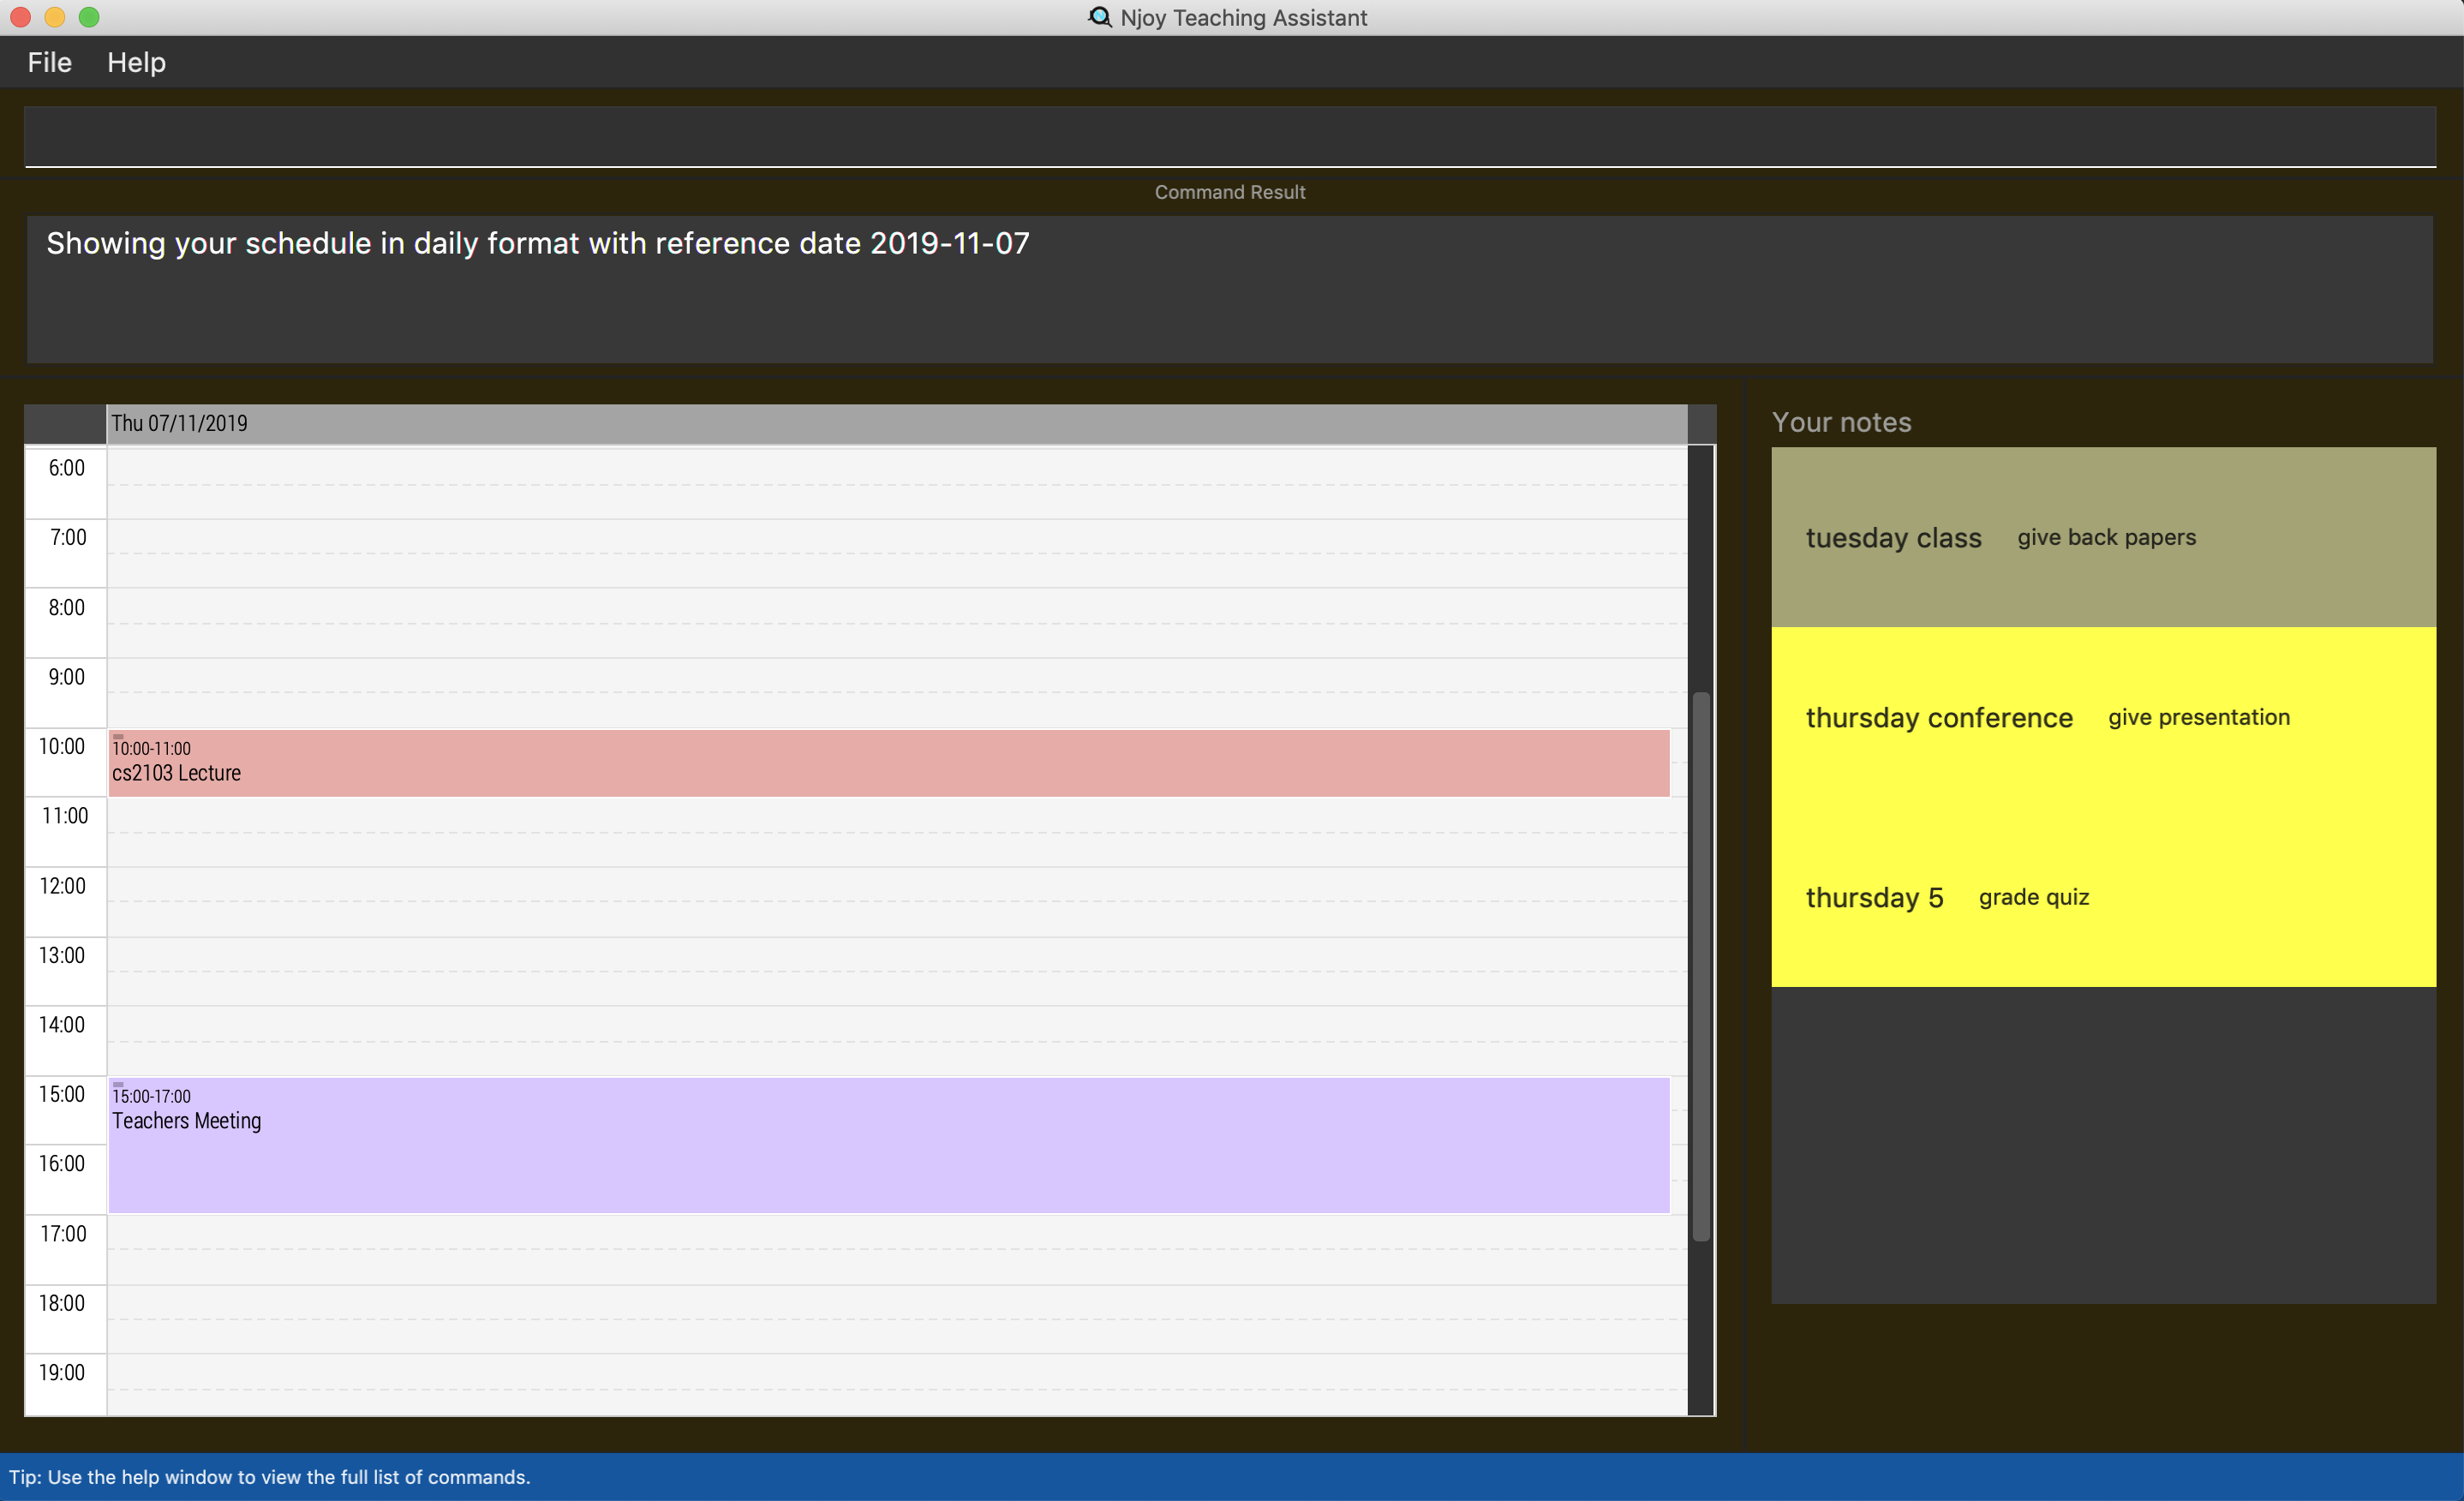
This is what our project looks like:
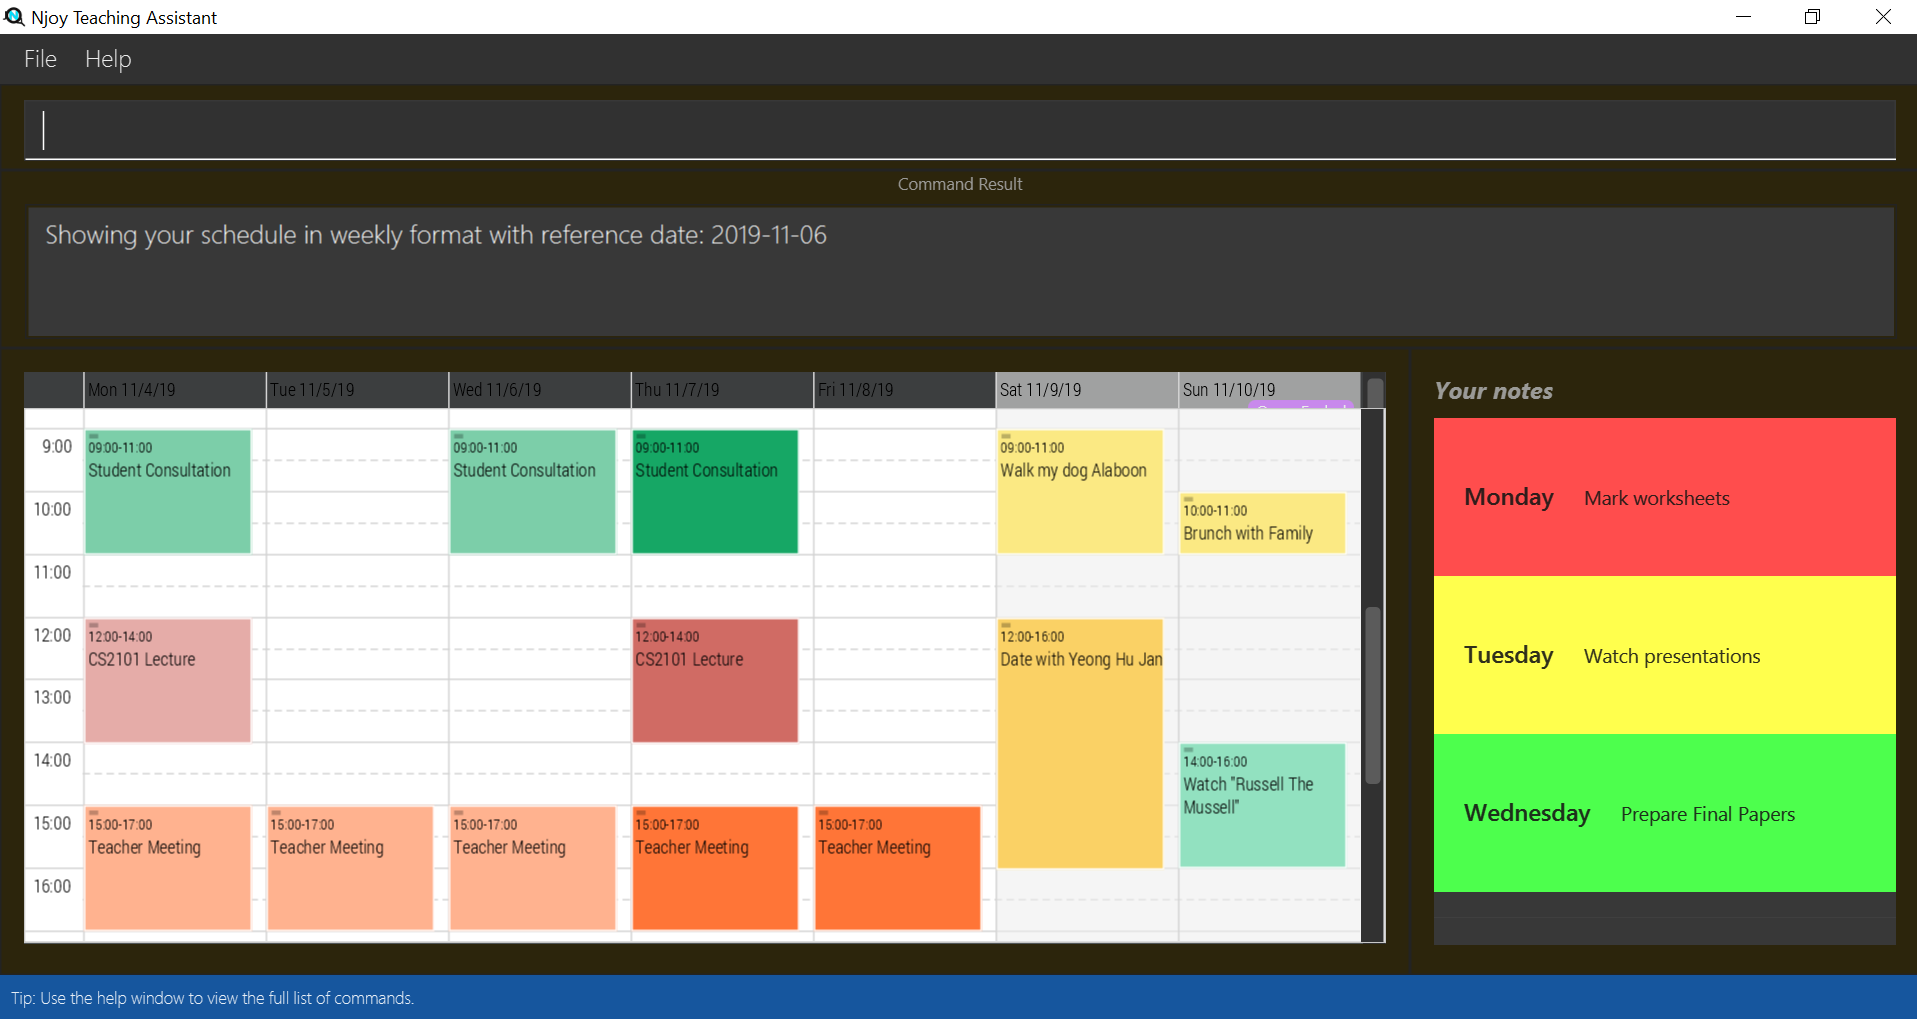
My role was to design and write code for teachers to better plan and manage events in their schedule. The rest of the sections will cover the summary of my contributions to the codebase, the user guide and the developer guide.
The following are icons and symbols that I will be using for the Project Portfolio:
This indicates a component, class or object in the architecture of the application.
This indicates important text.
Summary of contributions
This section summarizes my specific enhancements, code contributions and other helpful increments towards the Njoy Teaching Assistant.
I implemented the commands related to the event feature, which include:
Event Creation and Deletion
-
What it does: Users can create and delete events to keep track of their schedule. These events are created by specifying the event name, start and end date time. These events also can be set to recur weekly or daily, reducing the hassle for creating repeated events. Events can also have their own colors to allow users to easily identify and categorize their events. Users can also delete any events which they have mistakenly created, using the delete event command.
-
Justification: Teachers usually have numerous activities and events to attend. These include delivering lectures, meeting with parents, consultations, etc. I wanted to create a feature which allows teachers to easily manage their time, not just during the office hours, but also to schedule errands and other preparation work.
-
Highlights: Challenging portions of this feature include: ensuring there were no duplicate events created as well as implementing the recurring events feature.
Event Editing
-
What it does: Users can edit events that are currently in their calendar.
-
Justification: There is a possibility that events have to be rescheduled in the calendar, and this functionality allows teachers to do exactly that. In fact, teachers are allowed to edit any of the fields in an event including its color and recurrence type.
Event Viewing
-
What it does: Users can view their events in calendar form and set the target date of interest as well as the viewing mode of the calendar (weekly or daily).
-
Justification: Teachers may want to view the calendar in different forms, for different purposes. They might want to have a over-arching view of the upcoming events of the week, thus they may wish to view their events in a weekly form. They may also wish to go into the details of a specific day when making appointments with students and other teachers.
-
Highlights: This feature remembers the preferences of the user in the same instance of the application. For example, after switching to the student list and switching back to the calendar, it remembers the target date of interest as well as the viewing mode (weekly or daily), and renders it accordingly.
Event Screenshot
-
What it does: Users can take a screenshot of the calendar and save it to a png file.
-
Justification: Teachers may want to share their weekly schedule or simply have a image of their events to be viewed on their mobile devices. This feature allows them to do exactly that by taking a screenshot of whichever date and time the user is currently viewing and saving it into a png file.
-
Highlights: The implementation of this feature was rather challenging, as different users have different screen sizes, and taking a screenshot may not capture all the information desired by the user. As such, the screenshot feature, actually opens the calendar into full-screen mode before taking the screenshot. This is a "best-effort" approach to capture as much detail as possible within the confines of the user’s display.
Event Export
-
What it does: Users can export all their events into a ics file.
-
Justification: Teachers may want manage their events simultaneously in other calendar applications such as Google Calendar. Note that most calendar applications accept ics file types as imports.
-
Highlights: The implementation of this feature was rather challenging, as every event had to be converted into a ics-compliant format, which represents all its information including the recurrence type.
Code contributed
Please click the following link to see my code contributions dashboard. Code Report
Contributions to the User Guide
Given below are sections I contributed to the User Guide. They showcase my ability to write documentation targeting end-users. The following are specific portions of the NJoy Assistant’s User Guide that I have selected. I’ll only show one example of creation, editing and display for the features that I have created, as they are repetitive. |
The following is an example of Event screenshot section the User Guide:
Taking screenshot of schedule
Takes a screen shot of the calendar as PNG file
Format: event screenshot
| Scroll to which portion of the calendar is to be taken, and the application will then open a separate full screen window to maximise the content captured of the screenshot. |
| The event schedule screenshot is stored in the printable directory which is in the same directory as the NJoy assistant. If the directory exists beforehand, no new directory is created. See finding schedule screenshot. |
| The screenshot will be saved based on the current settings of your event schedule. For example if you are viewing 2019-11-23 on a weekly mode, the file name will be saved as WEEKLY_2019-11-23. NJoy will also overwrite any screenshots from the past with the same event name, to ensure that the screenshot in the printable directory is the most updated. |
-
Example:
event screenshot
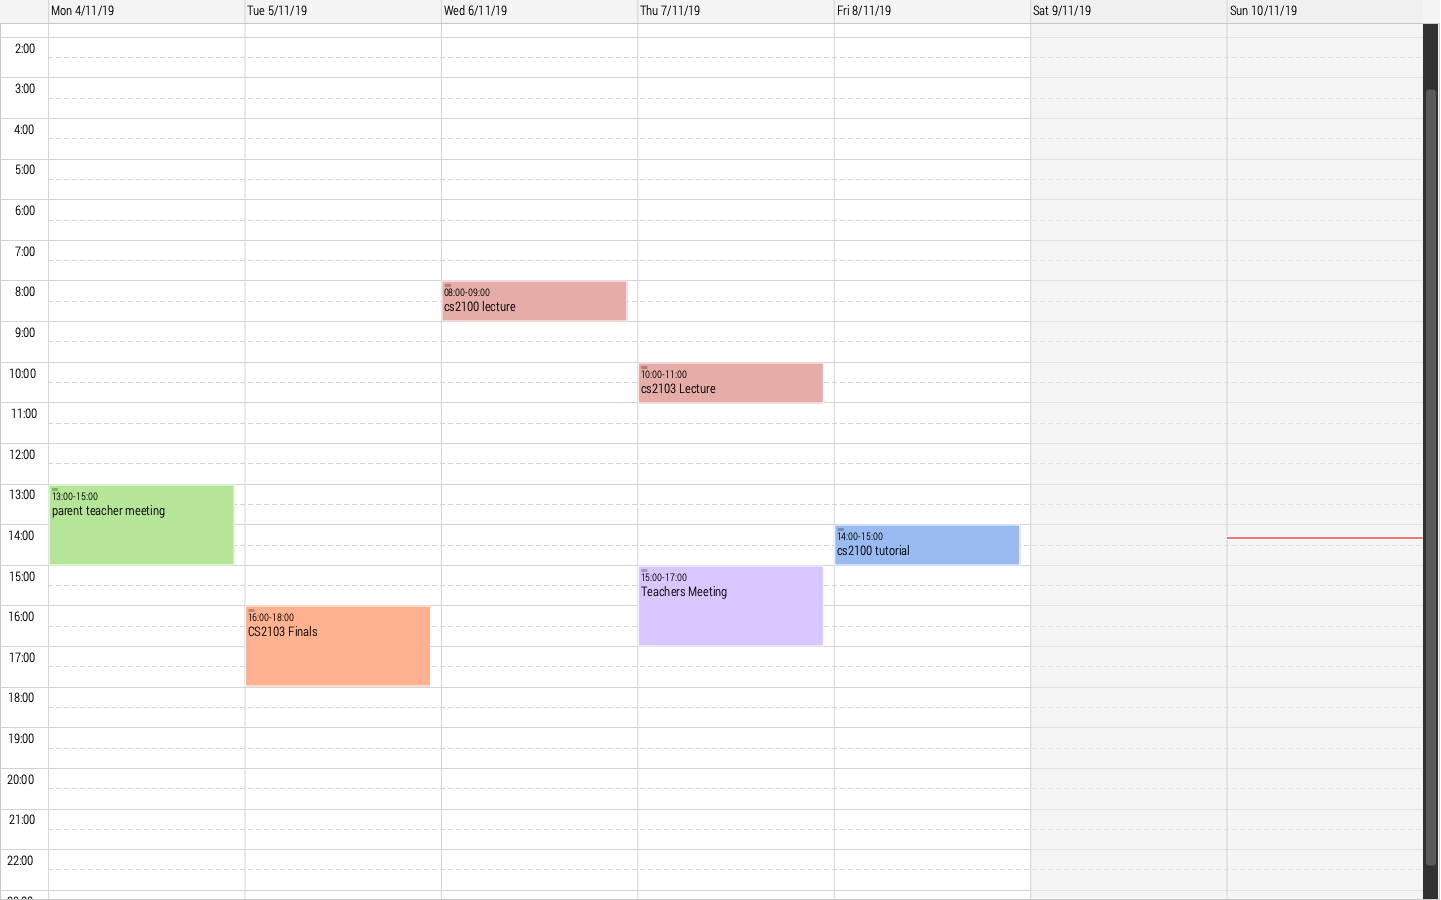
Takes a screenshot of the current calendar and saves it into Printable folder.
The following example demonstrates how to find the screenshot:
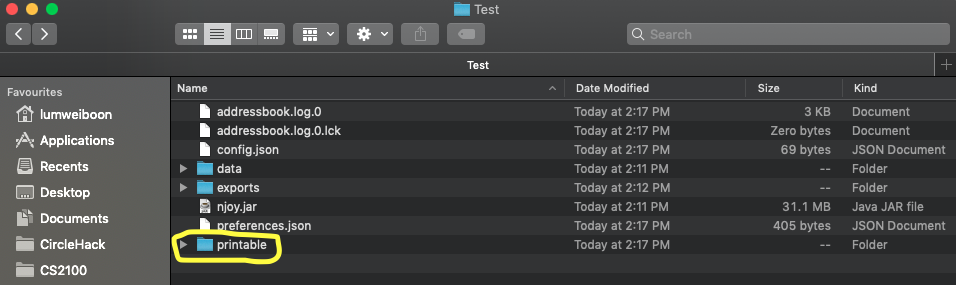
Step 1. After executing the event screenshot command, the user should navigate to their current directory. An printable folder as shown in the image below should be created!
Step 2. The png file will be named according to your schedule settings in the format VIEWMODE_TARGETDATE.png
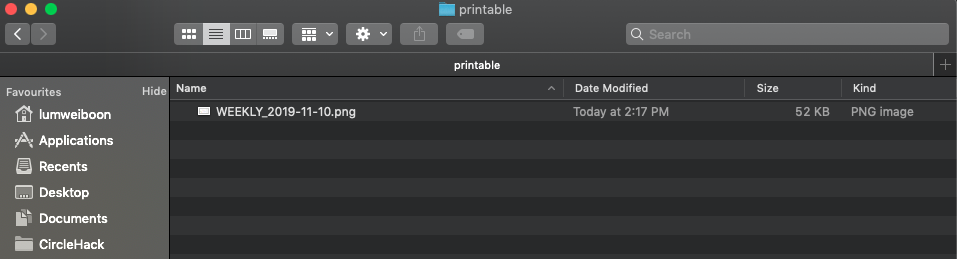
Step 3. Now you can share your calendar screenshot with others (or yourself)!
The following is an example of Event view section the User Guide:
Viewing all events
Show all your events in the calendar. All fields are optional
Format: event view scheduleMode/… targetDate/…
The options supported by this feature includes:
-
scheduleMode- Schedule viewing mode of the calendar. Either weekly or daily. -
targetDate- The target date to show for the week. If in daily mode, simply show the events in the date. If in weekly mode, show the week which includes the specified dateThe target date option must be specified in the following format: yyyy-mm-dd. E.g. 2019-11-23
Example:
-
event view scheduleMode/daily targetDate/2019-11-07
Opens the calendar view in daily mode with the target date 7 November 2019.
Contributions to the Developer Guide
Given below are sections I contributed to the Developer Guide. They showcase my ability to write technical documentation and the technical depth of my contributions to the project. Again, I’m only going to include the most relevant portions of the guide, especially the UML diagrams that I have created. Also, some of the command hyperlinks will obviously not work because I have omitted them for brevity. |
The following is the EventRecord class overview section of the Developer Guide:
Class Overview
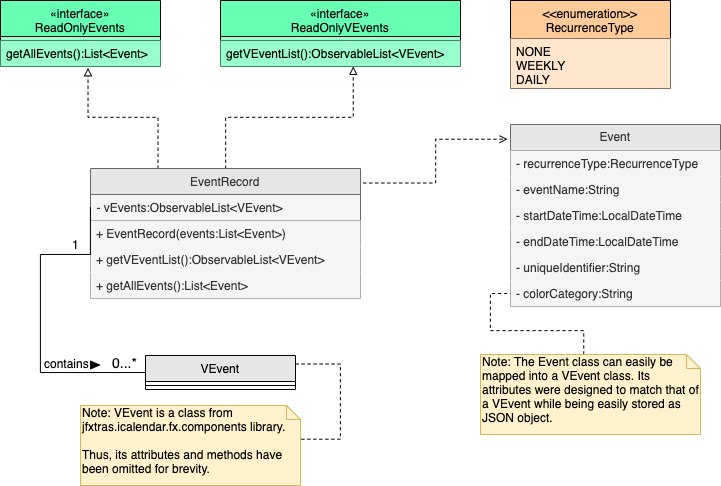
The figure below describes the interactions between event-related classes in the Model. Note how the EventRecord
class has a dependency on Event object in its constructor, but only has a VEvent attribute: vEvents. This
highlights a mapping between the Event and VEvent object within the EventRecord class. Althought the methods
of the EventRecord class are omitted for brevity, they are mostly VEvent based, which again highlights that
interactions with the Logic and UI components will mostly be done in VEvent type.
The following is the delete Event section of the Developer Guide:
Delete event command
Implementation
The following is a detailed explanation of the operations EventDeleteCommand performs.
-
The
EventDeleteCommand#execute(Model model)method is executed and it validates that the specifiedIndexto delete is within range. If valid, the vEvent to be deleted will be retrieved using itsIndex. -
The method
Model#deleteVEvent(Index index)will then be called to remove theVEventfrom theEventRecord.EventRecord#deleteVEvent(Index index)is invoked which makes a call to its internal list to remove the speficied vEvent. -
If successful, a success message will be generated by the and a new
CommandResultwill be returned with the generated success message. Otherwise, an error message showing proper note command syntax is thrown asCommandException. -
If the command syntax was valid and
VEventwas removed from theEventRecord,LogicManagercallsStorage#saveEventRecord(ReadOnlyEventRecord eventRecord)which saves the new notes record in JSON format after serializing it using theJsonEventRecord.
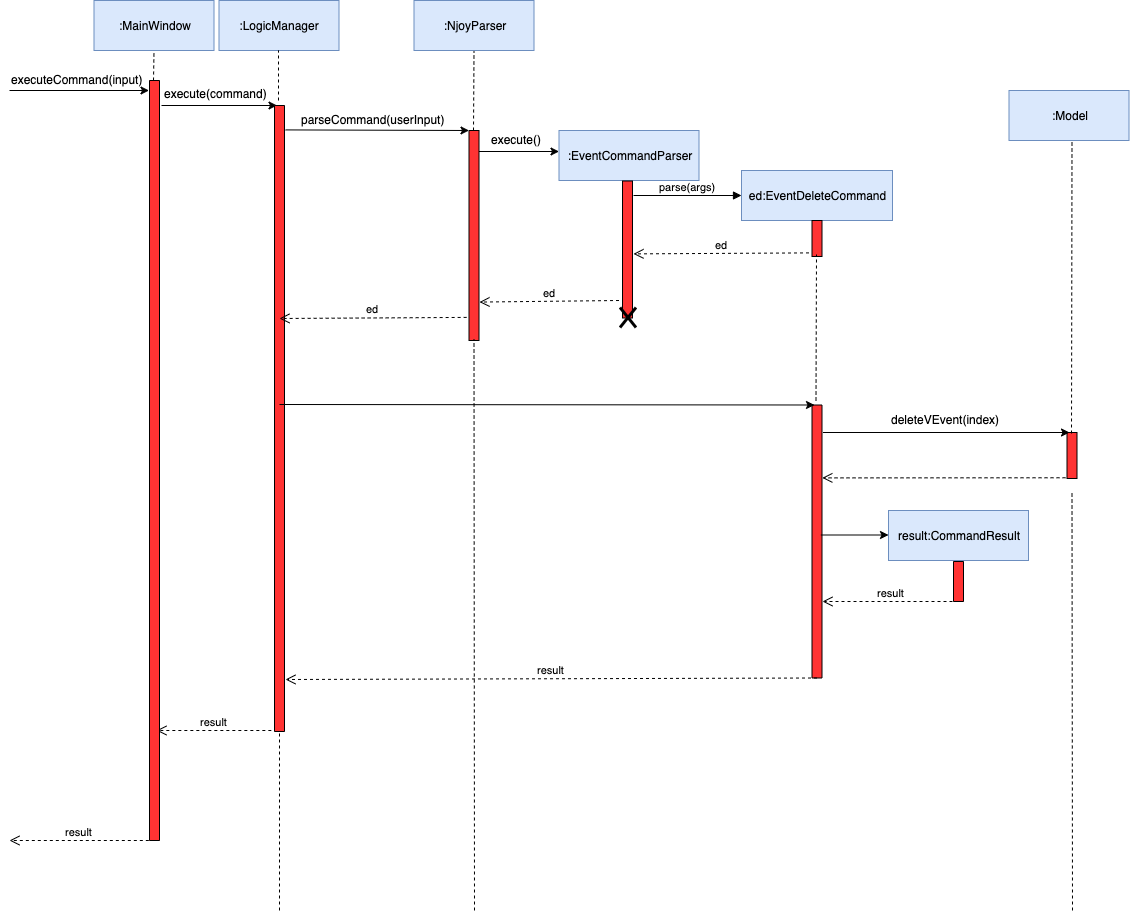
The following is a sample sequence diagram of the EventDeleteCommand. Other commands under the notes feature follow a similar program flow; their diagrams have been omitted for brevity.
The following is the index Event section of the Developer Guide:
Index command
The following is a detailed explanation of the operations EventIndexCommand performs.
The purpose of this command is to return the index of the vEvent(s) with event name that equals to the desiredEventName which is input from the user.
And if there are no matching VEvents with the same event name. Suggest a VEvent with the most similar event name to that of
the desiredEventName based on the Levenshtein distance formula
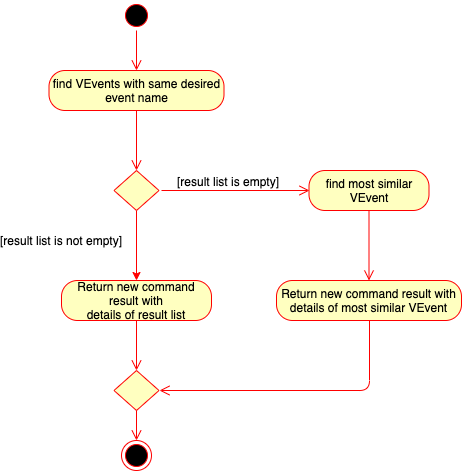
The following is a sample activity diagram of the execute method of EventIndexCommand. Note that the "details"
in the diagram refers to the VEvent object itself and its corresponding index.
Implementation
-
The
EventIndexCommand#execute(Model model)method is executed. -
The method
EventRecord#findVEvents(String desiredEventName)is then called through theModel#findVEvents(String desiredEventName)method. -
The
EventRecord#vEventslist is iterated once and the search is performed on the 'desiredEventName' usingStringUtil#equalsIgnoreCasewith thesummaryvalue of eachVEvent. MatchingVEvent’s and their corresponding index in `vEventswill form a newPair<Index, VEvent>and be added to theresultIndexList. At the end of the iterationresultIndexListis returned. -
If the
resultIndexListreturned is not empty, a newCommandResultwill be returned with a message stating the Index and the corresponding details of the VEvents found. -
Else, when the
resultIndexListis empty, the methodEventRecord#findMostSimilarVEvent(String desiredEventName)is then called through theModel#findMostSimilarVEvent(String desiredEventName)method. -
If the there are no
VEvent, invEventsofEventRecordthe method will throw aVEventNotFoundExceptionwhich will be caught. This exception will then be wrapped to aCommandExceptionand thrown upwards with a corresponding user message to be shown. -
Otherwise,
EventRecord#vEventswill be iterated once, and the similarity betweendesiredEventNameand thesummaryvalue of each VEvent will be calculated based on the Levenshtein distance formula. At the end the event which is most similar and its index will create be returned as a newPair<Index, VEvent>. -
A new
CommandResultwill be returned with a message stating the Index and the corresponding details of the most similar VEvent found.
VEvent objects use a summary object to represent the name of an event.
|