Overview
My team and I were tasked with enhancing AddressBook3 - a given CLI (Command Line Interface) application into a better product. Through the ideation phase, we decided to morph the application into the Njoy Teaching Assistant. We realised that many teachers had issues with managing large groups of students and keeping track of the many physical documents that they require to perform their daily tasks. Therefore, we came up with a solution for them : nJoyAssistant. In particular, the Njoy Teaching Assistant enables teachers to maintain student records to manage students better ; set questions and quizzes to enhance students learning; and keep track of their schedules with an interactive timetable.
This is what our project looks like:
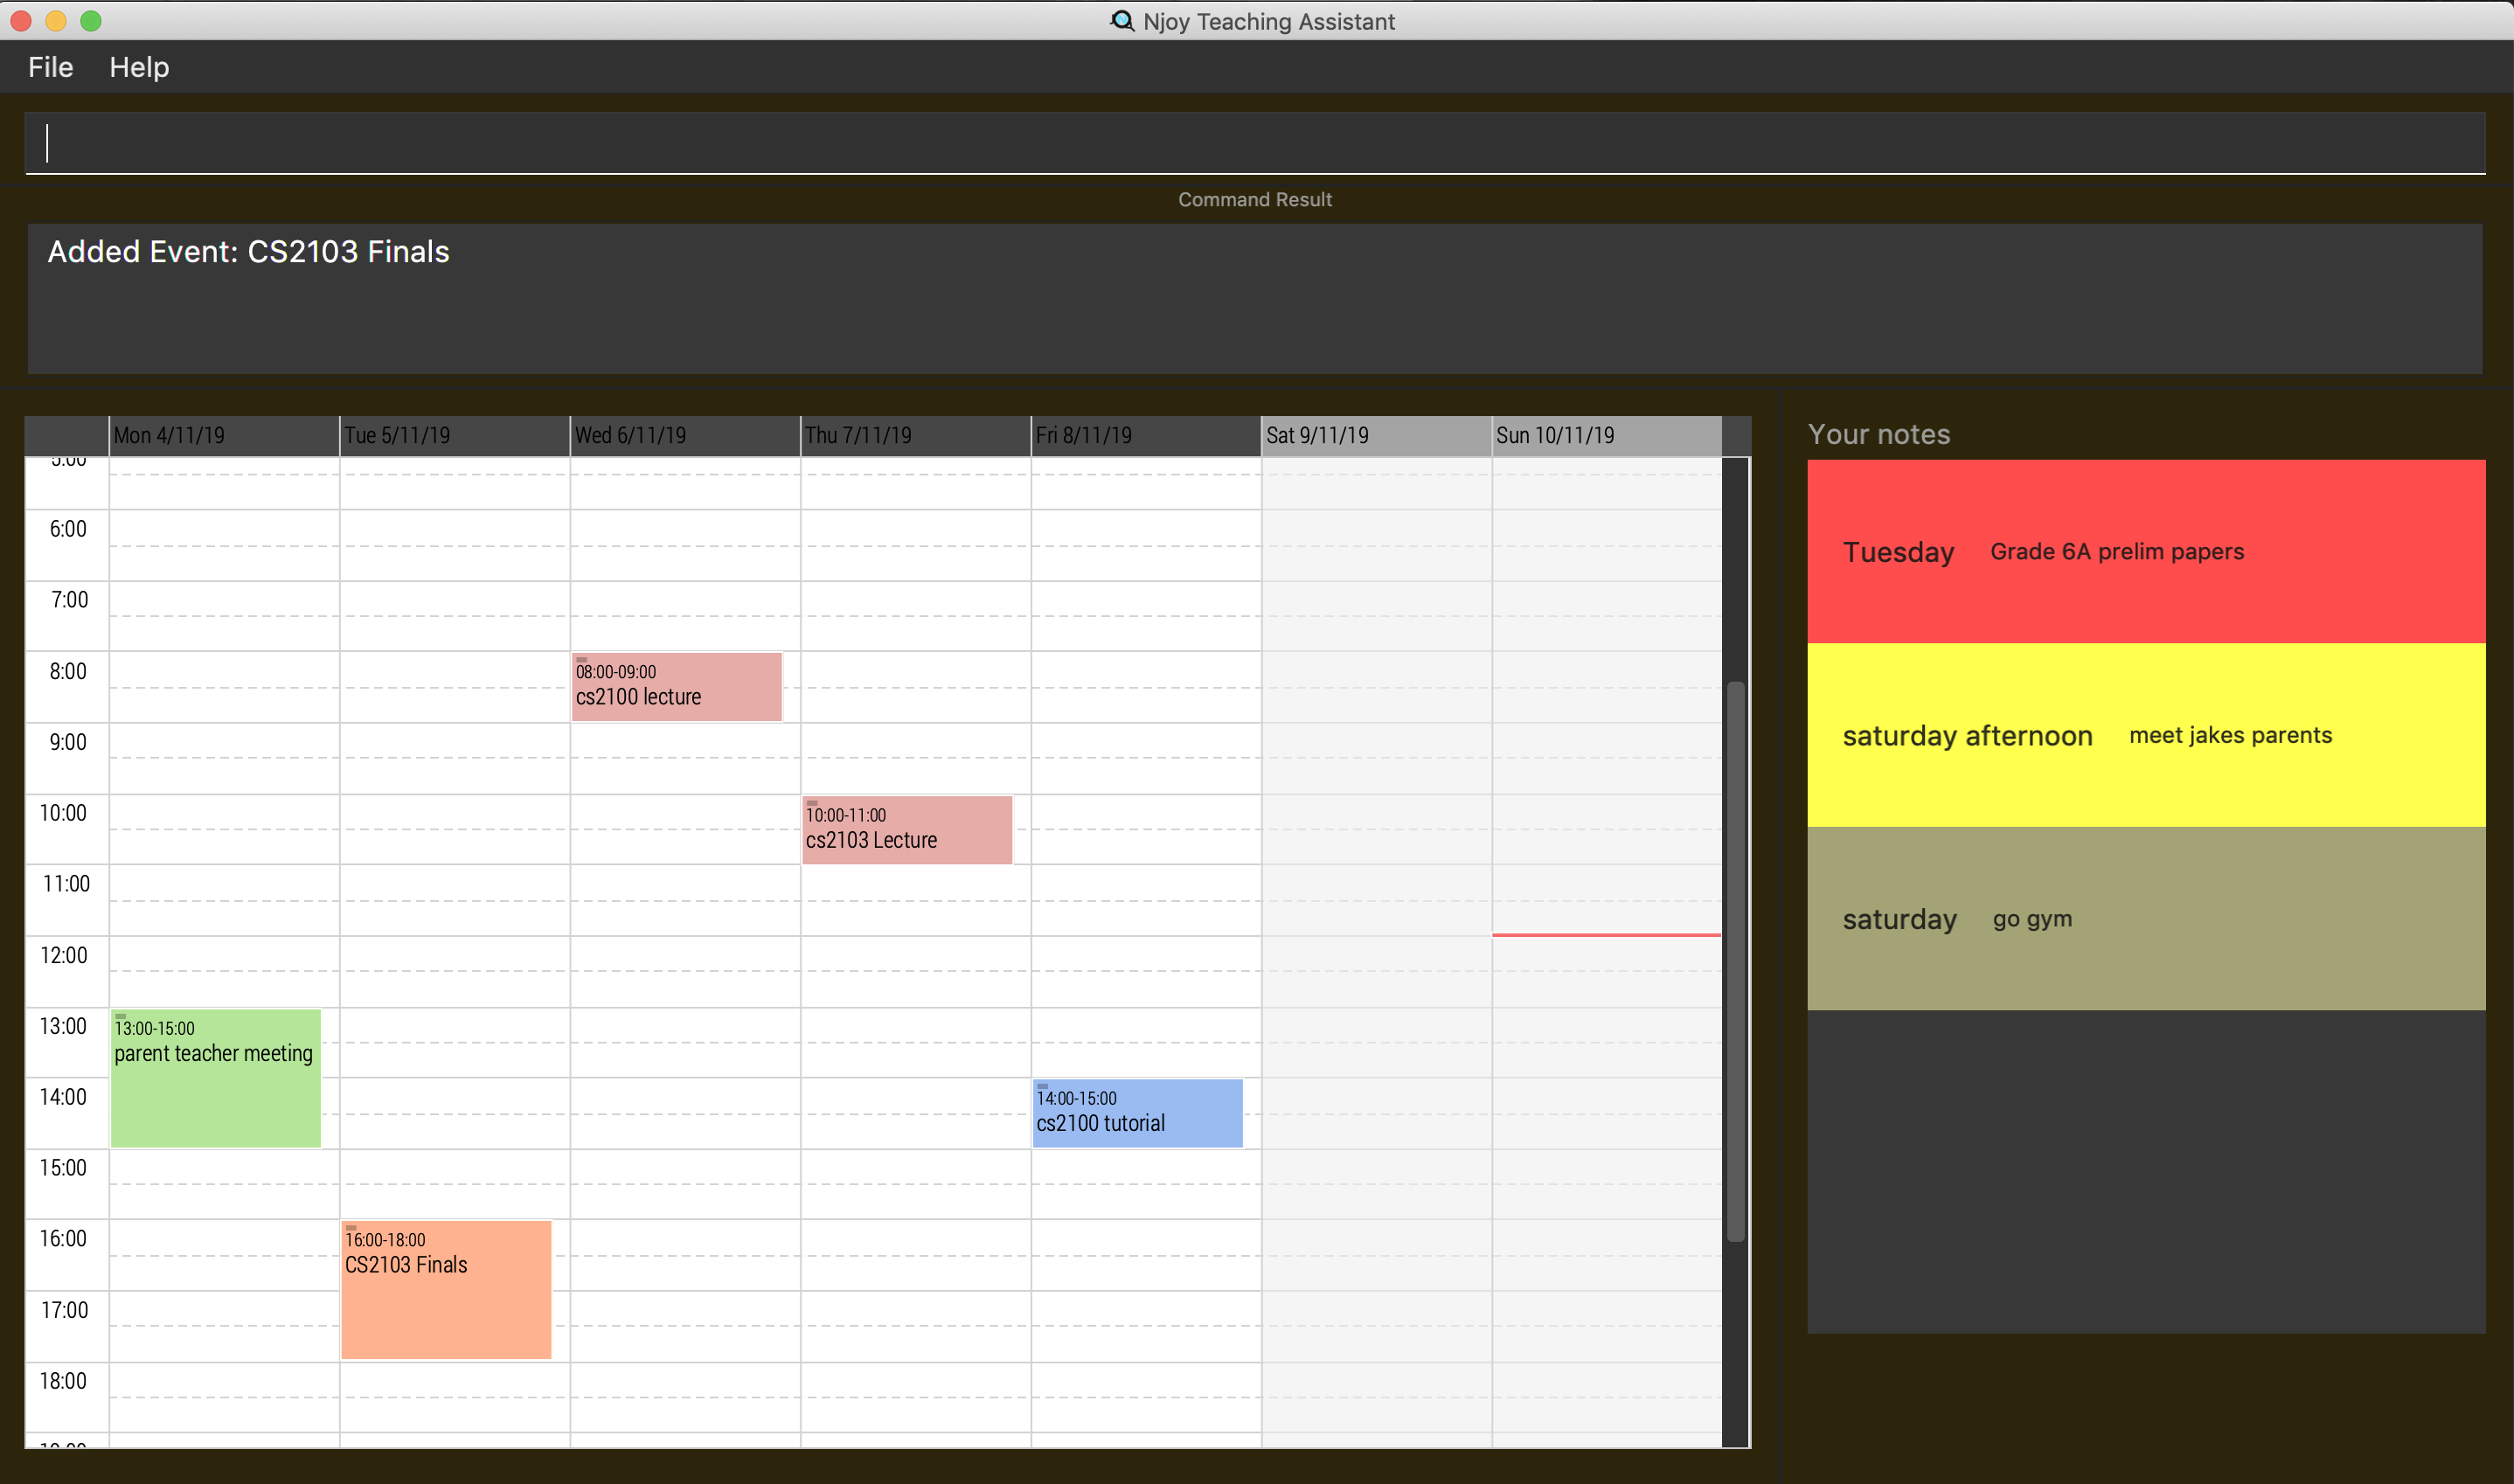
My role was to design and write code for the student, group, tag and mark features. The rest of the sections will cover the
summary of my contributions to the codebase, the user guide and the developer guide.
The following are icons and symbols that I will be using for the Project Portfolio:
This indicates a component, class or object in the architecture of the application.
This indicates important text.
Summary of contributions
This section entails a summary of my specific enhancements, code contributions and other helpful increments towards the Njoy Teaching Assistant.
I implemented the commands related to student, group, mark and tag, which include:
-
Adding a student to the student record
-
Removing a student from the student record
-
Editing a student in the student record
-
Listing all students in the student record
-
Adding a tag to a student
-
Adding a mark to a student
-
Removing a mark from a student
-
Creating a group of students
-
Adding a student to a group
-
Removing a student from a group
-
Listing all students in a group
-
Exporting a group of students to a word document
I’ll be sectioning the functionality into the following format (where applicable for the features):
-
Creation
-
Deletion
-
Editing
-
Display
Student
Student Creation and Deletion
-
What it does: Users can create students that represents the students that they teach. Students are created by specifying their full names at the point of creation, and students can be tagged with the
tag/command at the point of creation, which will be discussed under thetagfeature. Users can also remove students that they no longer teach from their list of students. -
Justification: Teachers usually have many students under their control, and having a physical copy of the student list to manage their students can be a hassle. Thus, with nJoyAssistant, teachers can now have a digital copy of the list of students that they teach, so that they can manage them easily.There is also a possibility that teachers may no longer teach a particular student, and thus nJoyAssistant provides the functionality for a user to remove students that users are no longer teaching.
-
Highlights: This enhancement works with existing as well as future commands. The hardest part was to make sure that no repeated students were added to the student list which involved keeping track of what questions have already been added.
Student Editing
-
What it does: Users can edit students that are currently in their student list.
-
Justification: There is a possibility that teachers key in the names of their students wrongly when using nJoyAssistant. Thus, instead of removing the student and adding a new student into the student list, nJoyAssistant provides the functionality to edit the name of a student within the student list.
Tag
Tag Creation
-
What it does: Users can
tagtheir students, with the tag keyword specified aftertag/. -
Justification: Different students usually have different subjects that they are weak at, and it is often hard for teachers to keep track of which students are struggling with which subjects. Thus, nJoyAssistant provides the functionality to tag students according to the subjects that they are weak in, allowing teachers to quickly and easily identify the weak subjects of the students that they teach.
Mark
Mark Creation and Deletion
-
What it does: Users can
marktheir students and removemarkfrom their students. -
Justification: Teachers usually have a handful of students that are struggling overall academically, and are in urgent need of academic help. Thus, nJoyAssistant provides the functionality of marking students, which highlights the students' name with a red marking on the user interface. This will once again allow teachers to easily identify these students, and provide academic help accordingly. Also, it is possible for students to improve academically, and thus nJoyAssistant provides users an option to remove marks from students.
Group
Group Creation
-
What it does: Users can create groups with students.
-
Justification: Teachers usually teach more than one class, and thus need a way to group their students according to the classes that the students are in. nJoyAssistant thus provides users the functionality to group students and name the group. Groups are also not limited to classes, and users may choose to group students however they like, for example grouping all students who are weak in Chemistry, and naming the group "Chemistry Supplementary Lessons"
Adding a student to a group and removing students from a group
-
What it does: Users can add students to a group after the group has been created, and remove students from the group as well.
-
Justification: There is a possibility that users may want to add students to a group after it has been created, and thus nJoyAssistant provides that functionality to teachers. Example would be if the student newly joined the particular class. There is also a possibility that users may want to remove students from a group after it has been created, and thus nJoyAssistant provides that functionality to teachers. Example would be if the student left the particular class.
Viewing students from a group
-
What it does: Users can view all students in a group that they created.
-
Justification: Users would want to know which students are in which group, and thus nJoyAssistant provides the functionality to view all the students in a particular group.
Exporting students from a group to a word document
-
What it does: Users can export all the students from a group into a word document.
-
Justification: Users may not have access to their computers at all times, and thus nJoyAssistant provides users an opportunity to export students from a group into a word document, which can then be printed and used at the times when users have no access to their computers.
-
Highlights: Students retain their tag and mark information when they are exported into the word document, which was hard to implement.
Code contributed
Please click the following link to see my code contributions dashboard. Code Report
Other contributions
-
Project management:
-
Managed releases v1.2.1 on GitHub, out of the 3 releases.
-
Resolved the issues found by others related to my feature on Github.
-
Updated the AboutUs page in GitHub for my team’s repository.
-
Updated the ReadMe description.
-
-
Enhancements to existing features:
-
Wrote additional tests for existing features(Group,Student,Tag and Mark) to increase coverage from 34% to 45% : #182
-
Helped create interface where team could use to export files to different formats(Word Document/Excel)
-
Wrote tests for generic classes, such as the NjoyParser, Logic Manager, Model Manager and Parser Util to increase coverage by 4%: #209, #215, #218
-
-
Documentation:
-
Community:
Contributions to the User Guide
Given below are sections I contributed to the User Guide. They showcase my ability to write documentation targeting end-users. The following are specific portions of the NJoy Assistant’s User Guide that I have selected. I’ll only show one example of creation, editing and display for the features that I have created, as they are repetitive. |
The following is an example of tag creation section the User Guide:
Tags - tag
Represents the weak subjects of a student, allowing users to focus on the specified weak subject of the student.
Adds a tag to a student: tag
Allows a user to add a tag to an already tagged student.
Format: tag index/… tag/…
The keywords supported by this feature includes:
| Keyword | Description |
|---|---|
|
The index number of the student you want to add the tag to |
|
The name of the tag you want to add to the student |
| Tags cannot be multiple-worded, and cannot contain special characters. |
Examples:
-
Add one tag:
tag index/1 tag/Chemistry
Adds tag Chemistry to student with index number 1 -
Add multiple tags to a student:
tag index/1 tag/Chemistry tag/Physics
Adds tag Chemistry and tag Physics to student with index number 1
The screenshot below shows a representation of a student with tags

The following is an example of the student editing section in the User Guide:
Editing a student
Edit a student currently stored.
Format: student [index number] name/…
| All tags and mark of the student to be edited will be transferred over to the new student. |
The keywords supported by this feature includes:
| Keyword | Description |
|---|---|
|
Index number of the student to be edited in the student list |
|
New name of the student to be edited. |
Examples:
-
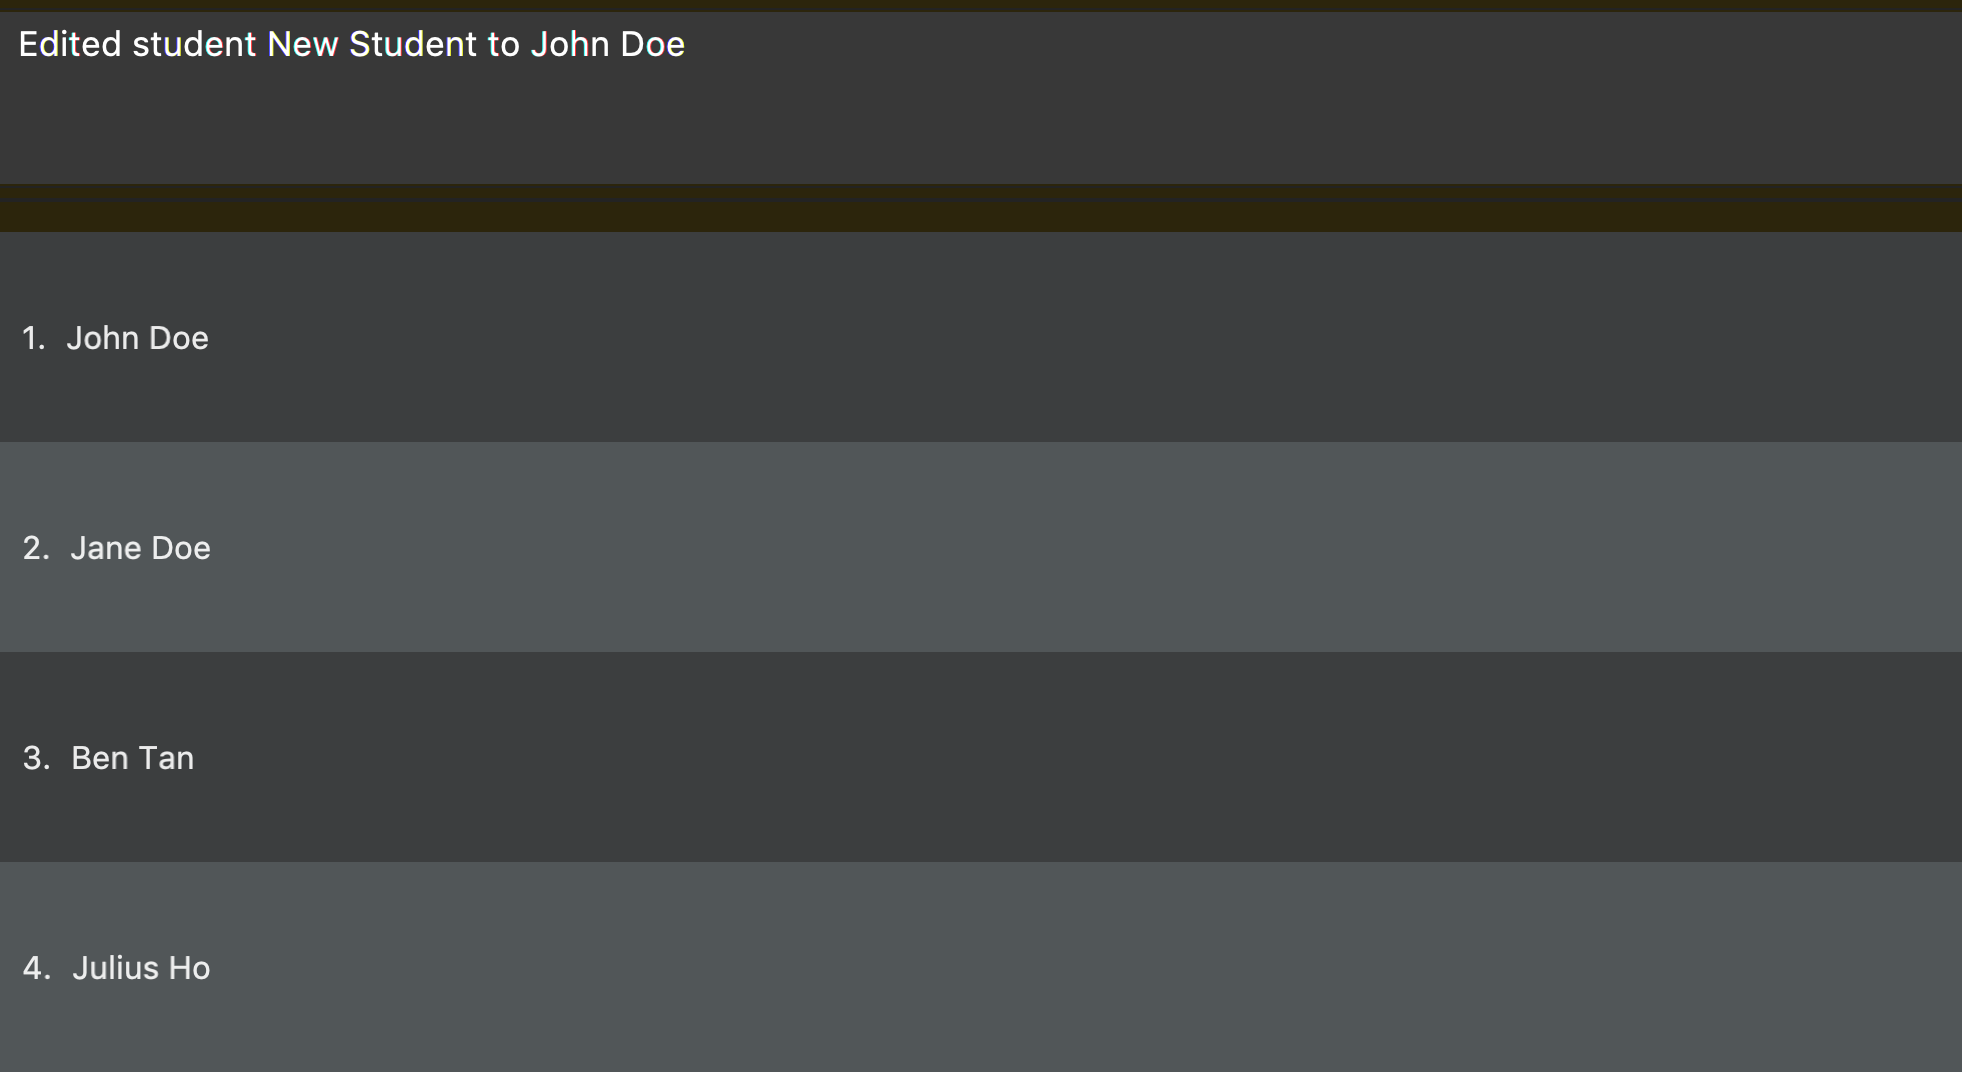
student 1 name/John Doe
Changes the name of the student with index number 1 in the student list to John Doe


The following is an example of the group display section in the User Guide:
Showing students from a group:
Allows a user to see all students from a group.
| Groups and students are meant to be separate entities, and only adding a student to the group or removing a student from a group will change the group view obtained by typing the below command. Tagging, Marking/Unmarking and editing students will not reflect in changes in the group view obtained. |
Format: group groupID/…
The keywords supported by this feature includes:
| Keyword | Description |
|---|---|
|
The name of the group |
Examples:
-
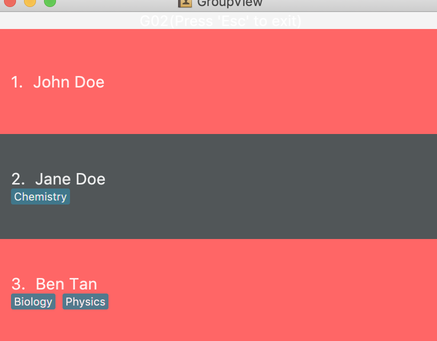
group groupID/G01
Shows all the students that belong to group with groupIDG01
Contributions to the Developer Guide
Given below are sections I contributed to the Developer Guide. They showcase my ability to write technical documentation and the technical depth of my contributions to the project. Again, I’m only going to include the most relevant portions of the guide, especially the UML diagrams that I have created. Also, some of the command hyperlinks will obviously not work because I have omitted them for brevity. |
The following is the add student section of the Developer Guide:
The Student Commands share similar paths, and is further illustrated in the following sequence diagram, which shows the sequence diagram for the StudentAddCommand.
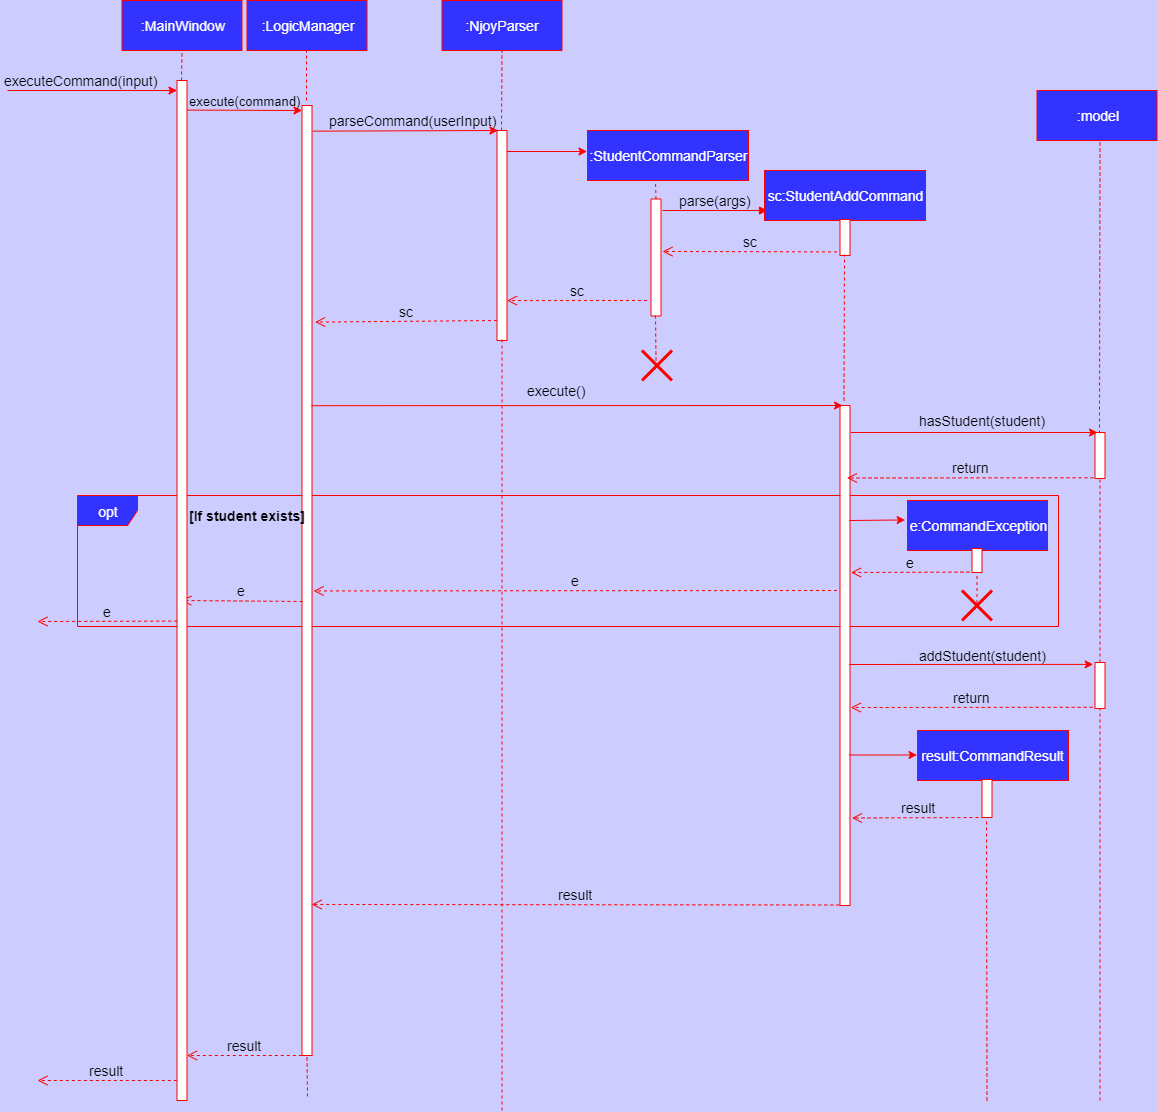
StudentAddCommandImplementation
The following is a detailed explanation of the operations StudentAddCommand performs.
-
If the parsing is successful,
StudentAddCommand#execute(Model model)method is executed and it validates the student defined. Since student names are unique, if a duplicate student is input, and exception is thrown and the duplicate student is not added. -
If tags are present in the input,
Tagsare created and added to theStudentin theStudentCommandParser#addCommand(ArgumentMultimap argMultimap)method. -
The method
Model#addStudent(Student student)will then be called to add the created student and a success message will be generated by theStudentAddCommand#generateSuccessMessage(Student student)method and a newCommandResultwill be returned with the generated success message. -
The newly created student is added to the
StudentRecord.
The following is the add mark section of the Developer Guide:
The logic flow for both the mark and unmark commands are quite similar, and can be seen by the following activity
diagram that depicts the execution of the AddMarkCommand.
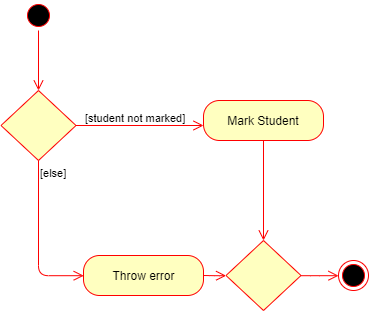
AddMarkCommand
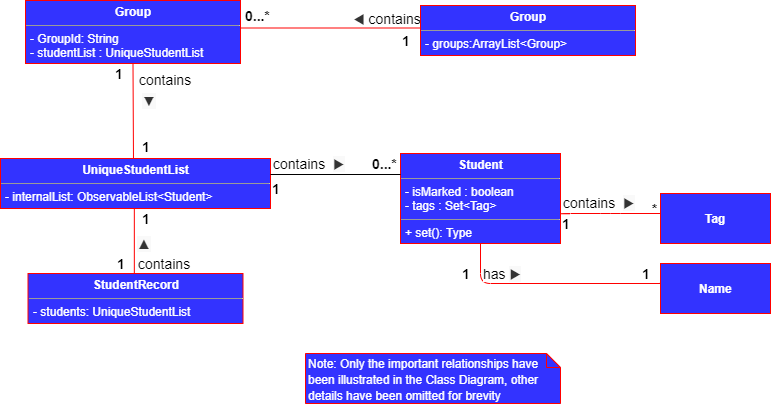
The following shows the relationship of Student, Group, Mark and Tag via a class diagram in the Developer Guide:
